


I had so much fun with this project that I made a few more.
You can order them here:
https://payhip.com/b/rRbZI
After my initial post indicating I was accepting commissions for custom forged goods, I was contacted by a reader who was outfitting a rustic home and found herself in need of hooks. She wanted a grab bag of little hooks, suitable for hanging hats, keys, purses, and other such brick-a-brack. They weren’t going to sit on a wall together, so she wanted a variety of them.
“Go nuts,” she said. “Experiment. I don’t care if they’re a little wonky, I want them to feel hand-made.”
Dangerous words.
I did my best to accommodate.
The next time I did a forge day, I made her a lot of ten and sent them on.


She loved them.
But, little did I know, I’d awakened a monster.
And the monster was hungry.
Time To Stretch
Almost as soon as the client hung the hooks, I got a cryptic note:
“I might have a challenge for you.”
She said she’d be in touch after the holidays.
Then, after the new year rolled around, another note appeared:
“I’d like a pair of crucifixes. I want them to look gnarly. I want them to show the twisted, horrible burden that Jesus bore on the cross.”
This, dear readers, is how you give an atheist a crisis of faith. Back when I was religious, I was part of the Protestant wing of the Christian religion, and Protestants are famously squeamish about iconography. American Protestants, being of a generally literalistic bent,1 have been known to occasionally carry on internecine feuds about things like painting and photography, as these technically qualify as graven images—something that the Ten Commandments is solidly against.
Now, as an apostate, I don’t have a particular attachment to the Ten Commandments any longer (beyond my affection for religious history and literature), so this oughta be no problem for me. Over the course of my adult life, I’ve made a study of iconography, religious art, religious architecture, and especially Christian traditions around these things (as they are my cultural heritage), and enjoyed the rich variety on offer.
But being asked to make an object of devotion by someone whose religion I no longer share occasioned a bit of soul-searching. This is important to believers. Those that go for iconography with enough gusto to commission custom work really care about the meaning and history around their icons. I couldn’t just bang something out—if I was going to take this commission, I had to figure out a way to make the work a spiritual endeavor, even though I did not believe in the god I would be depicting.
In the days between receiving the note and accepting the job, I had an ethical debate with myself about this. Would I be lying if I made an object of devotion for a religion I did not believe?
Or was it an artistic (which, in my world, is another way to say “spiritual”) endeavor analogous to writing a character who earnestly believes, and exploring their faith from inside their head?
I’ve done the latter, many times. I’ll do it many more. Religion is a great animating force in humanity, and Christianity is an inextricable part of my culture.
I could do this. I could do it with integrity. So I accepted the commission.
Now all I had to do was figure out how to design the thing…and how to actually do the job.
Because it would entail a level of sculpting I’d never attempted before.
This was gonna be an excruciating (pun intended)2 stretch.
The Best Laid Plans
Most of the things I’ve made so far are things I understood well enough to more-or-less wing it through. If I screwed it up, I could just take another run at it.
Things are different now. I’m starting to document my processes, build jigs and tooling, and otherwise enhance my capabilities to do repeatable work. That’s important around the homestead, when time is scarce. It’s doubly important if you’re spinning up a farm business in making forge goods.
I realized, upon getting this commission, that I’ve pretty much backed into doing that, so I decided to embrace it in the most official way possible:
With graph paper.
Since I started giving people hooks a couple years ago, word has gotten around that there’s a new blacksmith in the family/town, so siblings, parents, nieces and nephews, friends and neighbors have all decided that I need scrap metal (they’re right). As a result, I’ve received a whole mess of railroad spikes on recent birthdays.
Normally when you make something out of railroad spikes, you want to preserve the railroad-spikiness. It seemed obvious to me that a spike and a crucifix should go together—I mean, Jesus was nailed up, right? The charge document putatively hung above his head read INRI, which, as every kid in Sunday School knows, stands for “I’m Nailed Right In.”3 And a spike is, after all, just another kind of nail.
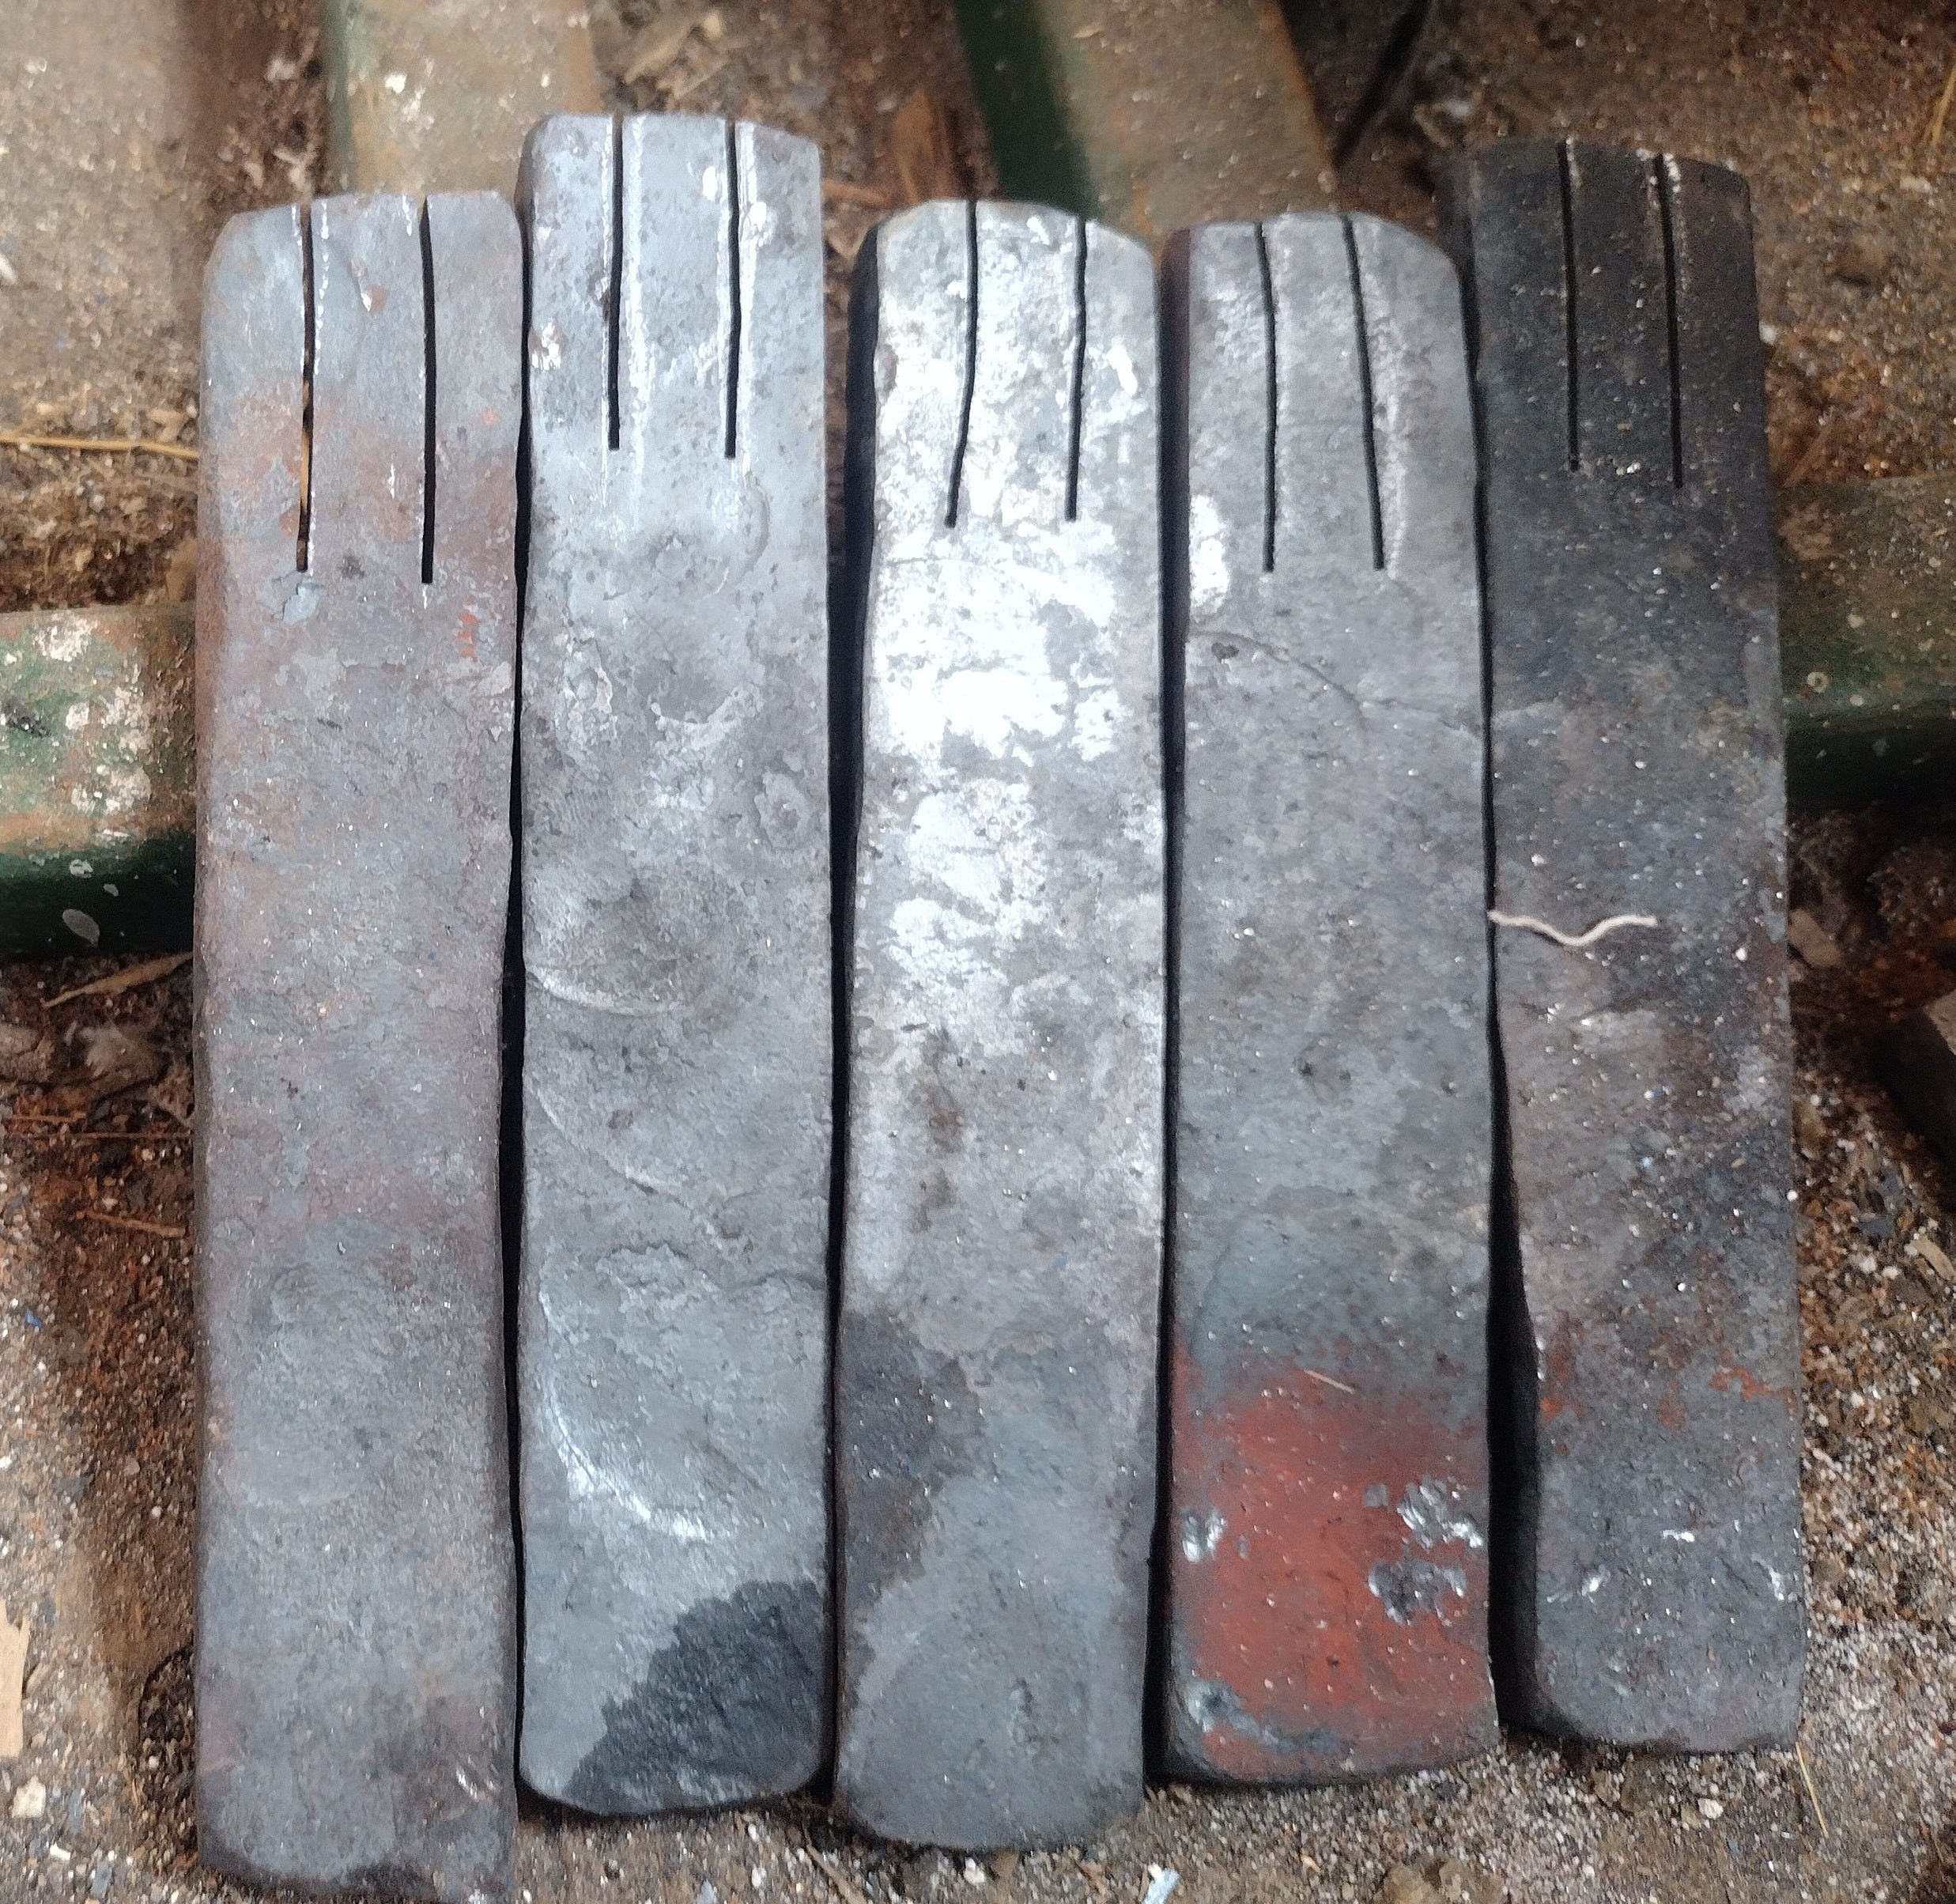
I noodled at it for a good long while, and I just couldn’t figure out how to make it work. I decided, instead, to work the spike as if it were just a regular square bar of material. The result was what you see here:
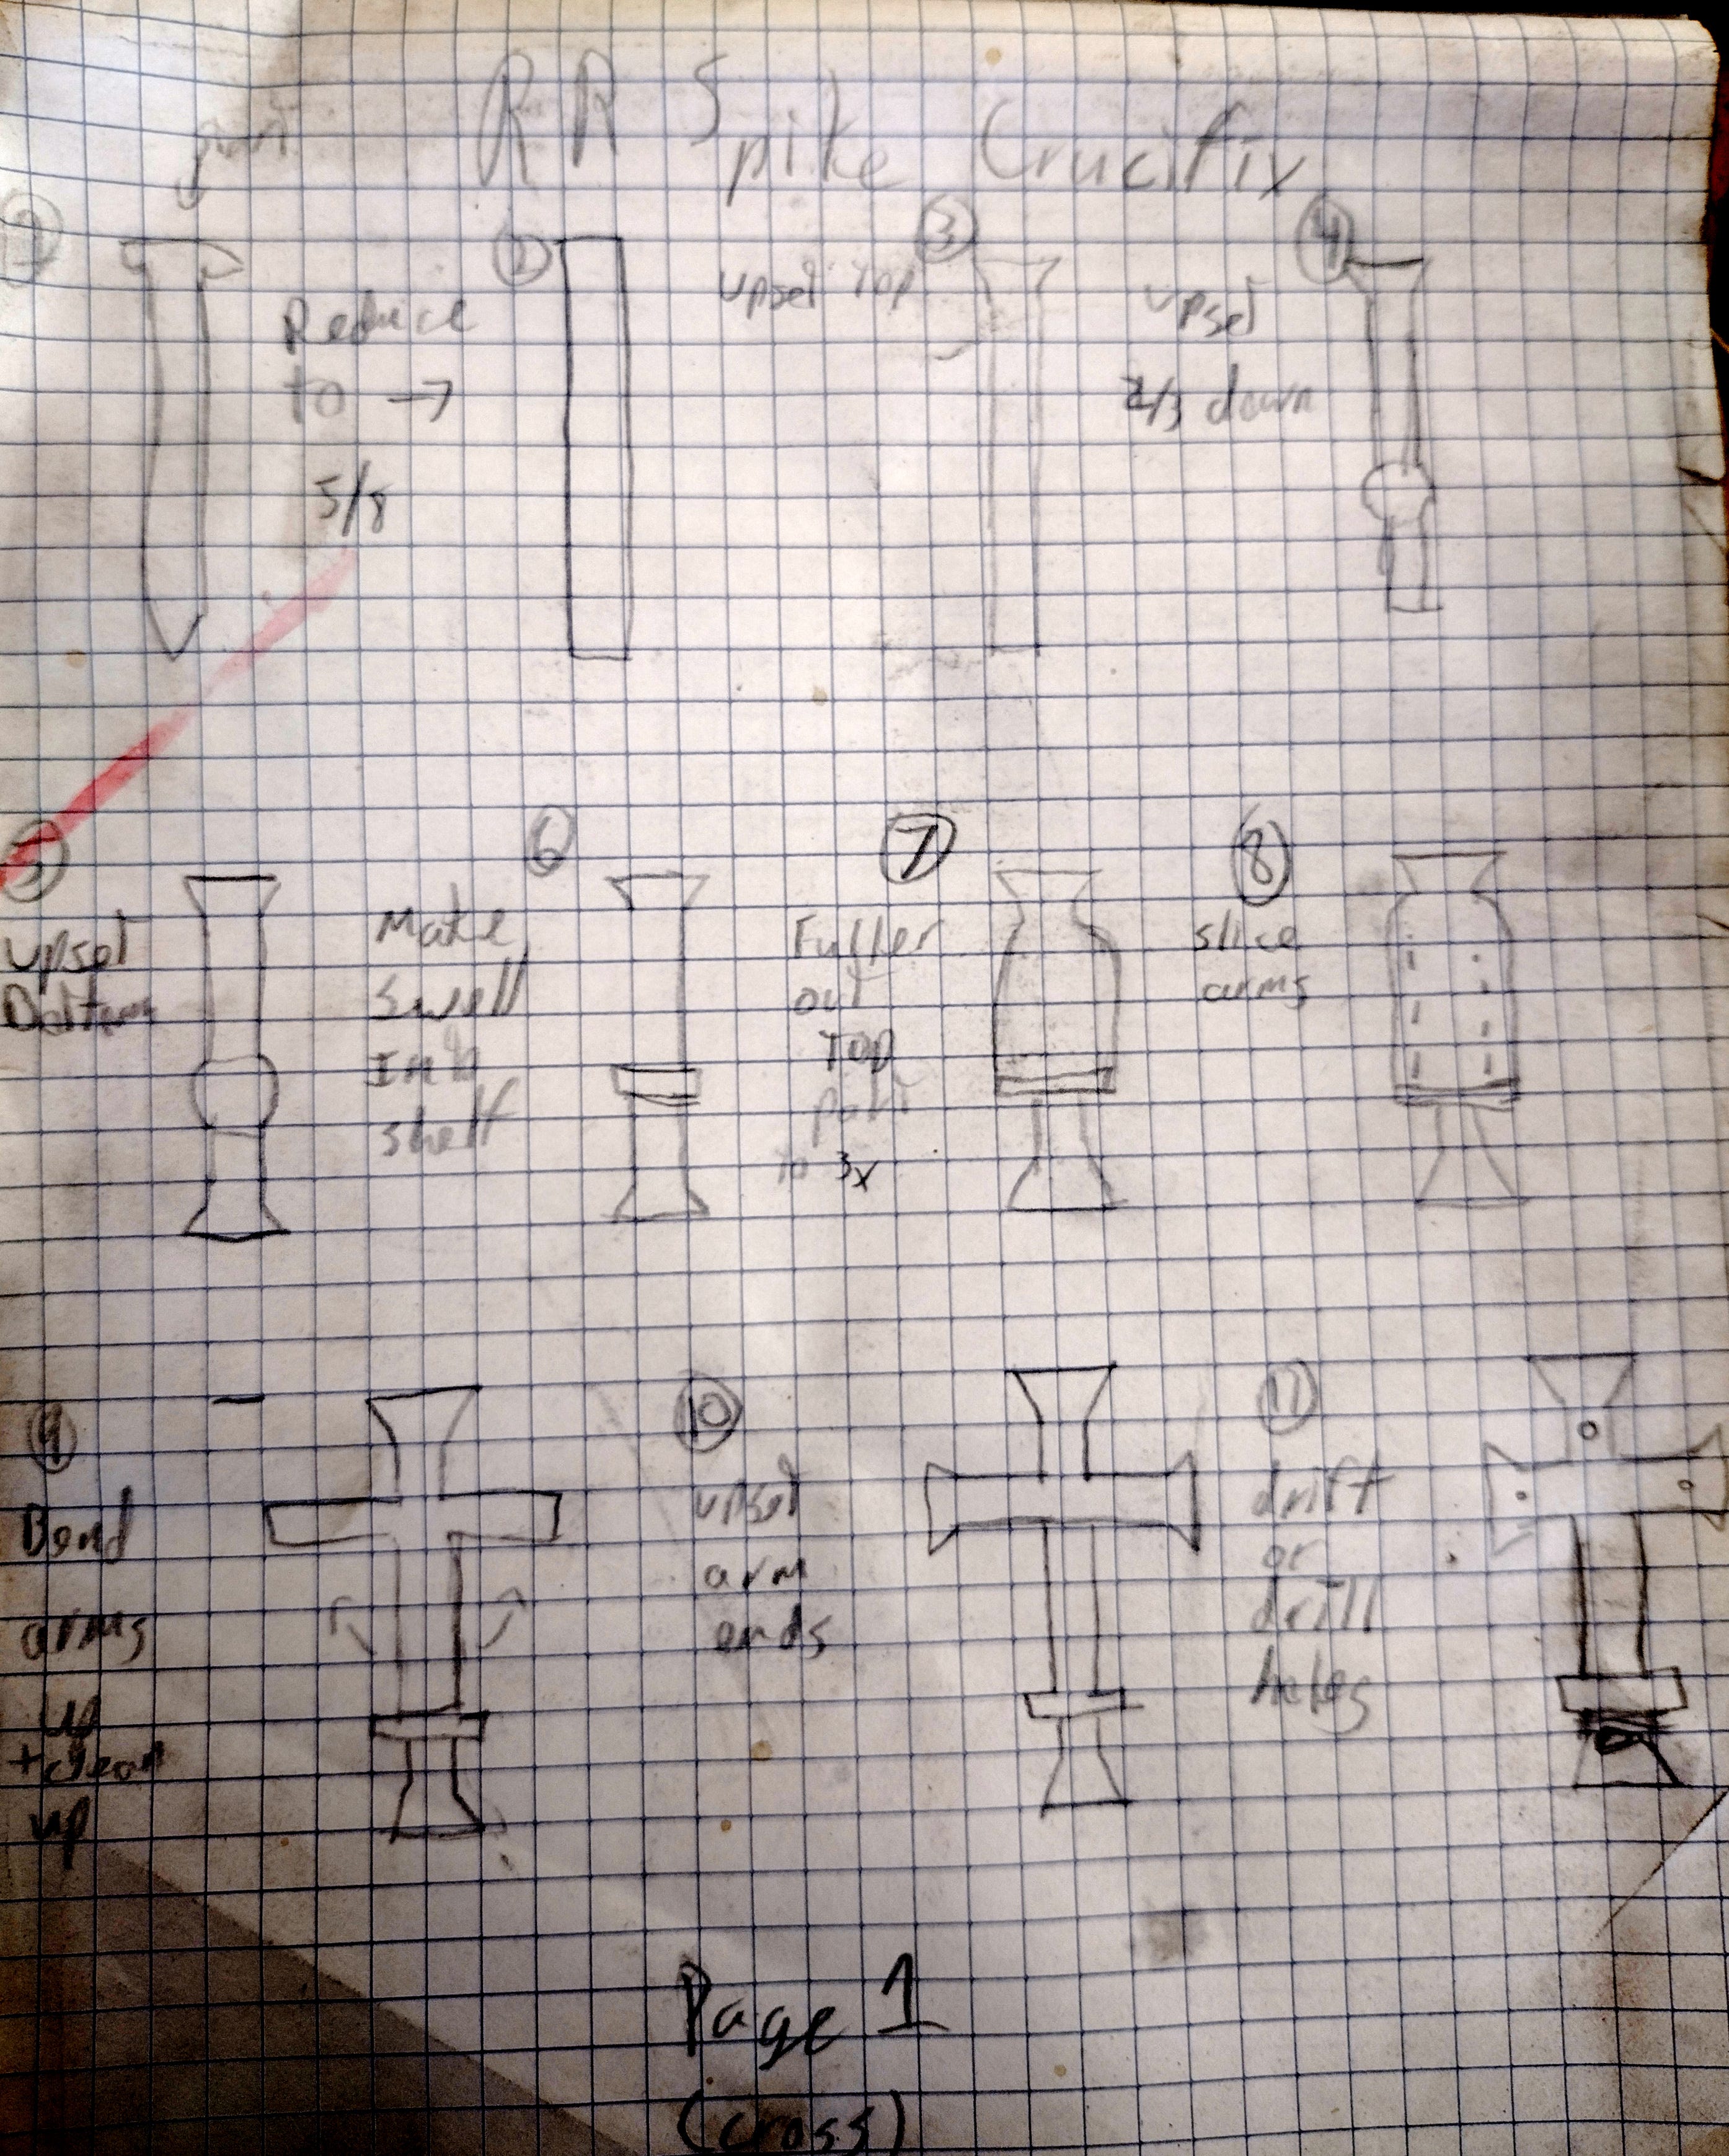
A ten-step plan for taking a railroad spike, and working it in a way that would create a fairly ornate cross. Once I nailed this, I’d move along to the figure.
So into the forge I went!
I started with some spikes.
And then worked them down into bar stock.

From there I worked them hot, isolating a bulge for where the feet would sit, flattening the middle part, and then slitting and bending the arms up.


I got to the end of this, and beheld the horrors to which my hubris had led me, and I wept for the future of my soul.
Seriously, take a moment and blow up the rightmost picture in that gallery above. Those crosses look like a plague victim shrugging as if to say “Eh, you know, food is okay, I guess.”
A day or two of fiddling with them, and I realized that what I had, in fact, made, were eventually going to be some exciting hat hooks with faces carved into the tops.
They were not crosses.
The big problem (other than that stupid foot-shelf idea) was that bending the arms up left a visible transition that I didn’t know how to get rid of. I know it can be gotten rid of, because I’ve seen more advanced smiths do it. But I didn’t know how.
To make the crosses I’d have to figure out that trick. But, in the meantime, there was another piece of the project that did need that weird shruggy effect:
The crucified figure.
It was at this point that I decided to regroup, make some new tooling, and take a fresh run at the whole project…starting with the figure first.
Re-tooling and Regrouping
A couple posts back, I talked about the tooling I made for this build:
Spring fullers, a round punch, and a chisel fuller.

I used them all here, but over the course of figuring out the right workflow for this project, I eventually wound up putting the spring fullers to one side. They didn’t do the job I wanted nearly as well as I could just using my various hammers and the new punches I made.
Nonetheless, I built them (click the above link to see that build), and I used them here—just less than I expected.
With all the new tooling done, I once again attacked the project with renewed vigor…and, tragically for my determination to document and systematize my forge builds, I did it without plans.
I started out by evaluating the previous failure. Working the entire railroad spike into a square bar was far more time consuming than I should be tolerating with projects I’m getting paid for. That kind of extravagance is fine for a hobby, or a gift, but it doesn’t wear well if you have to bill for your time.
What I need, I thought, is some flat bar. If I had something about an inch wide and 1/3” thick, that might be enough to make a figure out of, and to make it big enough that my tools will be useful for it.4
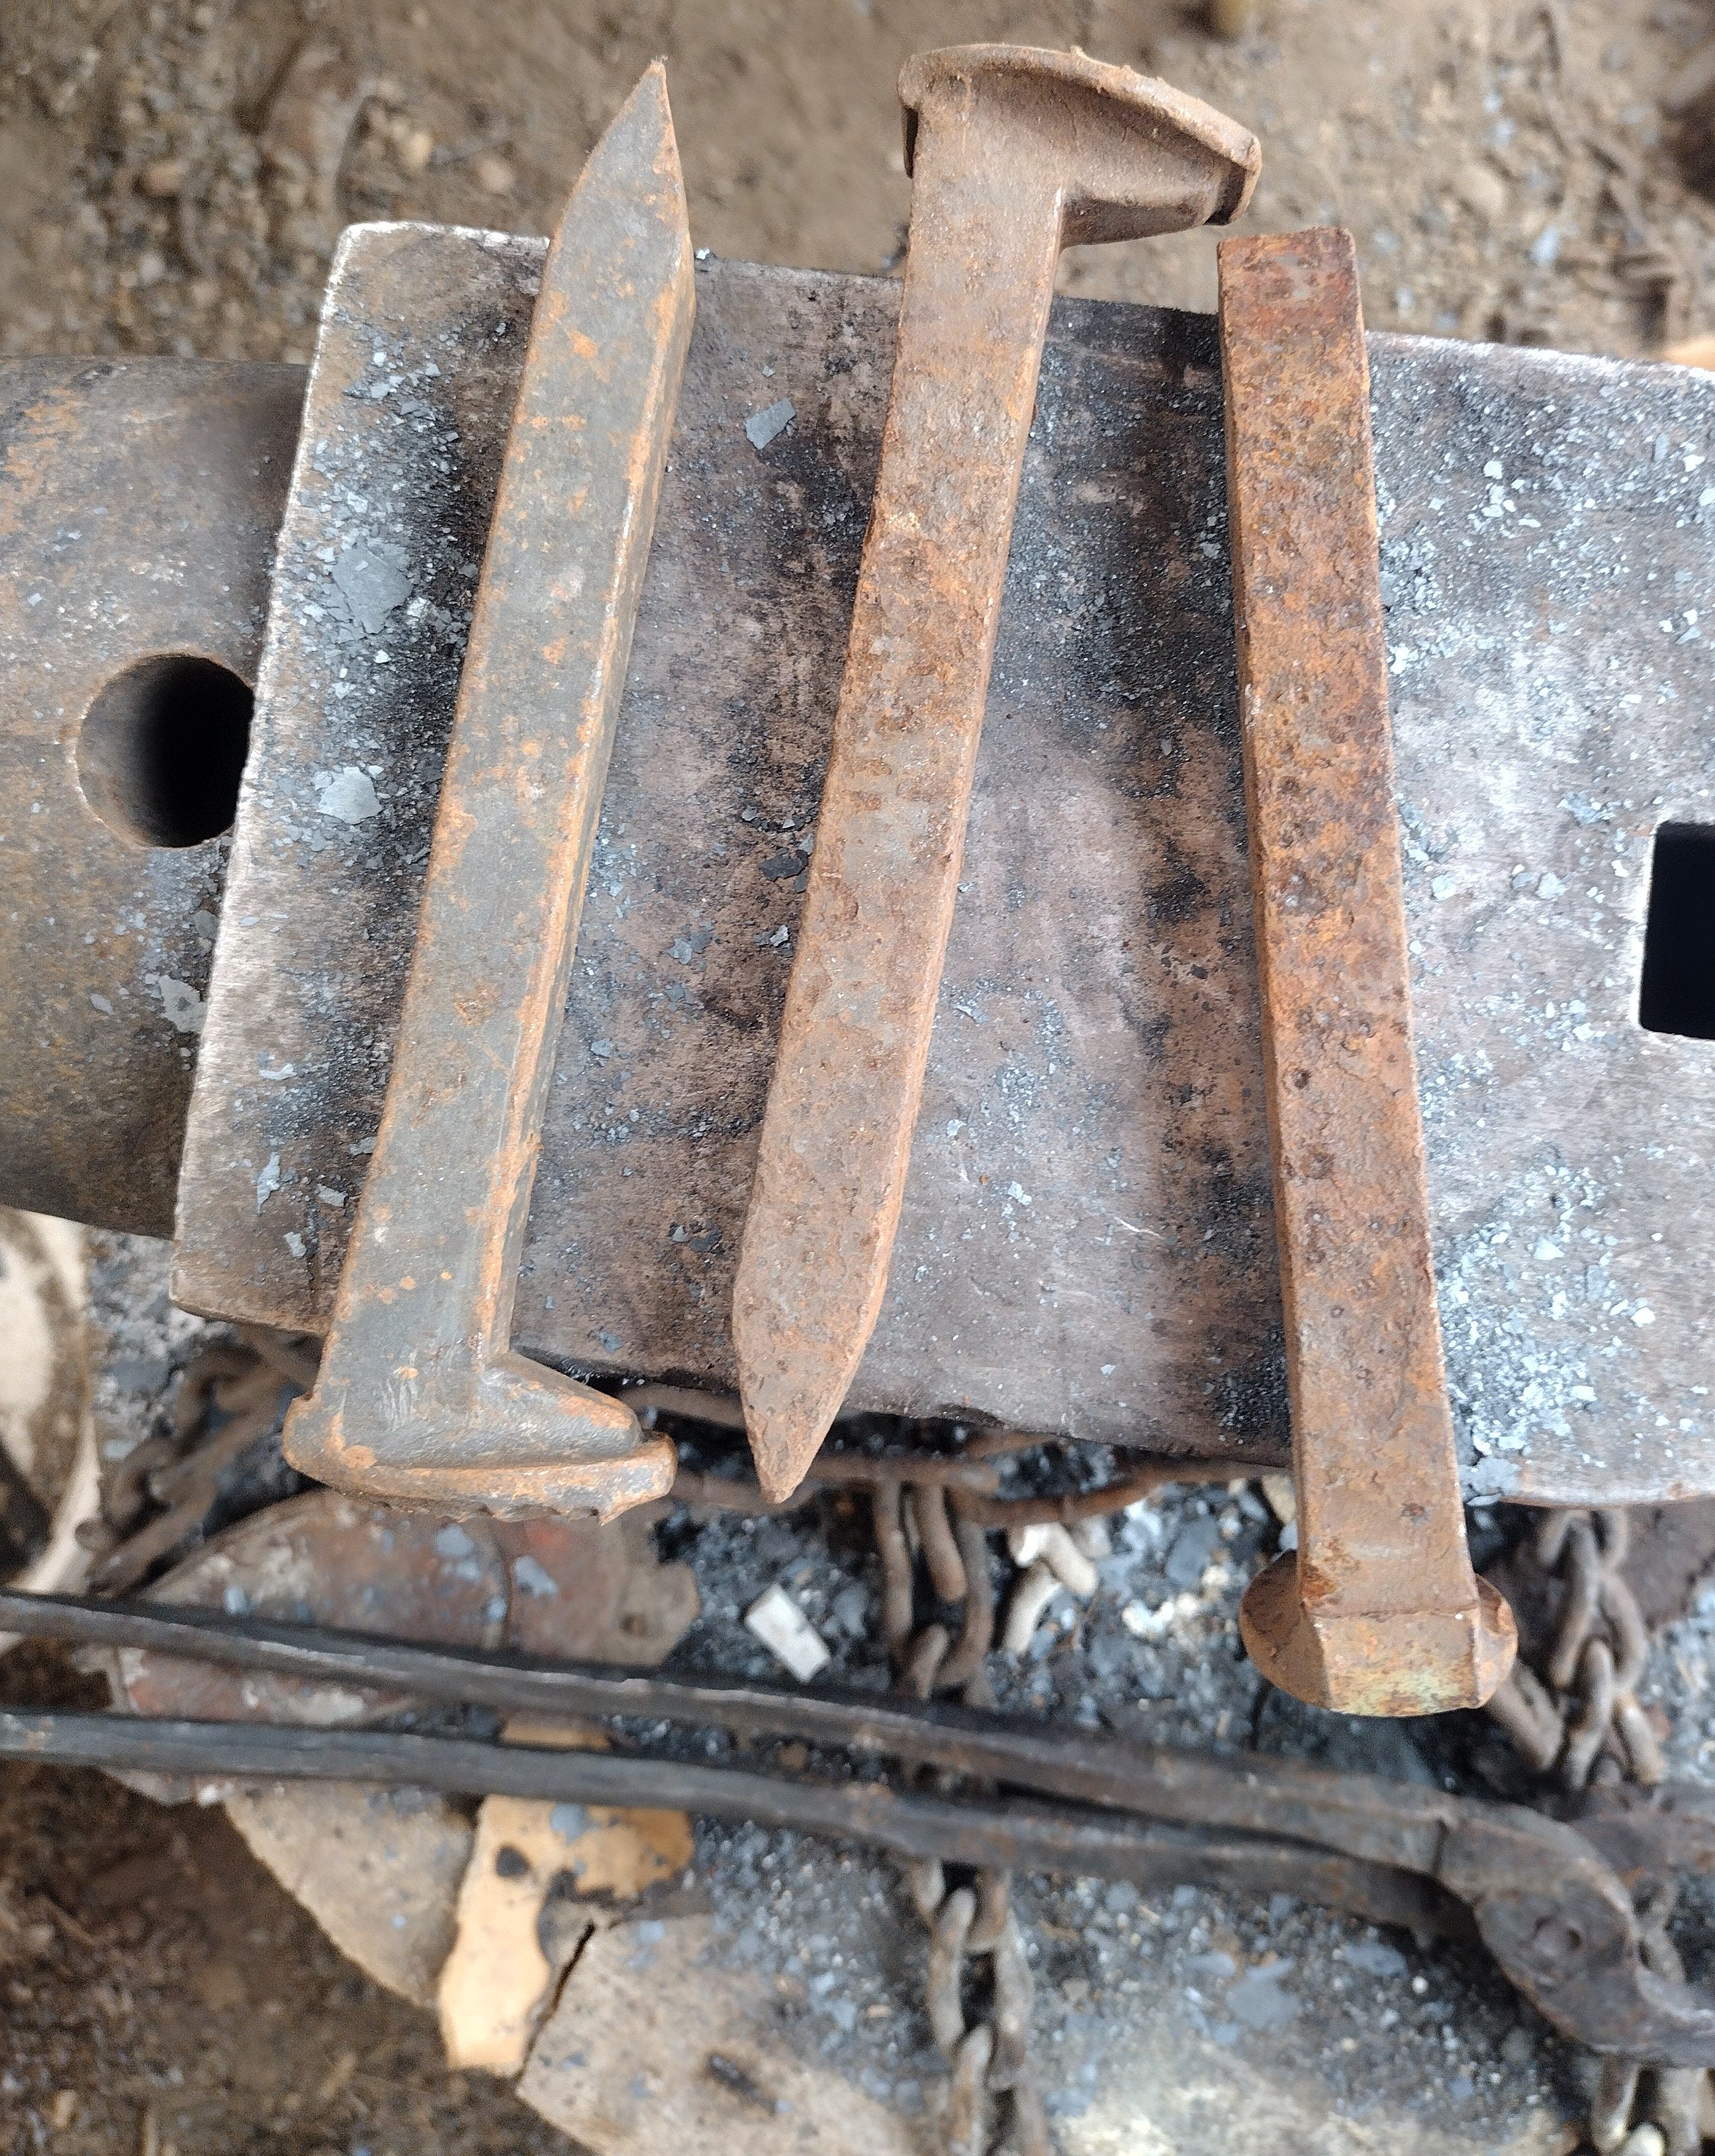
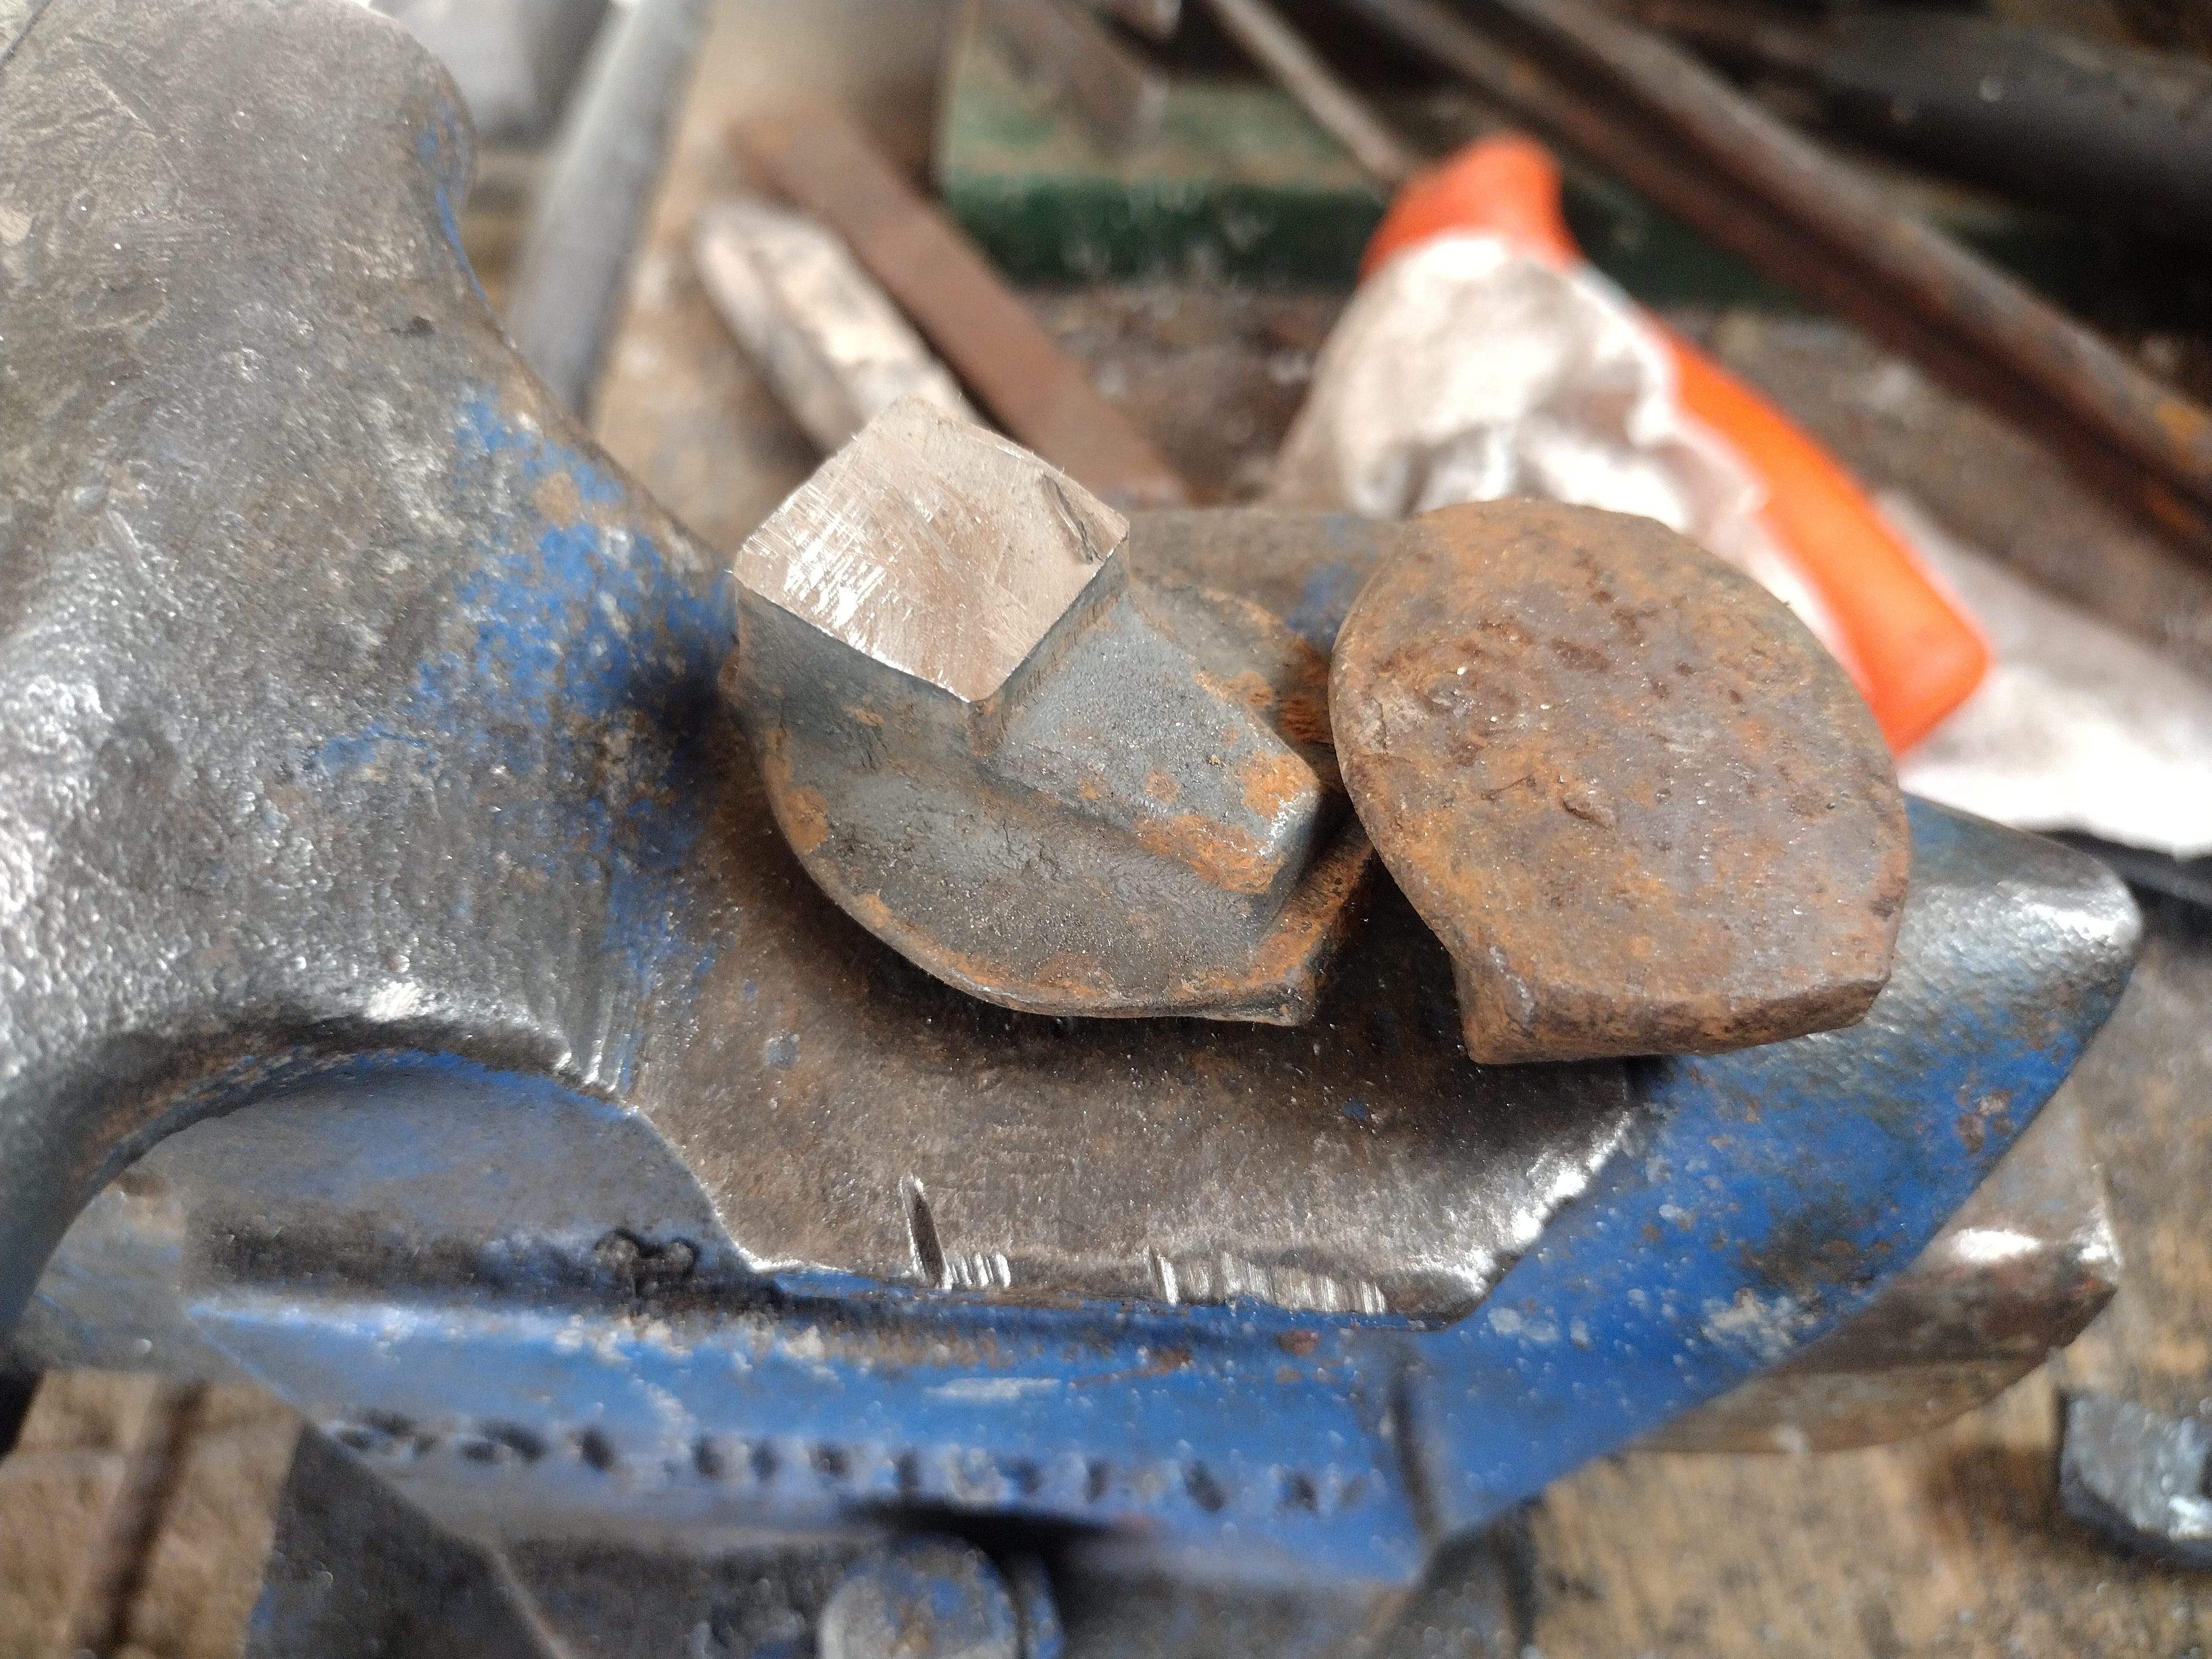
Since I didn’t have any flat bar, I’d have to make some. I dove into the railroad spike bucket, retrieved a handful, and cut the heads and tips off.
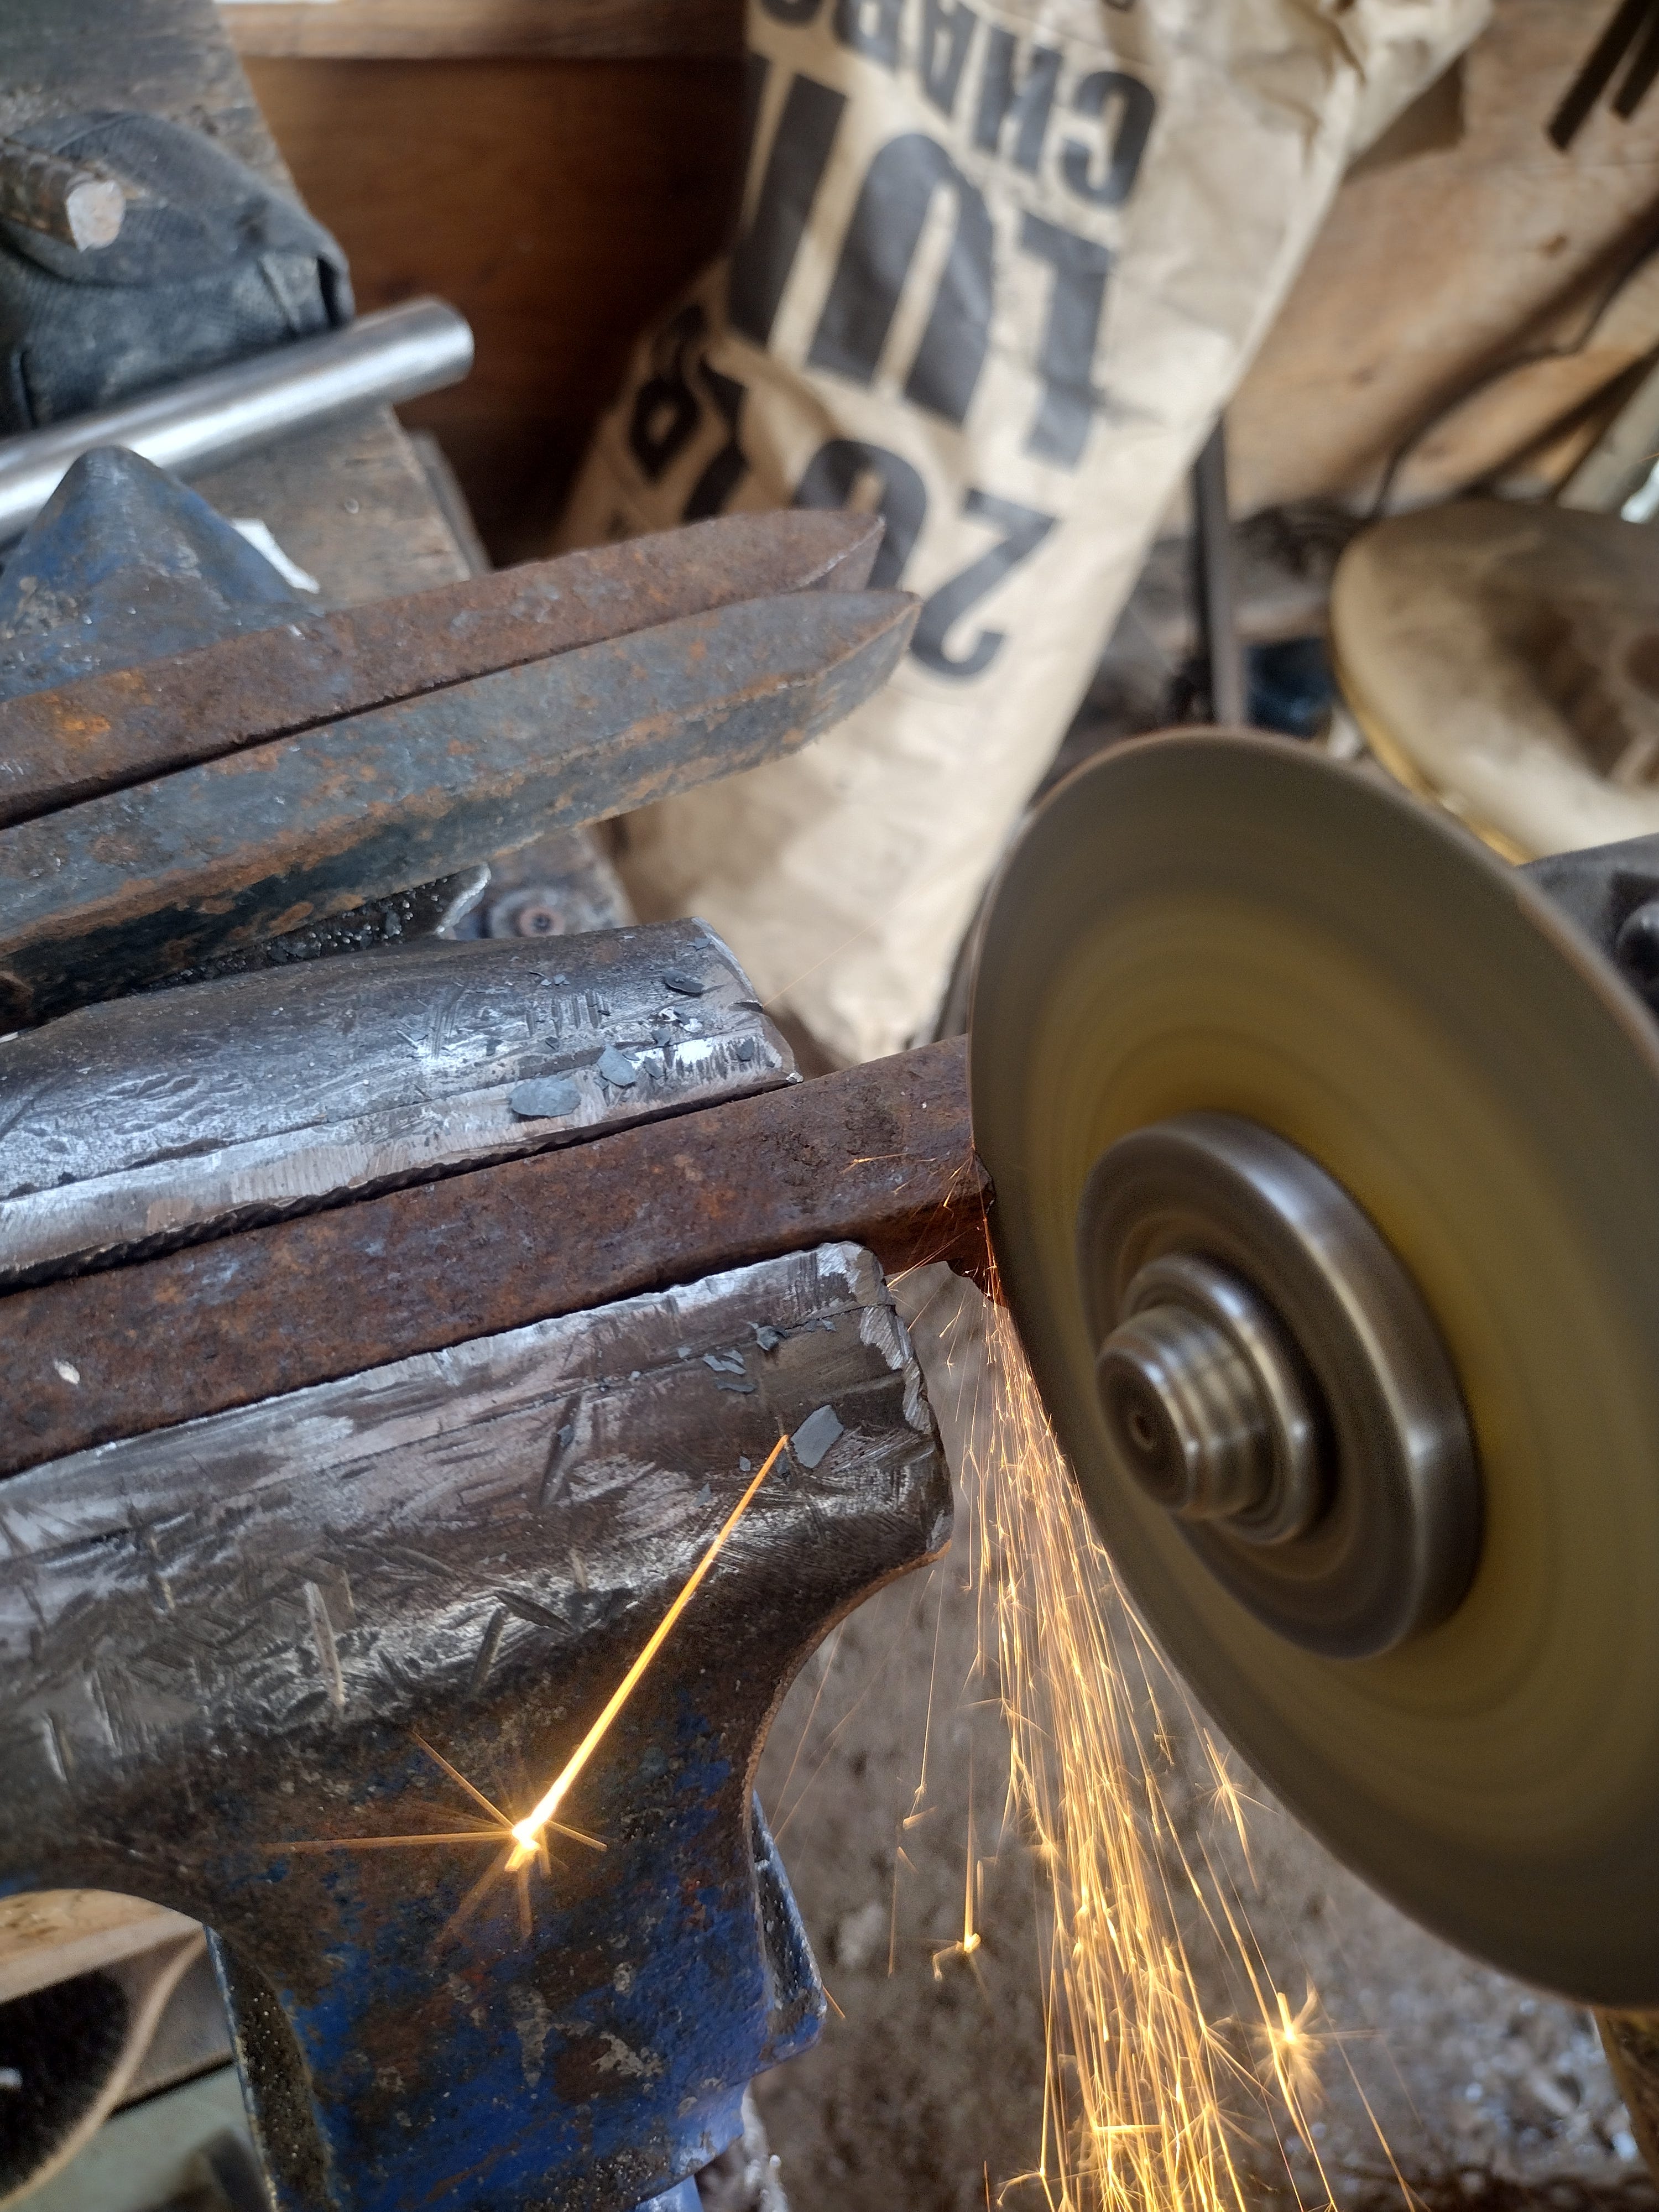
The sacrificial tips went into the scrap bucket. The heads? Well, they’re going to become some very handsome drawer pulls in the not-too-distant future.
So, with my newly minted square bar (these railroad spikes are 5/8” square at the shank), I resolved to work out the procedure by trial-and-error, then document it.
Building the Bar
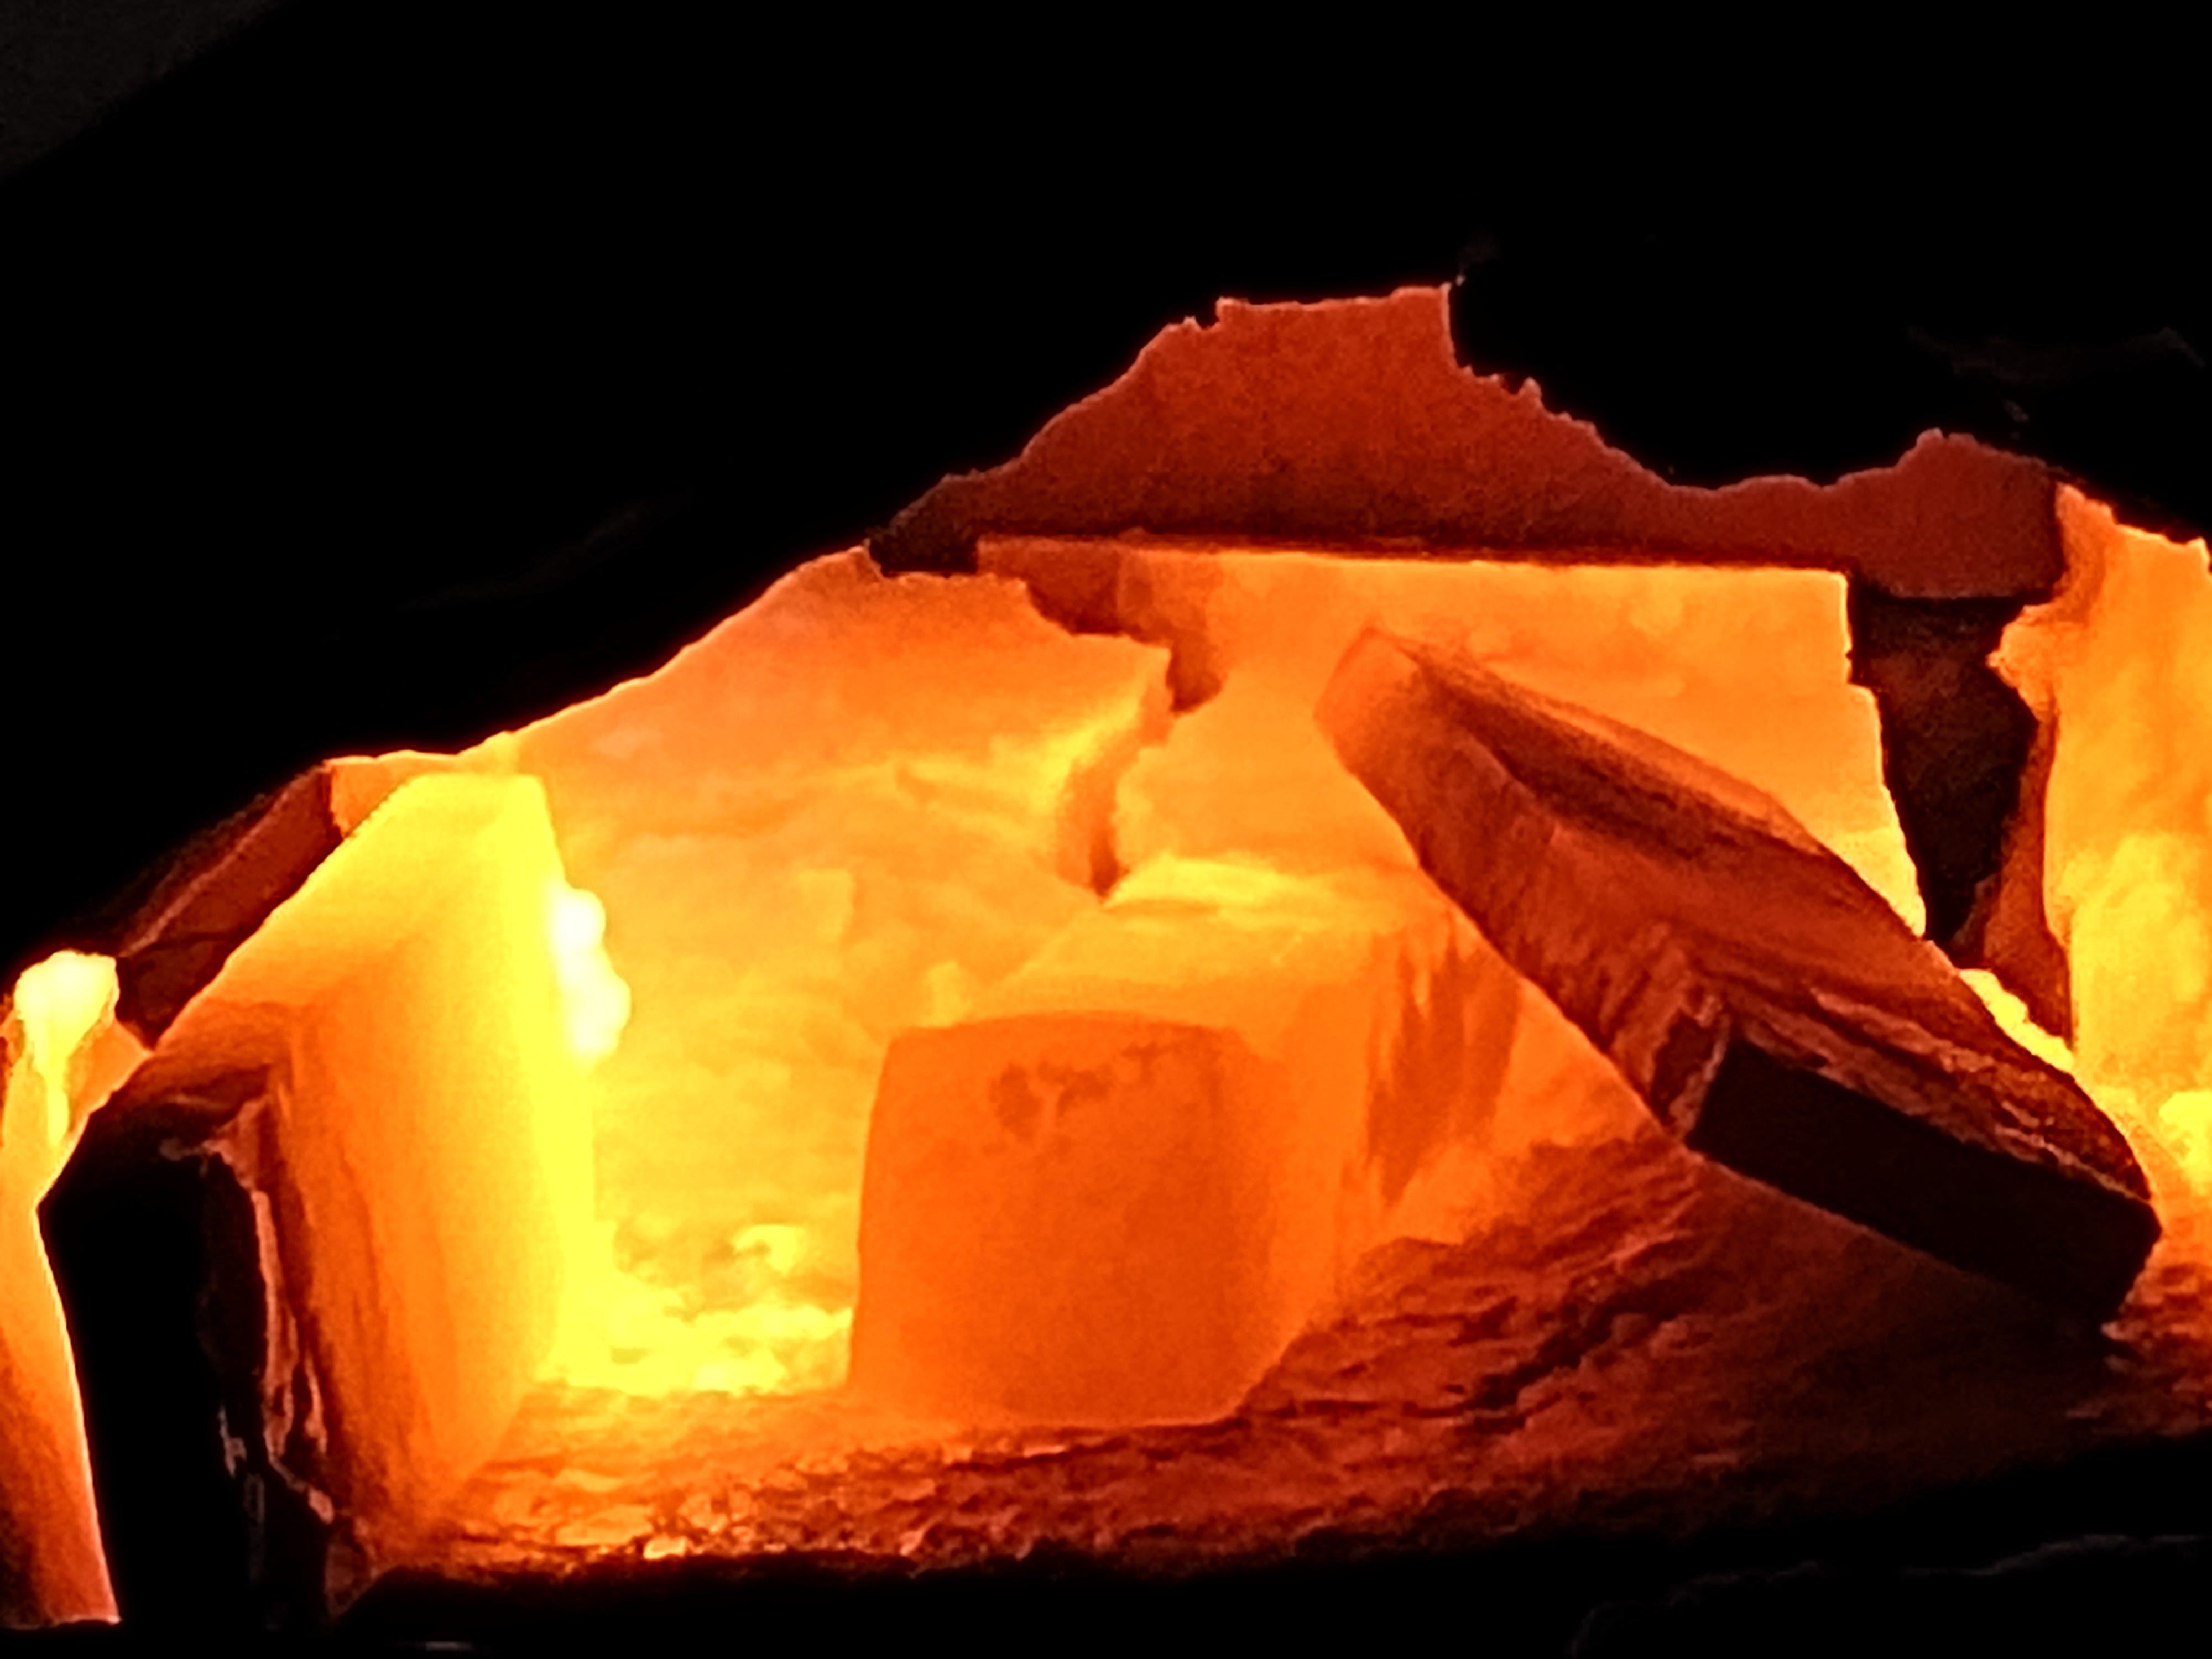
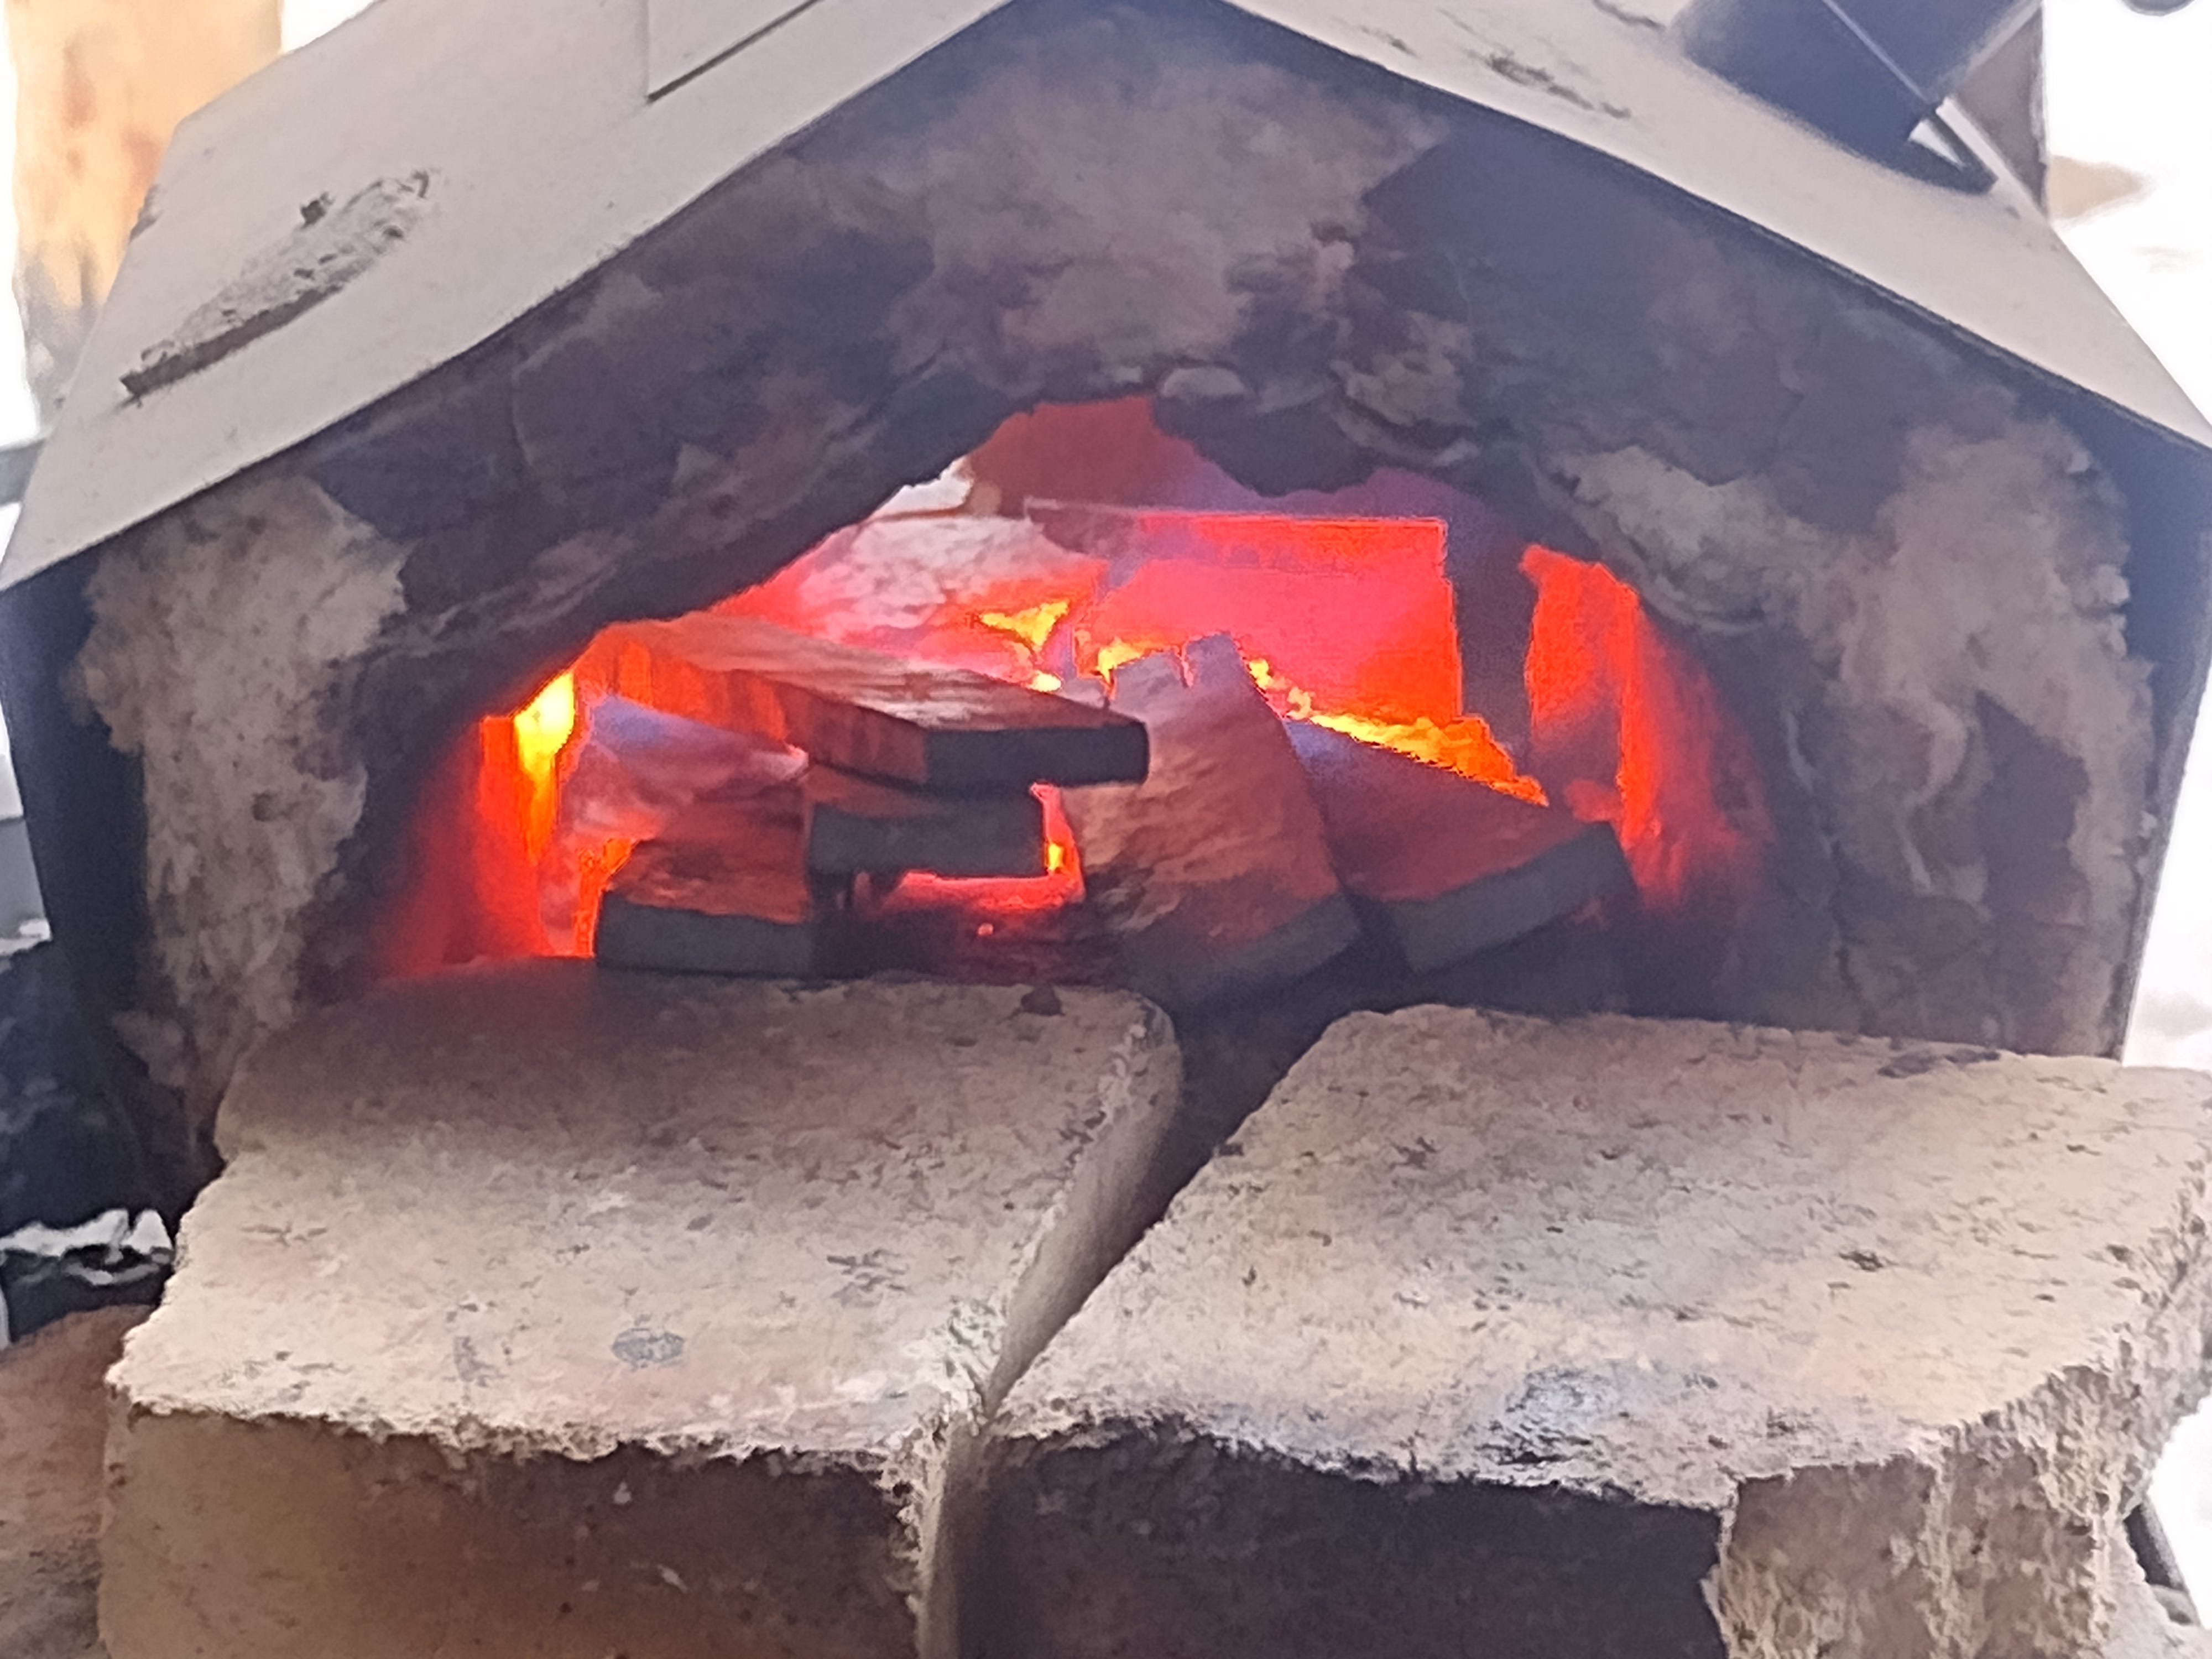
Into the forge went the railroad spike shanks!
Out they came when they’d attained a bright orange heat (around 1800 degrees Fahrenheit), and they went up on end. Over a few successive heats, I beat them down in order to beef them up to a 3/4” square bar. This would give me the width to spread them to a full inch wide without making them too thin.
I rotated the irons in and out of the fire to make the most of my time (and forge fuel), and before long I had me some flat bar of the appropriate dimensions.
I used my dividers to mark thirds on one end of the stock.
The Long History of Division
A quick word about dividers:
Unlike carpentry or fabrication or sculpting, blacksmithing is a craft still more-or-less stuck in the Dark Ages. Oh, a smith can use measuring tapes and drills and other fancy gadgets like that, but he doesn’t need to—and he may not even want to. Hot metal tends to warp, scorch, burn, and otherwise mar tape measures and rulers, it ruins the temper on drill bits, and when metal is hot it expands, so your measurements aren’t any good anyway, unless you make them when the metal is cool.
Besides, inches, centimeters, and all those kinds of measurements? They’re for wusses. They were invented and/or codified by eggheads in the last few centuries. Before that, people who built things had to do without.
How did people build Gothic cathedrals, lavish palaces, and Greek temples without them? How did they make furniture, sailing ships, sculptures, idols, and canals?
They used ratios.
The basic tool for deriving a ratio is the humble set of dividers.

Looks a lot like the compass you used to draw circles in geometry class doesn’t it? Well, that compass was just a set of dividers with a peg leg.
This is the most basic sort of dividers, with two points that can be fixed in relation to one another. By walking the points across a surface, tweaking the distance between them, and walking them again, you can perfectly divide a surface into whatever fraction you want.
Once you know that “Column A” is 2/3 the height of “Column B,” and you can reliably re-create that ratio, you can build anything without formal measurements.
This is how all of civilization was built until approximately the eighteenth century.
Blacksmiths still use dividers, and a major rite of passage involves making your own set (I’m not there yet).
So, anyway, back to the show…
Carving the Bars
Once I had divided the bars and scratched markings into the forge scale, I proceeded on to the “conquer” phase of my plan.
Step one: Conquer the scratch-marks with soap stone so I wouldn’t have to squint to see them.
Then, it was off to the bandsaw—an epic journey of almost thirteen inches.
Each bar got sliced an inch deep along those marks, yielding a crop of raw material that looked suspiciously like this pile of metal:
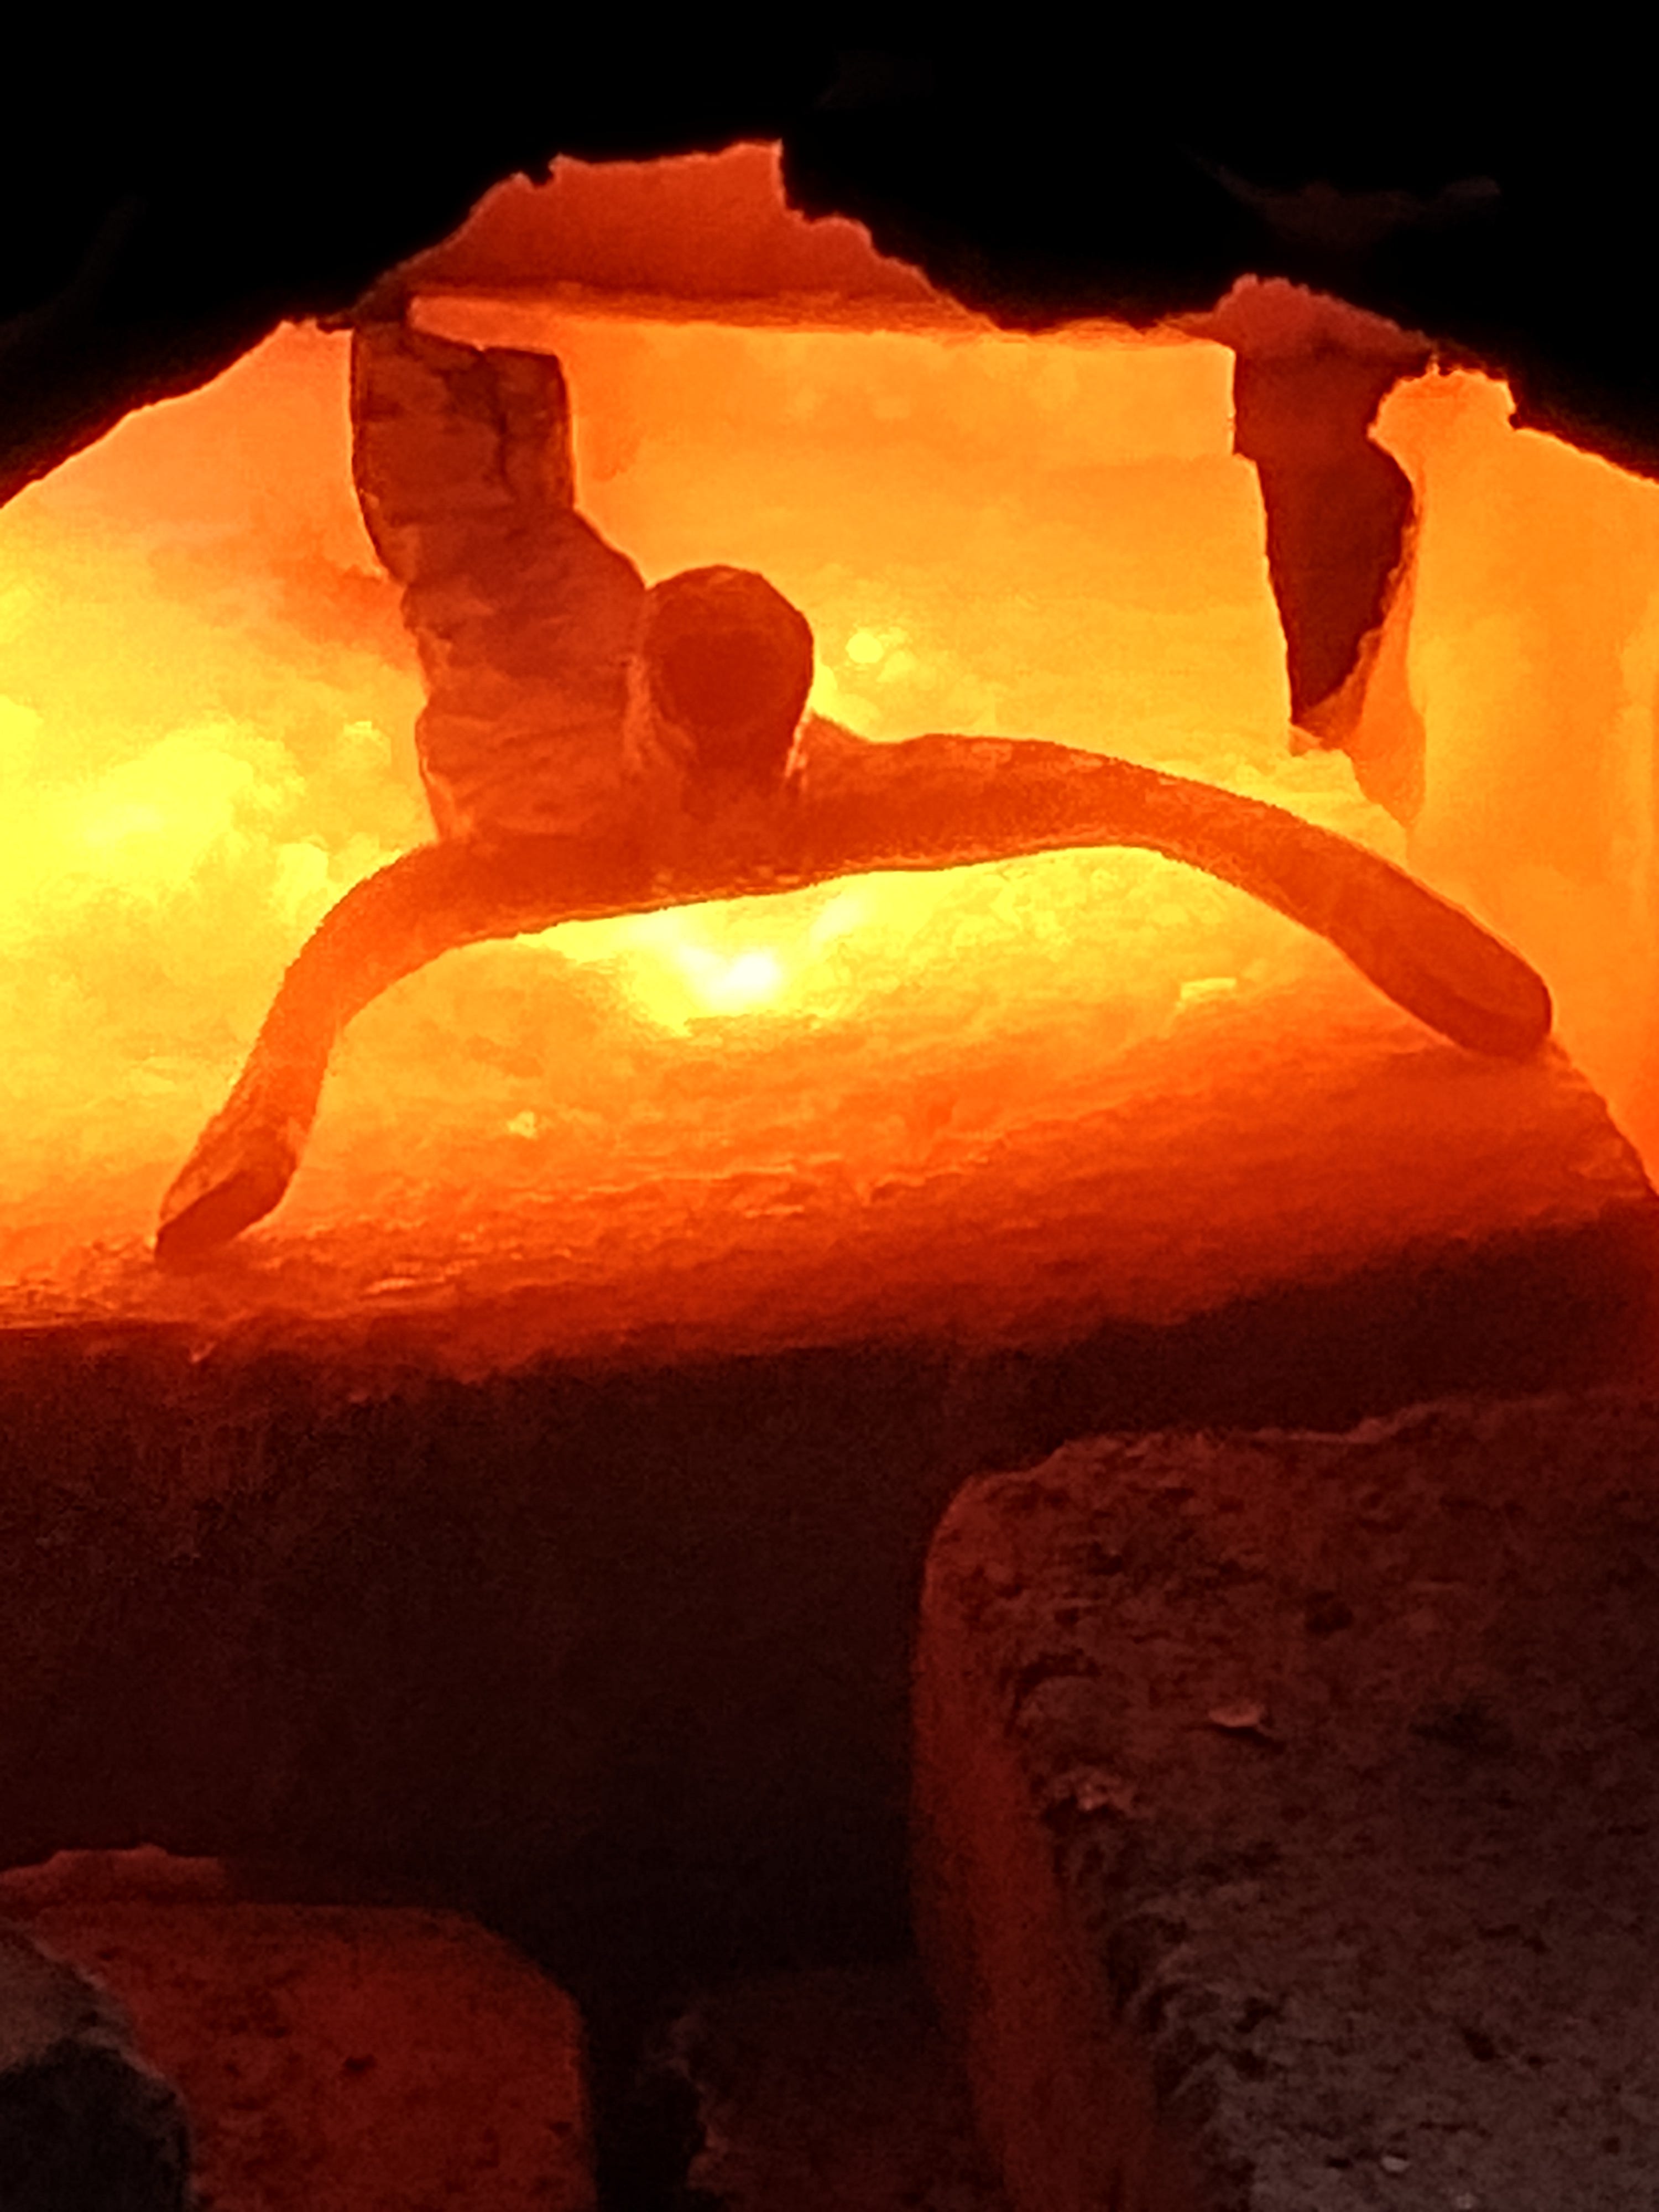
Into the forge they went—a harrowing experience, to be sure. One of the fun things about forging a crucifix (which surprised me) is that you’re basically unintentionally re-enacting the whole crucifixion/resurrection narrative. Even if you’re not a believer, there’s a certain mythic, meditative quality to it.
The events aren’t exactly in order, though, and things like the Harrowing of Hell come before the actual crucifixion, but hey, if you add an imaginary TARDIS,5 it works out.
Joking aside, consider this:
Up to this point, everything has been prep. Every time I learn a new craft—from filmmaking to voice acting to radio drama producing to auto repair to carpentry to fabrication to leatherwork to forestry—I am startled anew by how much of the work happens in the pre-production phase. You think I’d have learned to expect it by now, but apparently “getting a clue before the rest of us die of boredom” is not part of the “intelligence” they measure in IQ tests (a good thing, or I’d have been denied a driver’s license on the grounds of being a moron).
This is, I am convinced, why most people don’t stick with things long enough to really get good at them. It’s not that skills are hard to acquire, it’s that prep work is dull and feels meaningless until you’ve already been through the ritual a few times and start to understand why things are done the way they’re done (see installment four of The Autodidact’s Bible for a deeper exploration of this issue).

But, since I was now done with prep, it was at this point that things really started to move.
Once out of the forge, the figures proceeded along these lines:
First, I bent the slits out into two arms using my cut-off hardy tool as a lever, like so:
Then, over a few successive heats, I folded the center-third double to create enough mass for a head, then shaped the “arms” into actual arms.
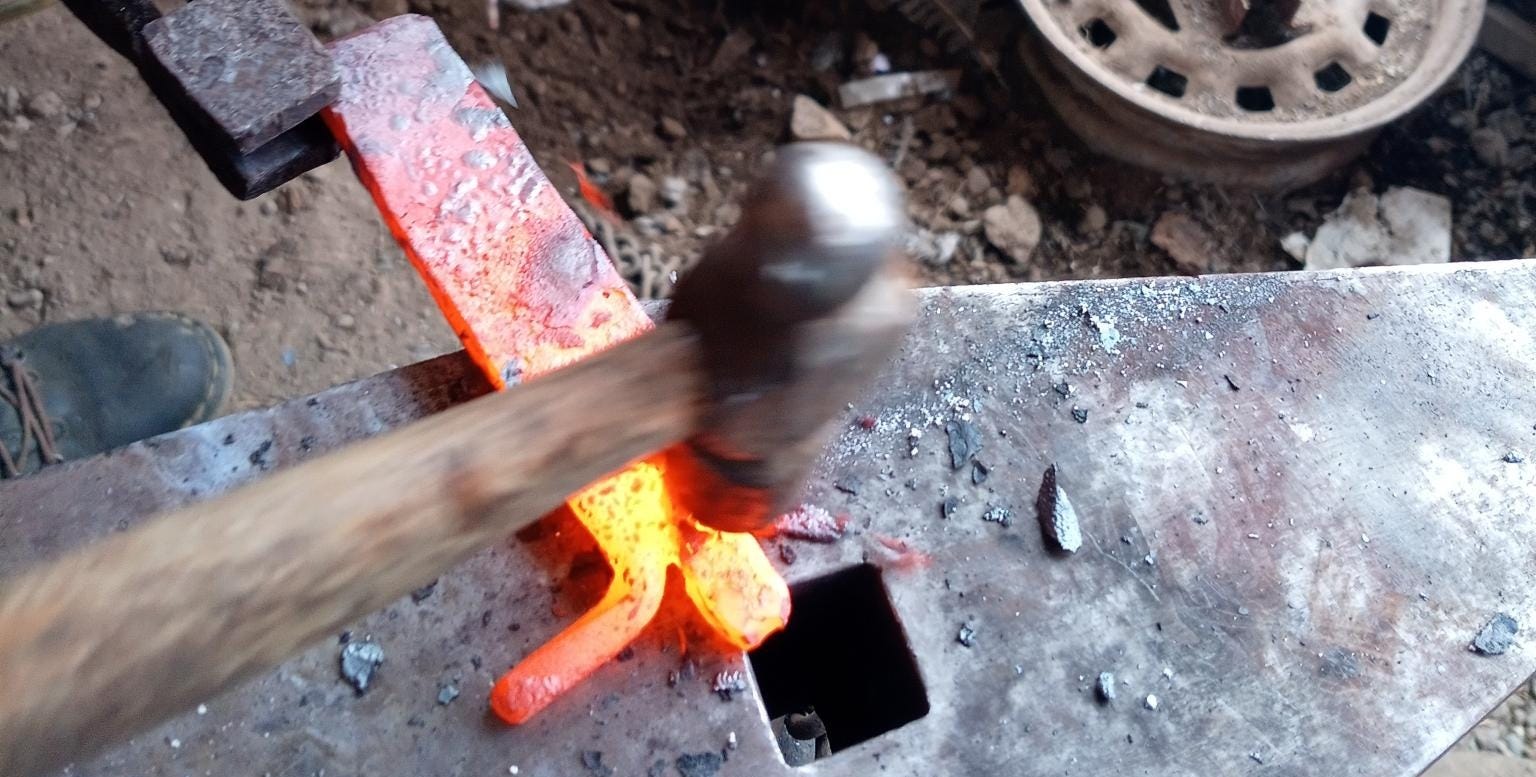
I then flipped the workpiece around to work on shaping the torso and legs.


Then it was back into the heat so I could start adding details and fine shape with the chisels, punches, and a much smaller hammer.


Crossing Myself
It’s a lot easier to size a cross to an existing figure than it is to size a figure to an existing cross. The reason is pretty obvious: the figure is a complicated bit of sculpting. A cross is simple to make.
Believers are always talking among themselves about how things work best when you put Christ first. Turns out that they’re right, at least when it comes to making crucifixes.
The cross started life as another one of those bars:

From this starting point, the biggest trick to making a cross is keeping everything even and square.
Or, more-or-less square. Part of the charm of a hand-made wall-hanging crucifix is the opportunity to make things a little gnarly, and “gnarly” was part of the client’s instructions. Consequently, as I shaped the cross, I found myself using the music of my childhood to guide my hand and eye.

I sang this song for a good hour or two as I shaped, hammered, and tweaked the cross into something that looked rugged and weathered..
Once I was more-or-less satisfied with the proportions, I did a test fit-up.
At which point it was time to make the cross look more like old wood, rather than hammered steel or stone. Even though we’re ultimately dealing with an abstract sculpture, I wanted it to catch the light with a texture that feels somehow more-real-than-real (all the best abstract sculpture does this, so it’s a good thing to shoot for).


I used the blade-peen on the chipping hammer to get wood-grain texture in the surface, used the dividers to make sure the cross-arms were even (and then to mark them for cutting where they weren’t). In the end, a good test fit told me it was time to move on.
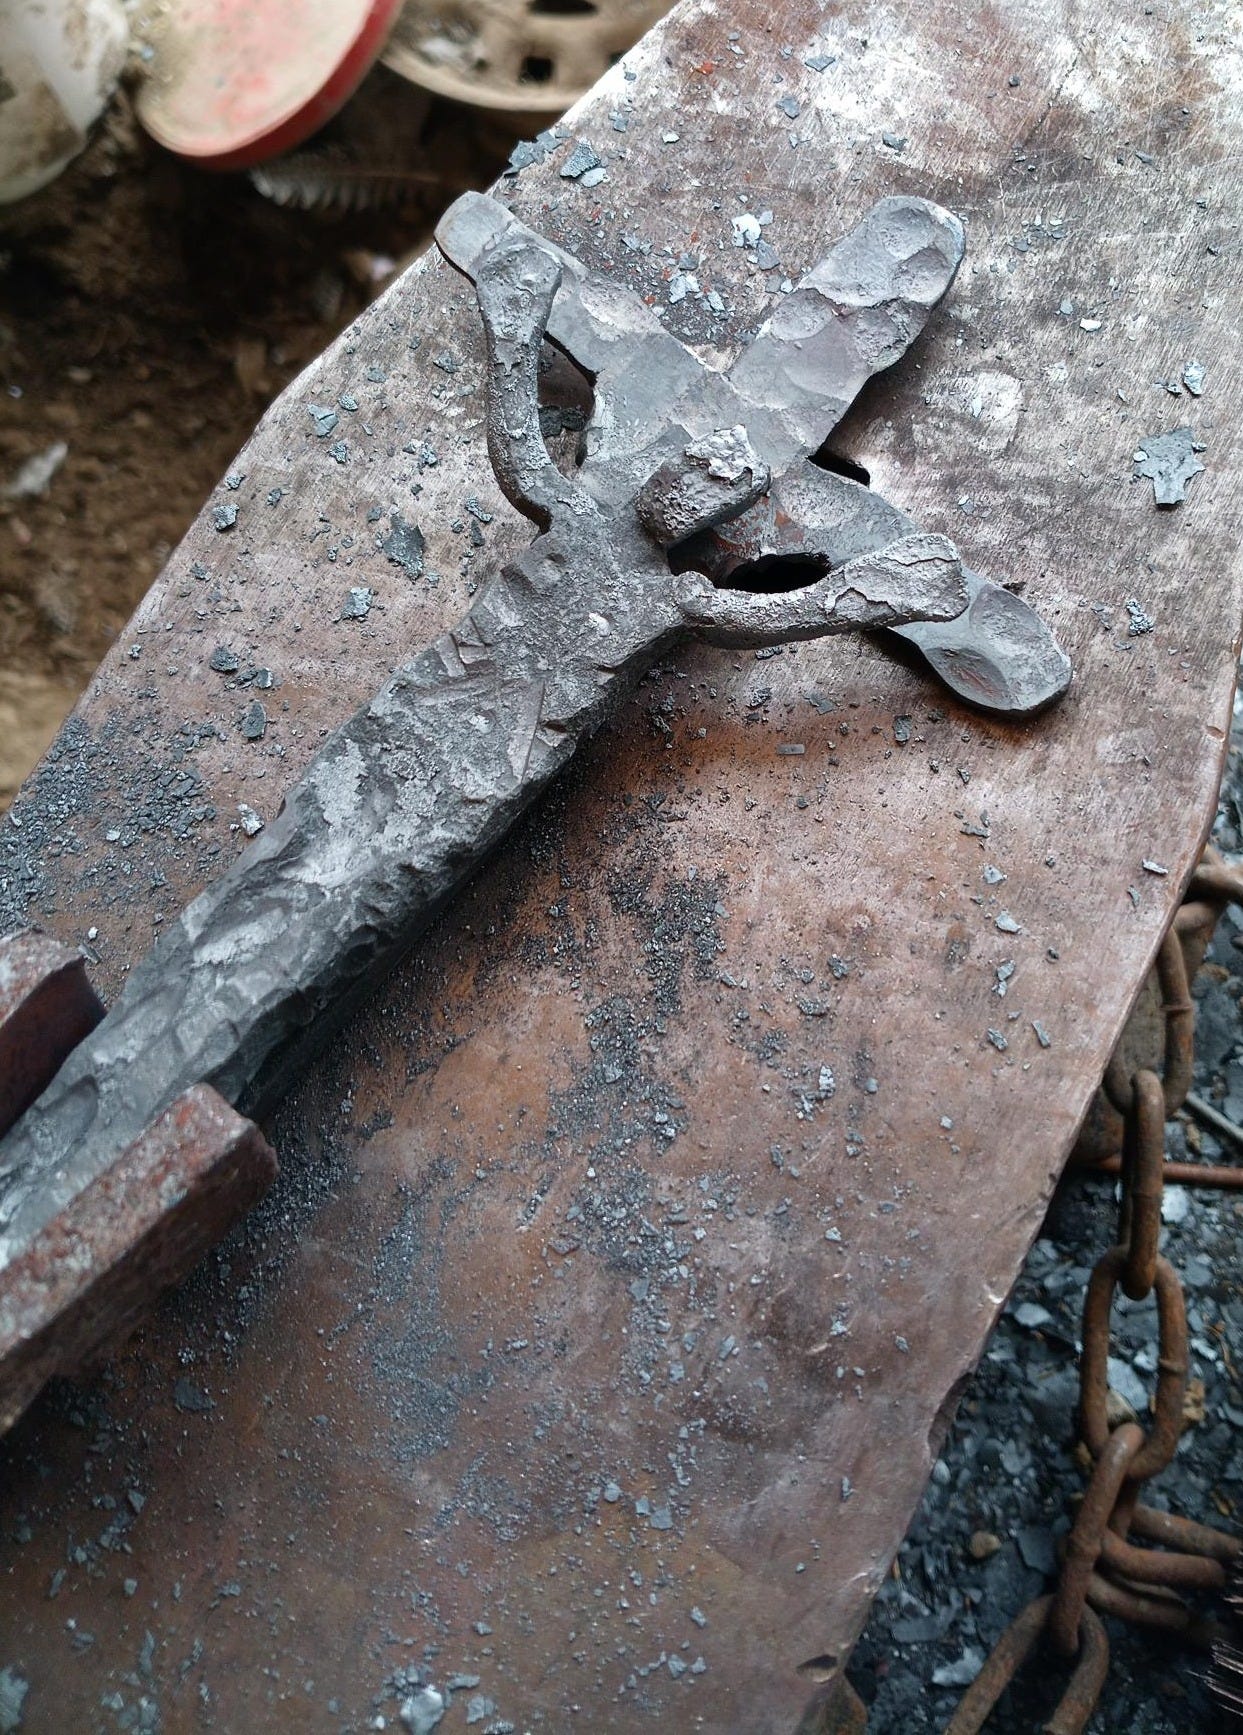
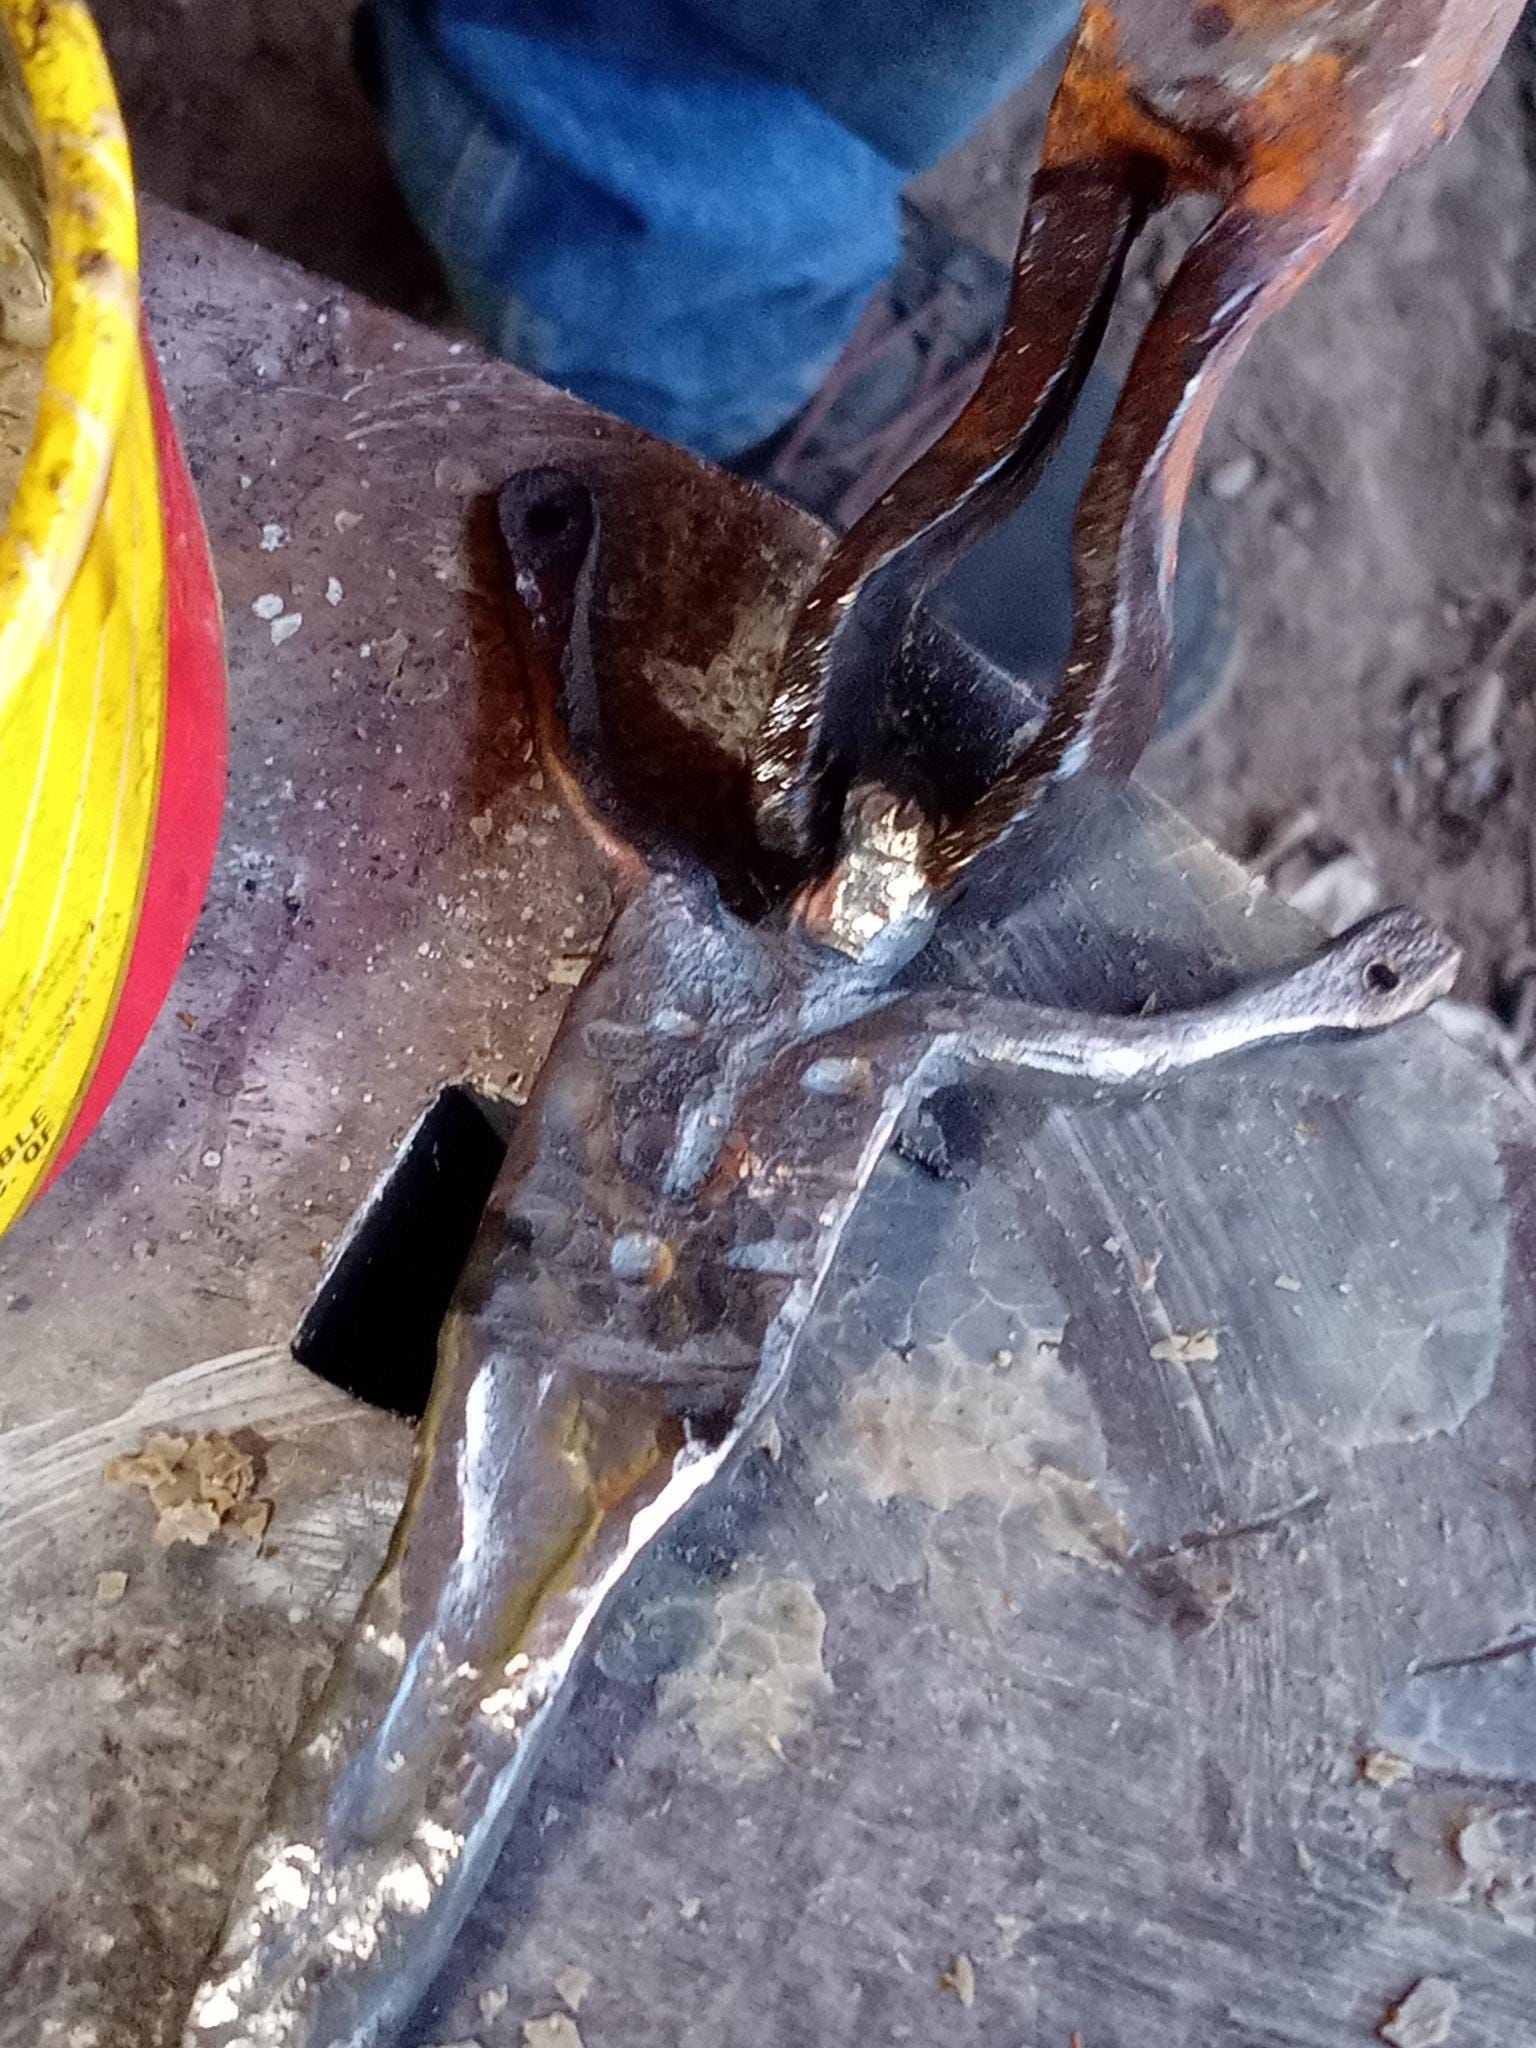
I popped Jesus back in the oven for a bit so I could get his arms bent into exactly the right position, so that his body would hang properly off the cross instead of leaning back against it.
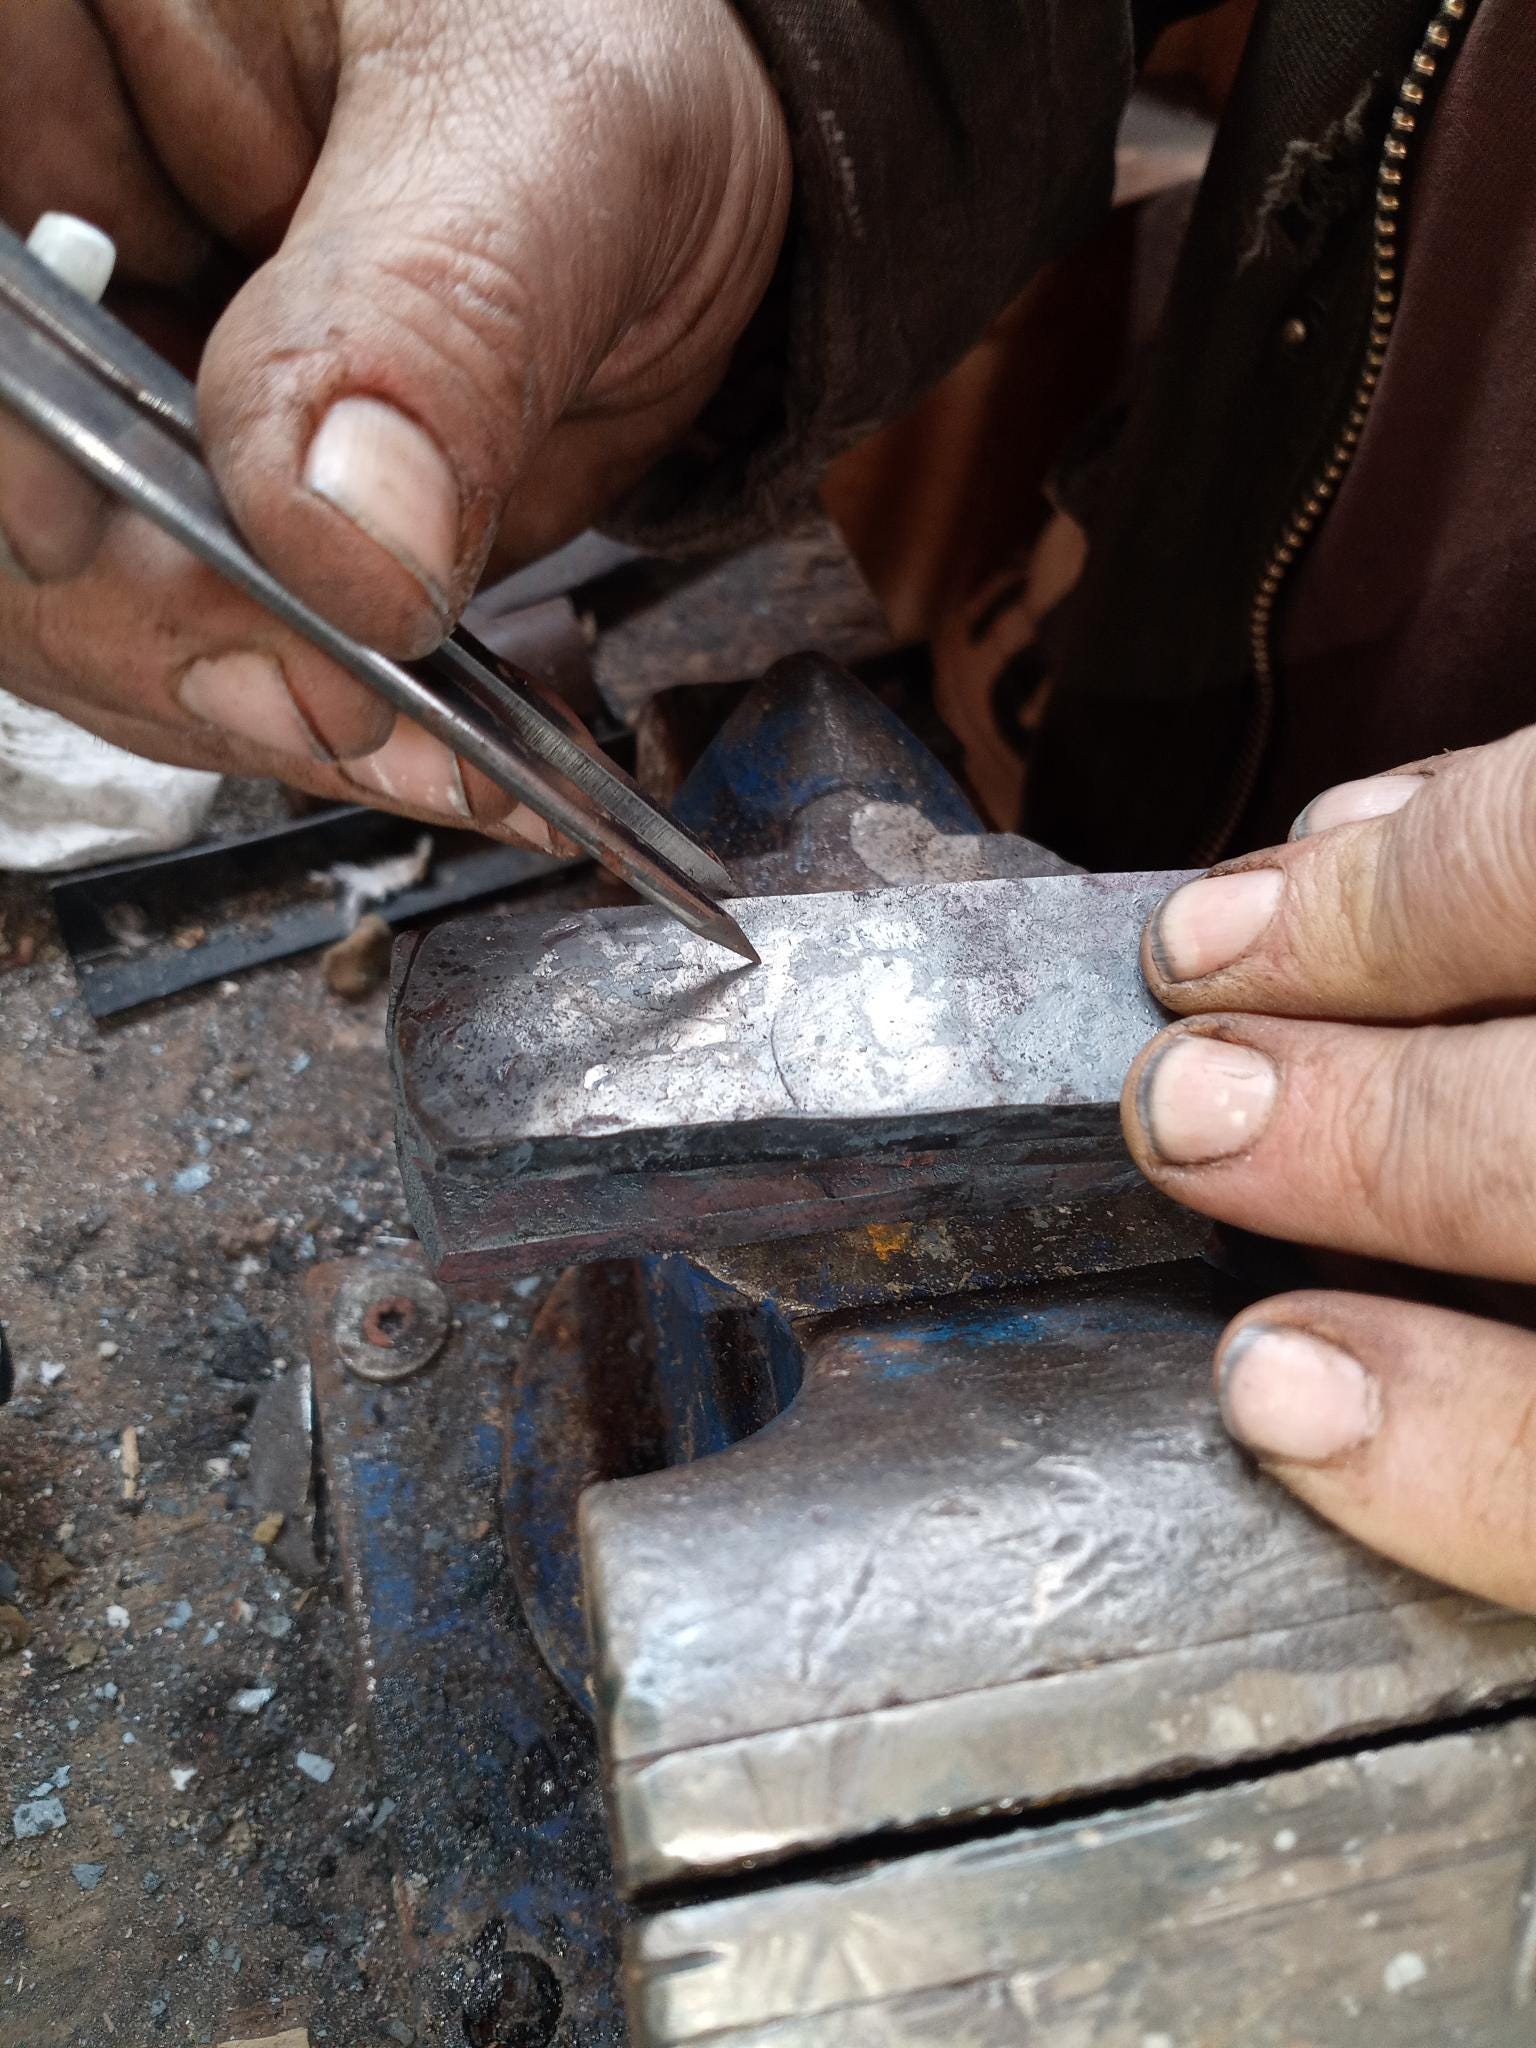
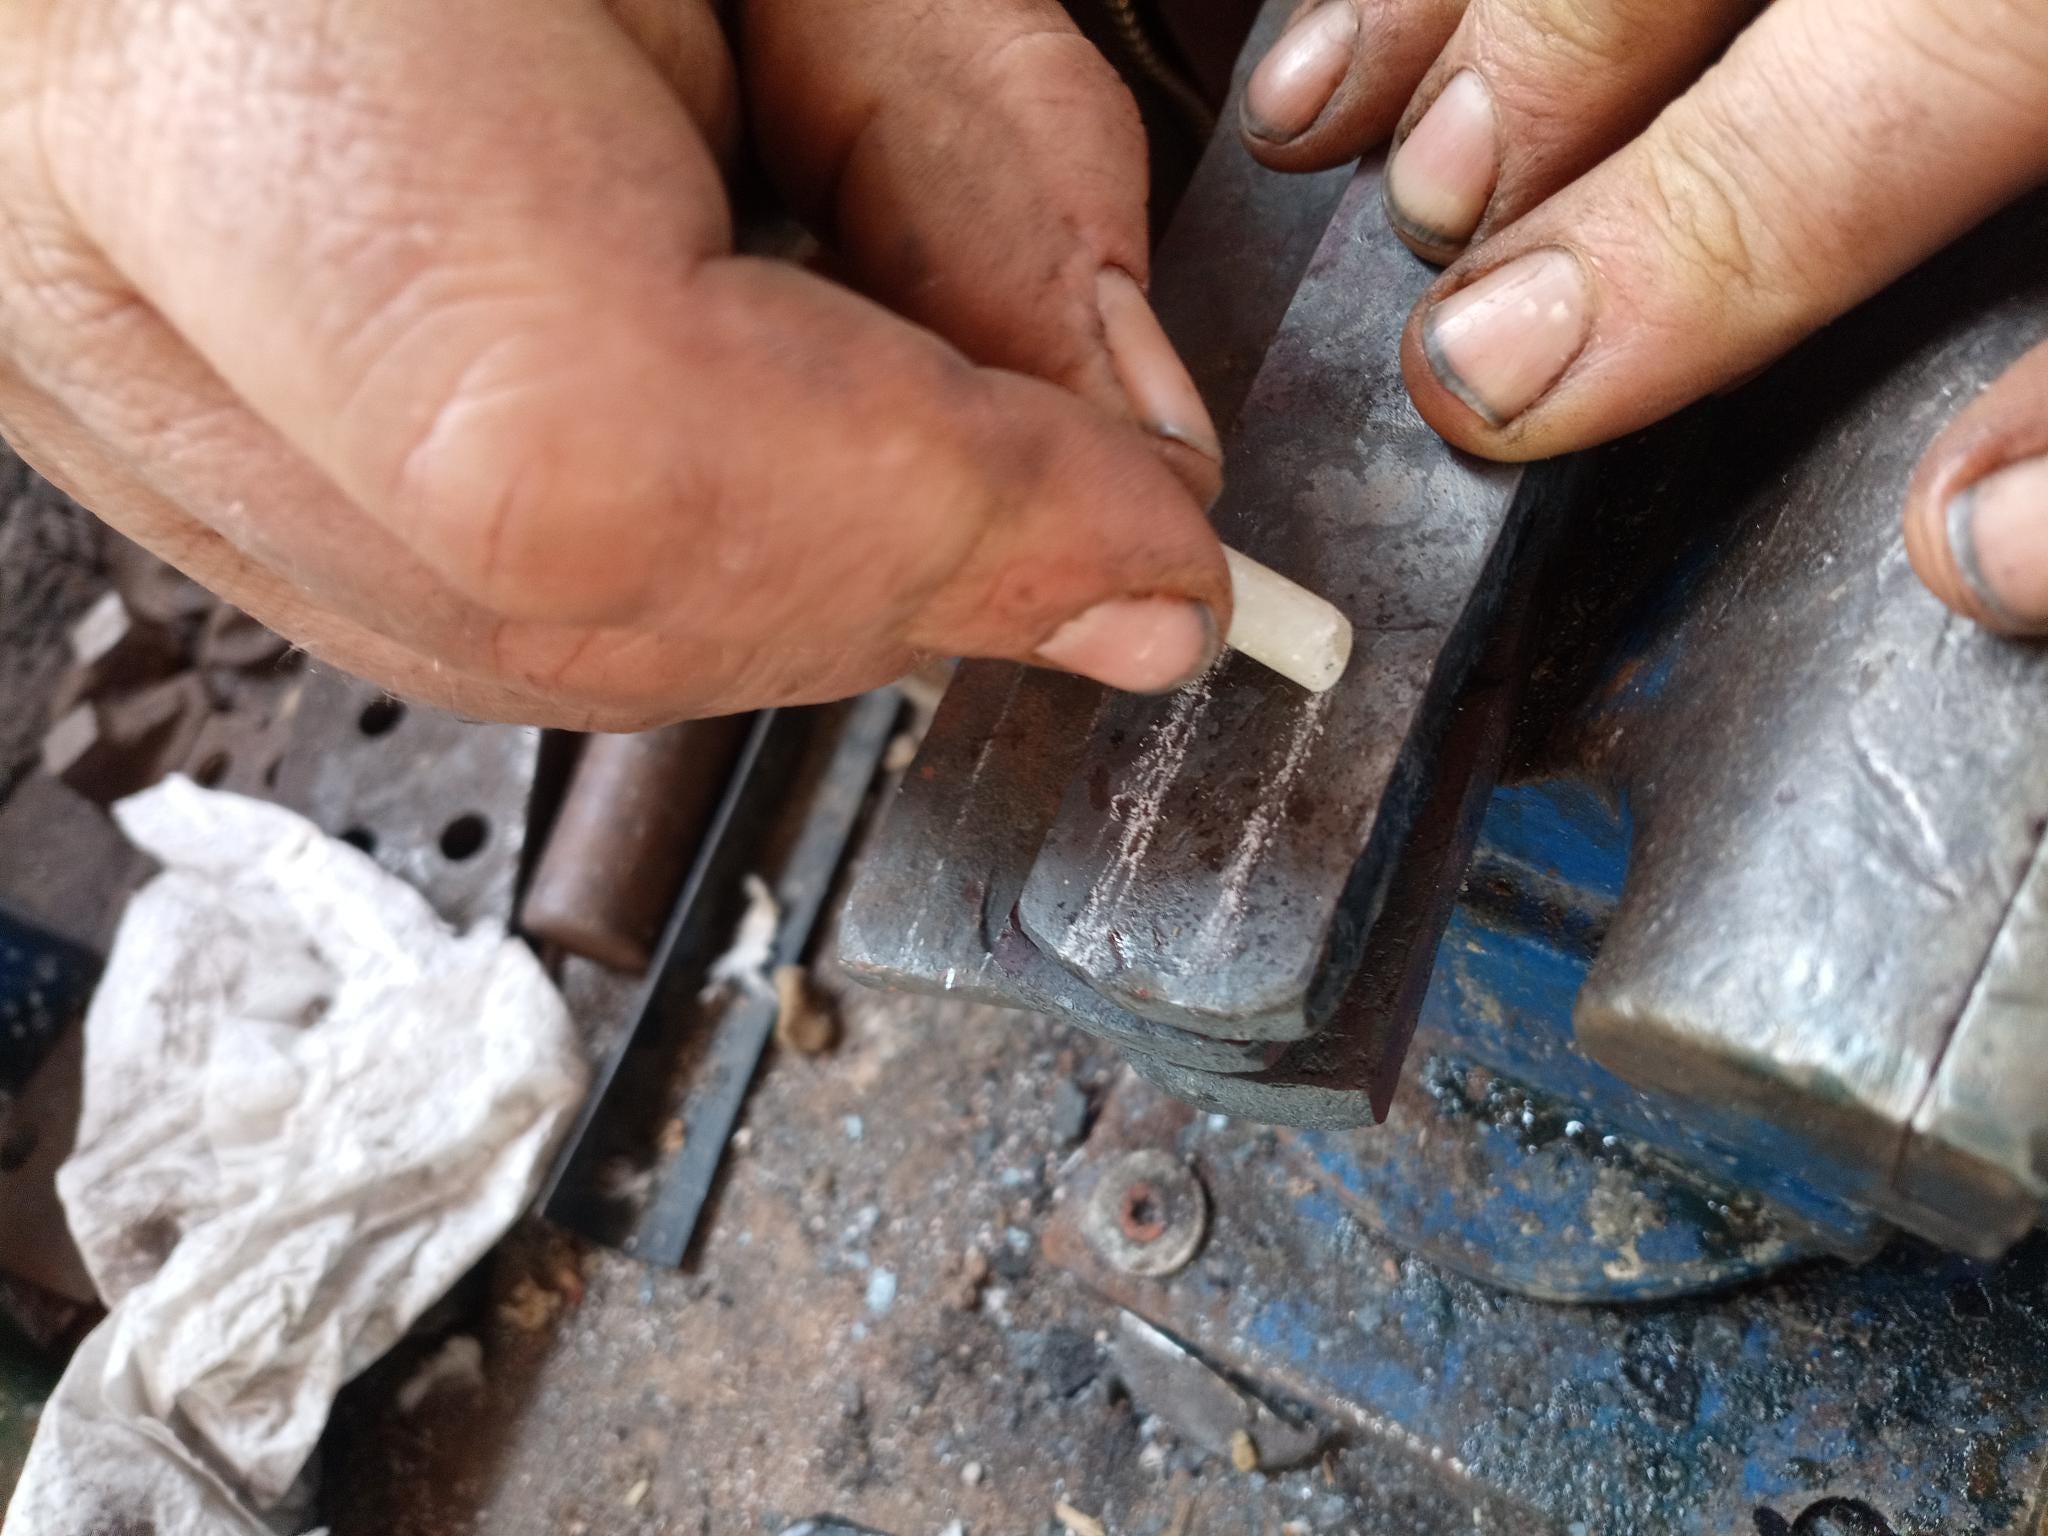
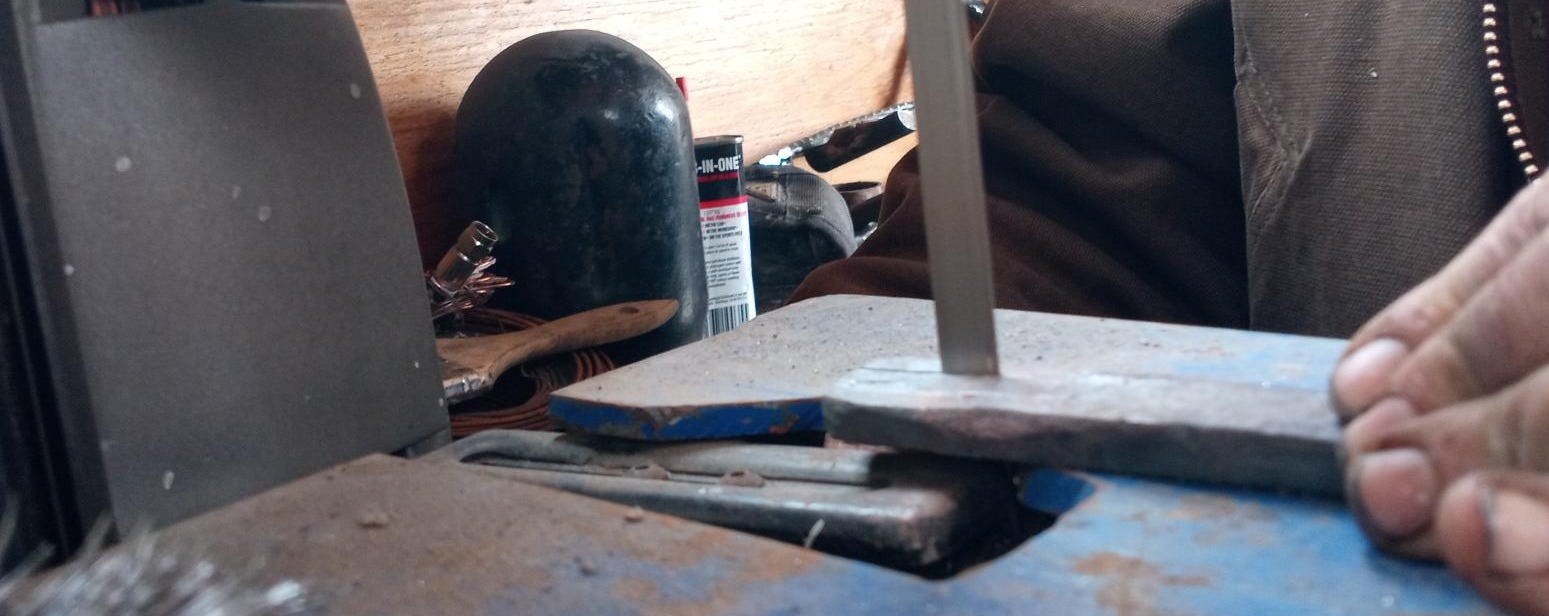
Then I used a center-punch to mark the holes for nailing him to the cross, and then drilled them.


I did the same thing with the cross—pushing the drill through the holes in the Jesus figure in order to make sure they all lined up—and then set about doing the pretty parts:
The finish work.
The cross got a wire brushing, then went into the forge to get temper colors, before receiving a hot wax coating to protect it from rust.


Those colors you see are natural to the metal. When steel heats up to around six hundred degrees, its surface turns blue and purple. Arresting it at that state is tricky, and I didn’t quite pull it off. I didn’t cool the metal enough before putting the wax on, and consequently the surface continued to cook. The final product (which you’ll see further down) is a lot more of a deep blue-black (the temper-color of the 700 degree range) than that pretty metallic blue.
Now, to get my nails done.
I intended to use brass for these, but I discovered that you can’t turn brass rod into nails (well, rivets, really) without a monkey tool and rivet set,6 and I wasn’t in a position to make either for this job. I needed something else, and I didn’t want to use steel. The client wanted this crucifix to emphasize the suffering in Christ’s sacrifice, so drawing attention to the nails was a must.
I cast about for something that would work, and I discovered just the thing:
Romex.
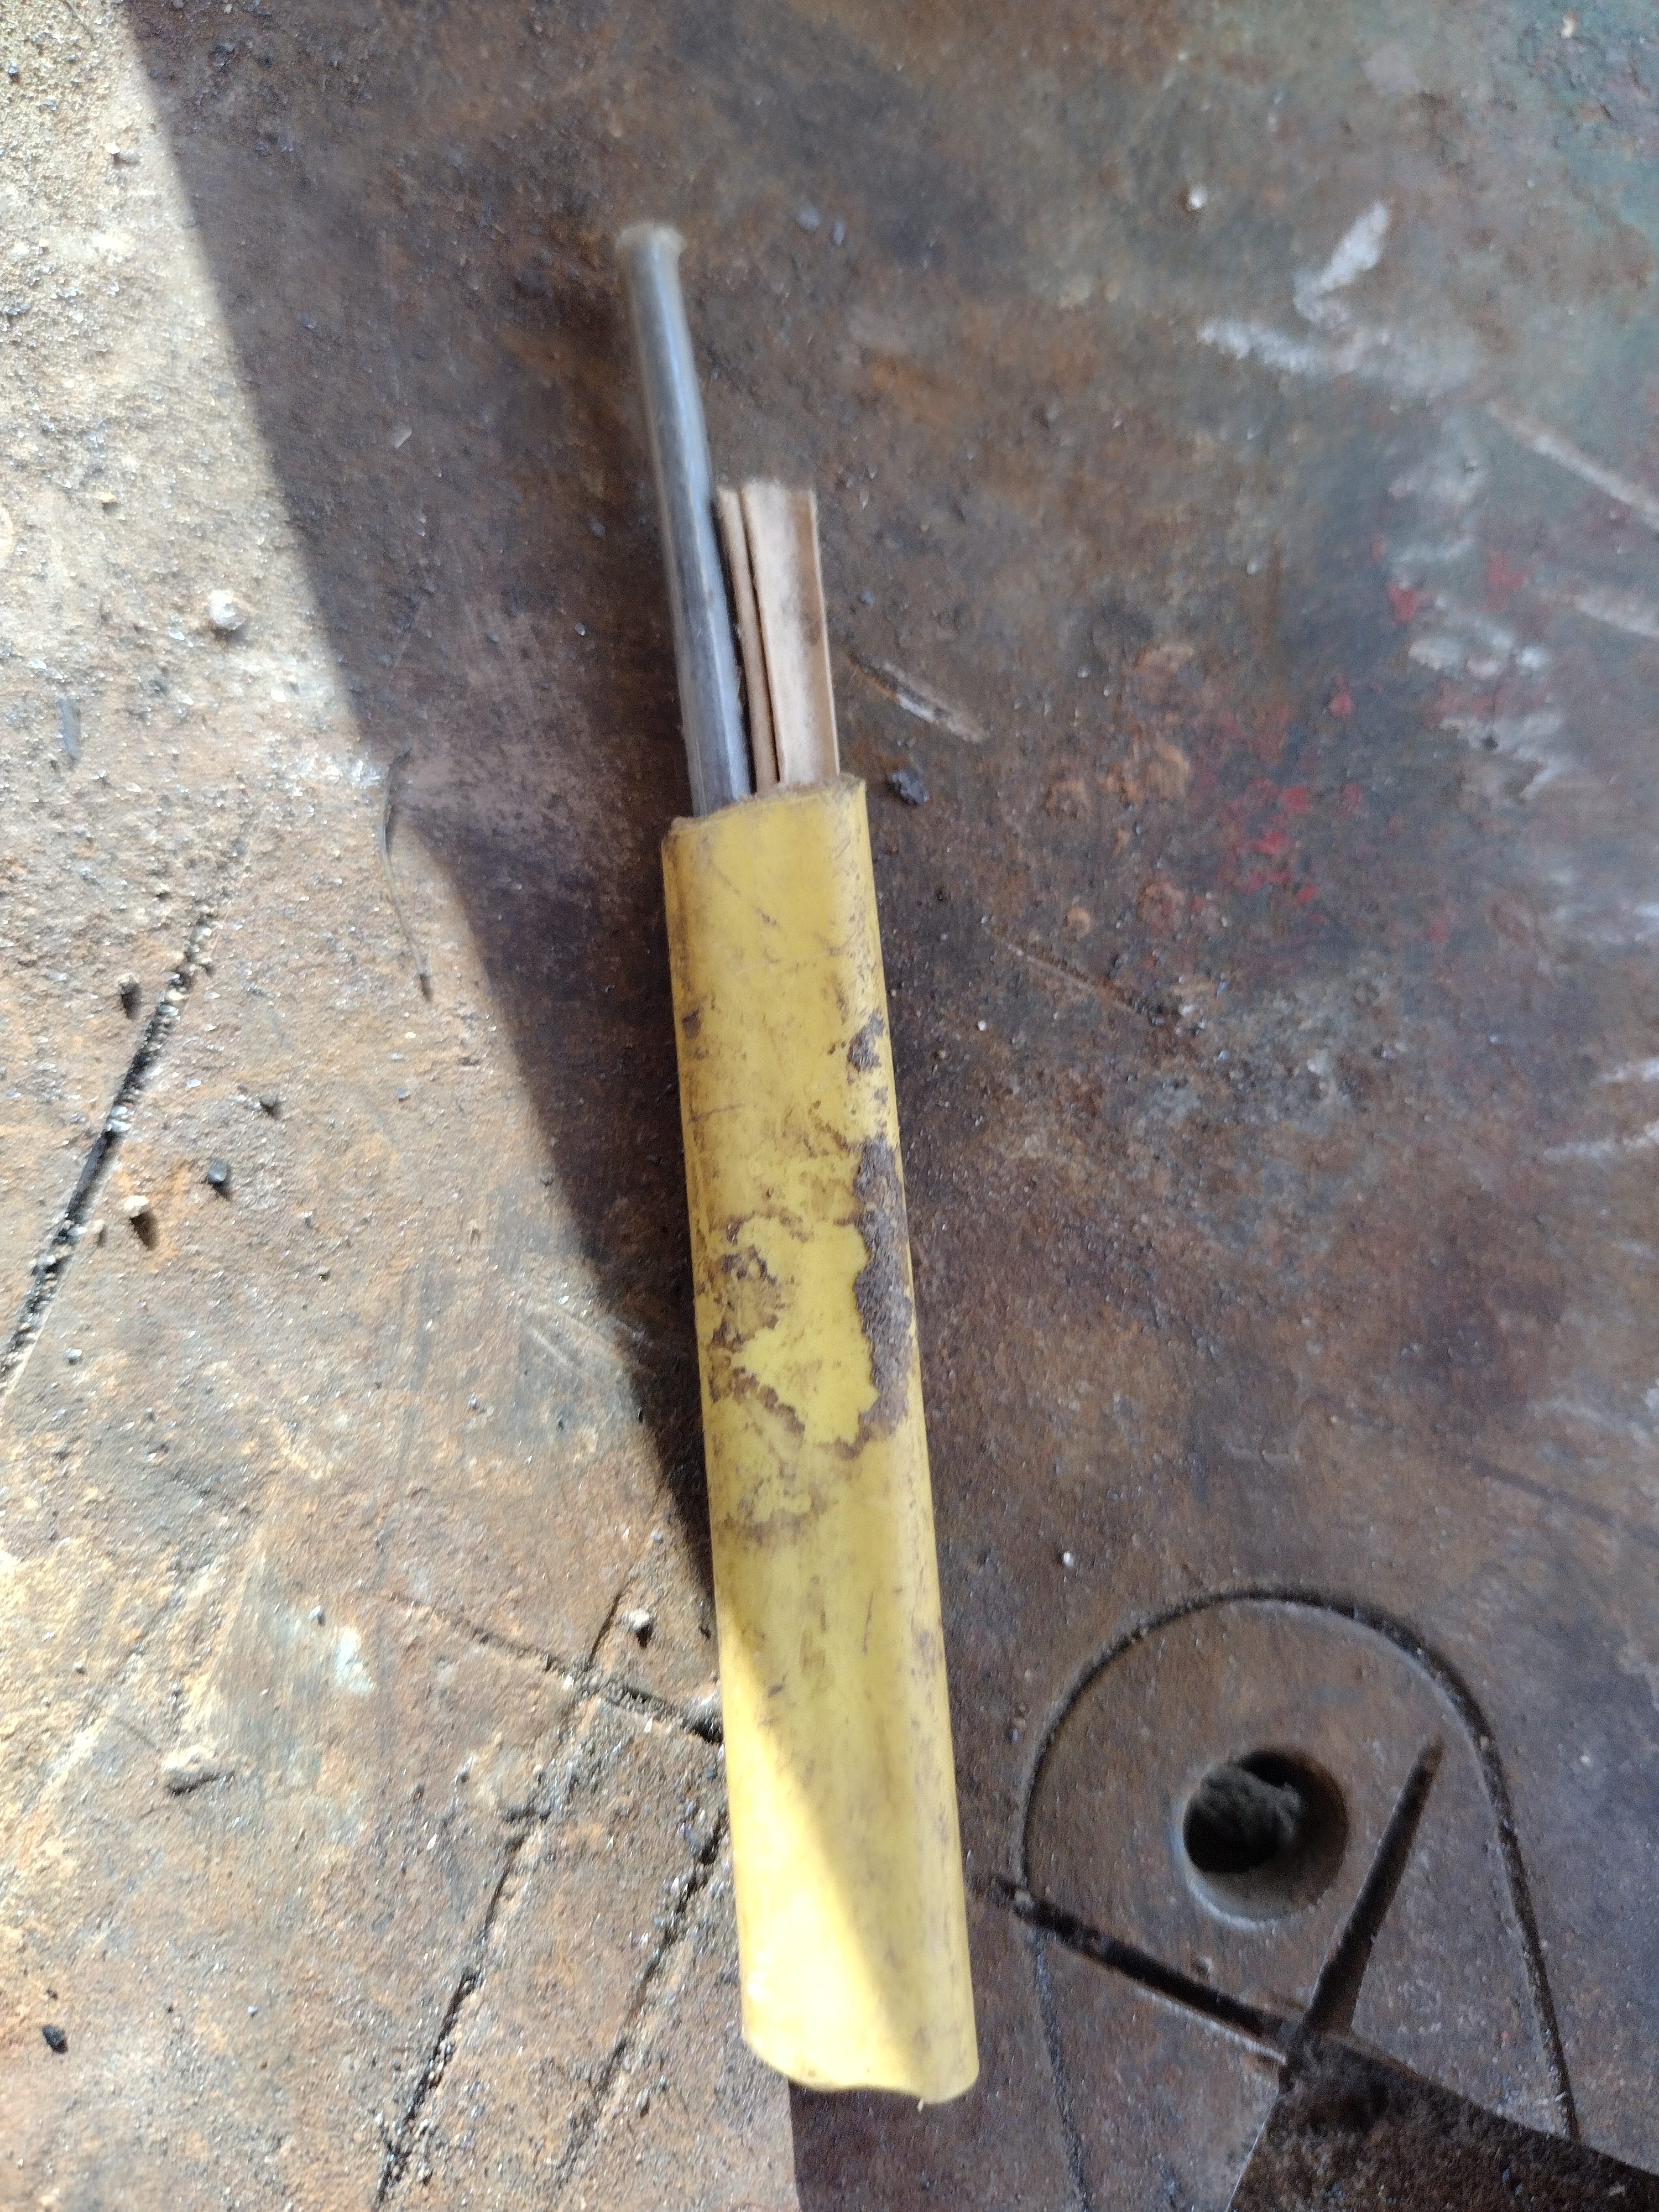
That’s the electrical cable that runs through your walls. It ties your breaker panel to your outlets and light fixtures. I’ve got a few acres of the stuff—it’s essential for build projects of all sorts.
Those three strands are each solid copper.
I took a length of it, put it in the vise, and peened over the end.
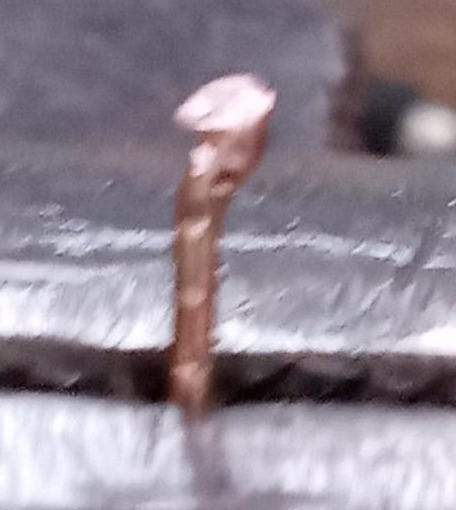
It’s only a rough nail shape, but it was close enough to work. I quickly made a mess of them for assembling my crucifix.
Finishing Touches
Despite having put Christ first in this build, I wasn’t quite happy with him. Sure, he was intentionally as abstract as the Holy Ghost, but there was still something missing.
I don’t have any shots of exactly this stage, but this is what he looked like before getting the rest of the torso detailing you’ve seen above (lighter included for scale).
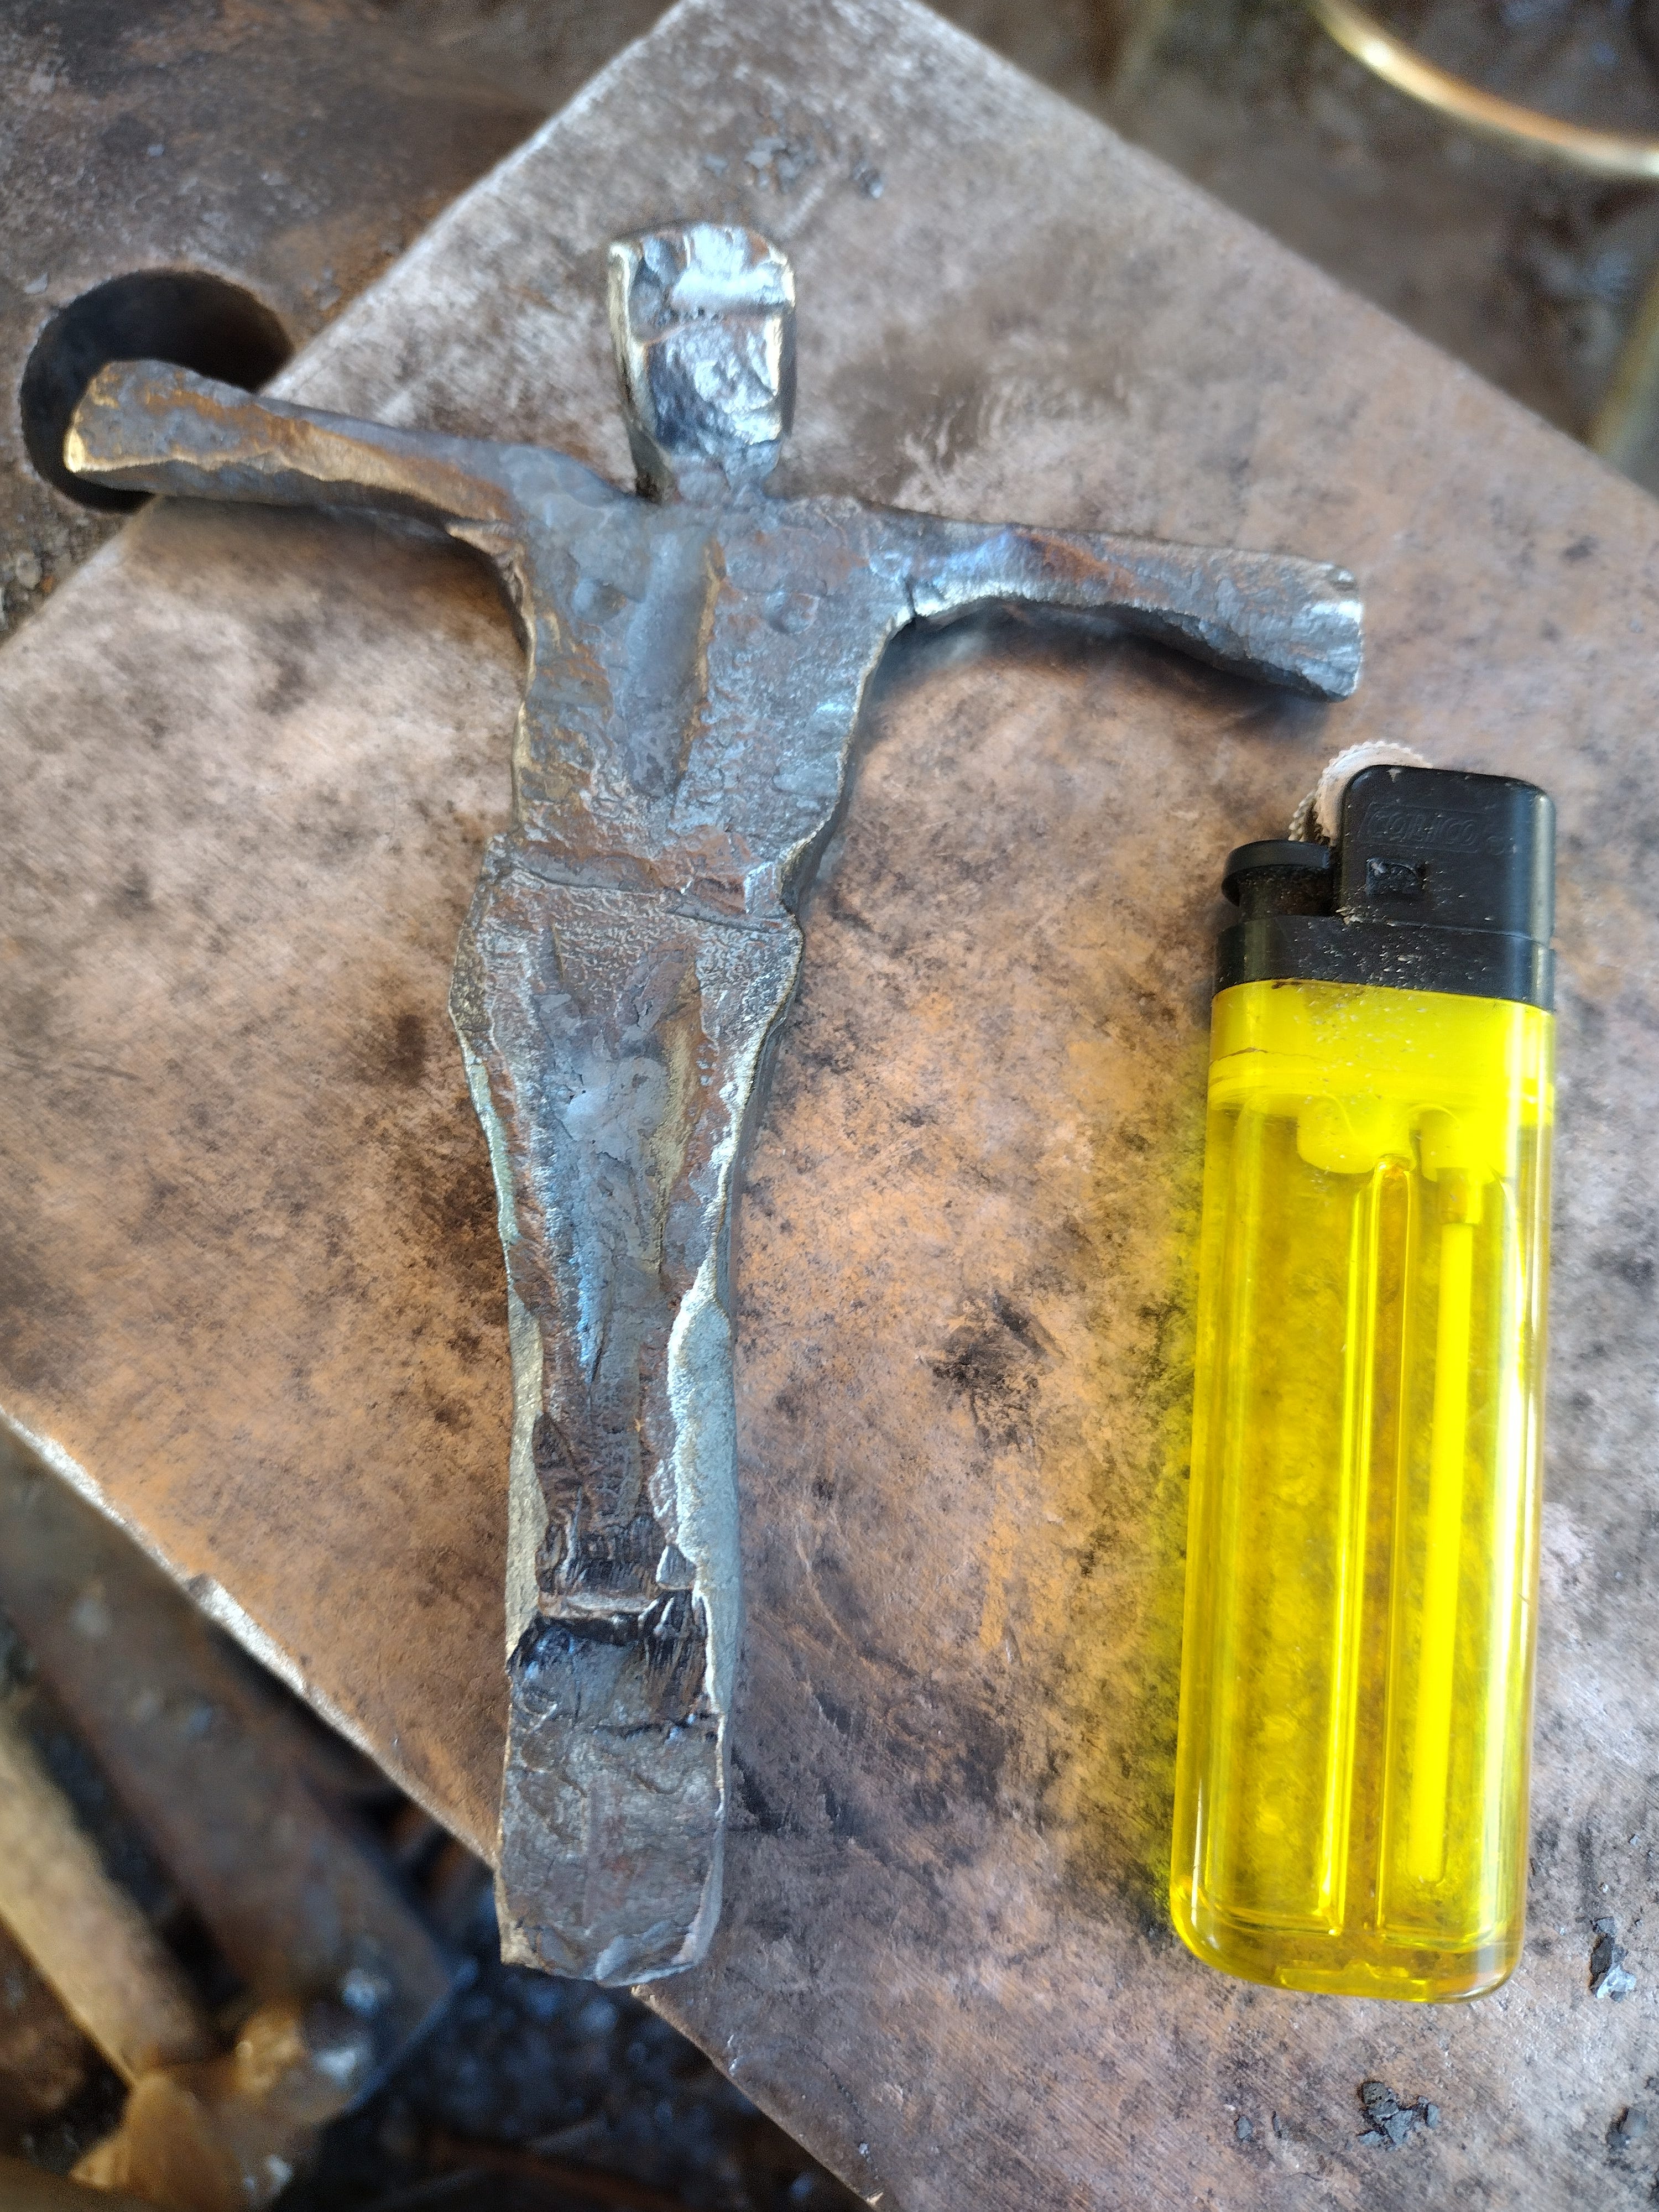
Even after the torso detailing, something was missing.
I studied it for a while, then I realized:
There’s no crown of thorns, and no wound-in-the side.
These details would be something the client would find absolutely essential, and they would go a long way towards humanizing and concretizing the figure.
So I clamped the savior in the vise and proceeded to scourge him with the slot punch I made in that big tooling build.


This sort of fine-detail work is generally done cold. Mild steel (the sort of steel you use for sculpture work) is considerably softer than tool steels (which your chisels, drill bits, and punches are made out of), so this works surprisingly well.
Once I was satisfied with that, it was time to heat the figure to get temper colors and wax-finish it…
And then nail it to the cross by using those little copper nails as rivets running all the way through both pieces.
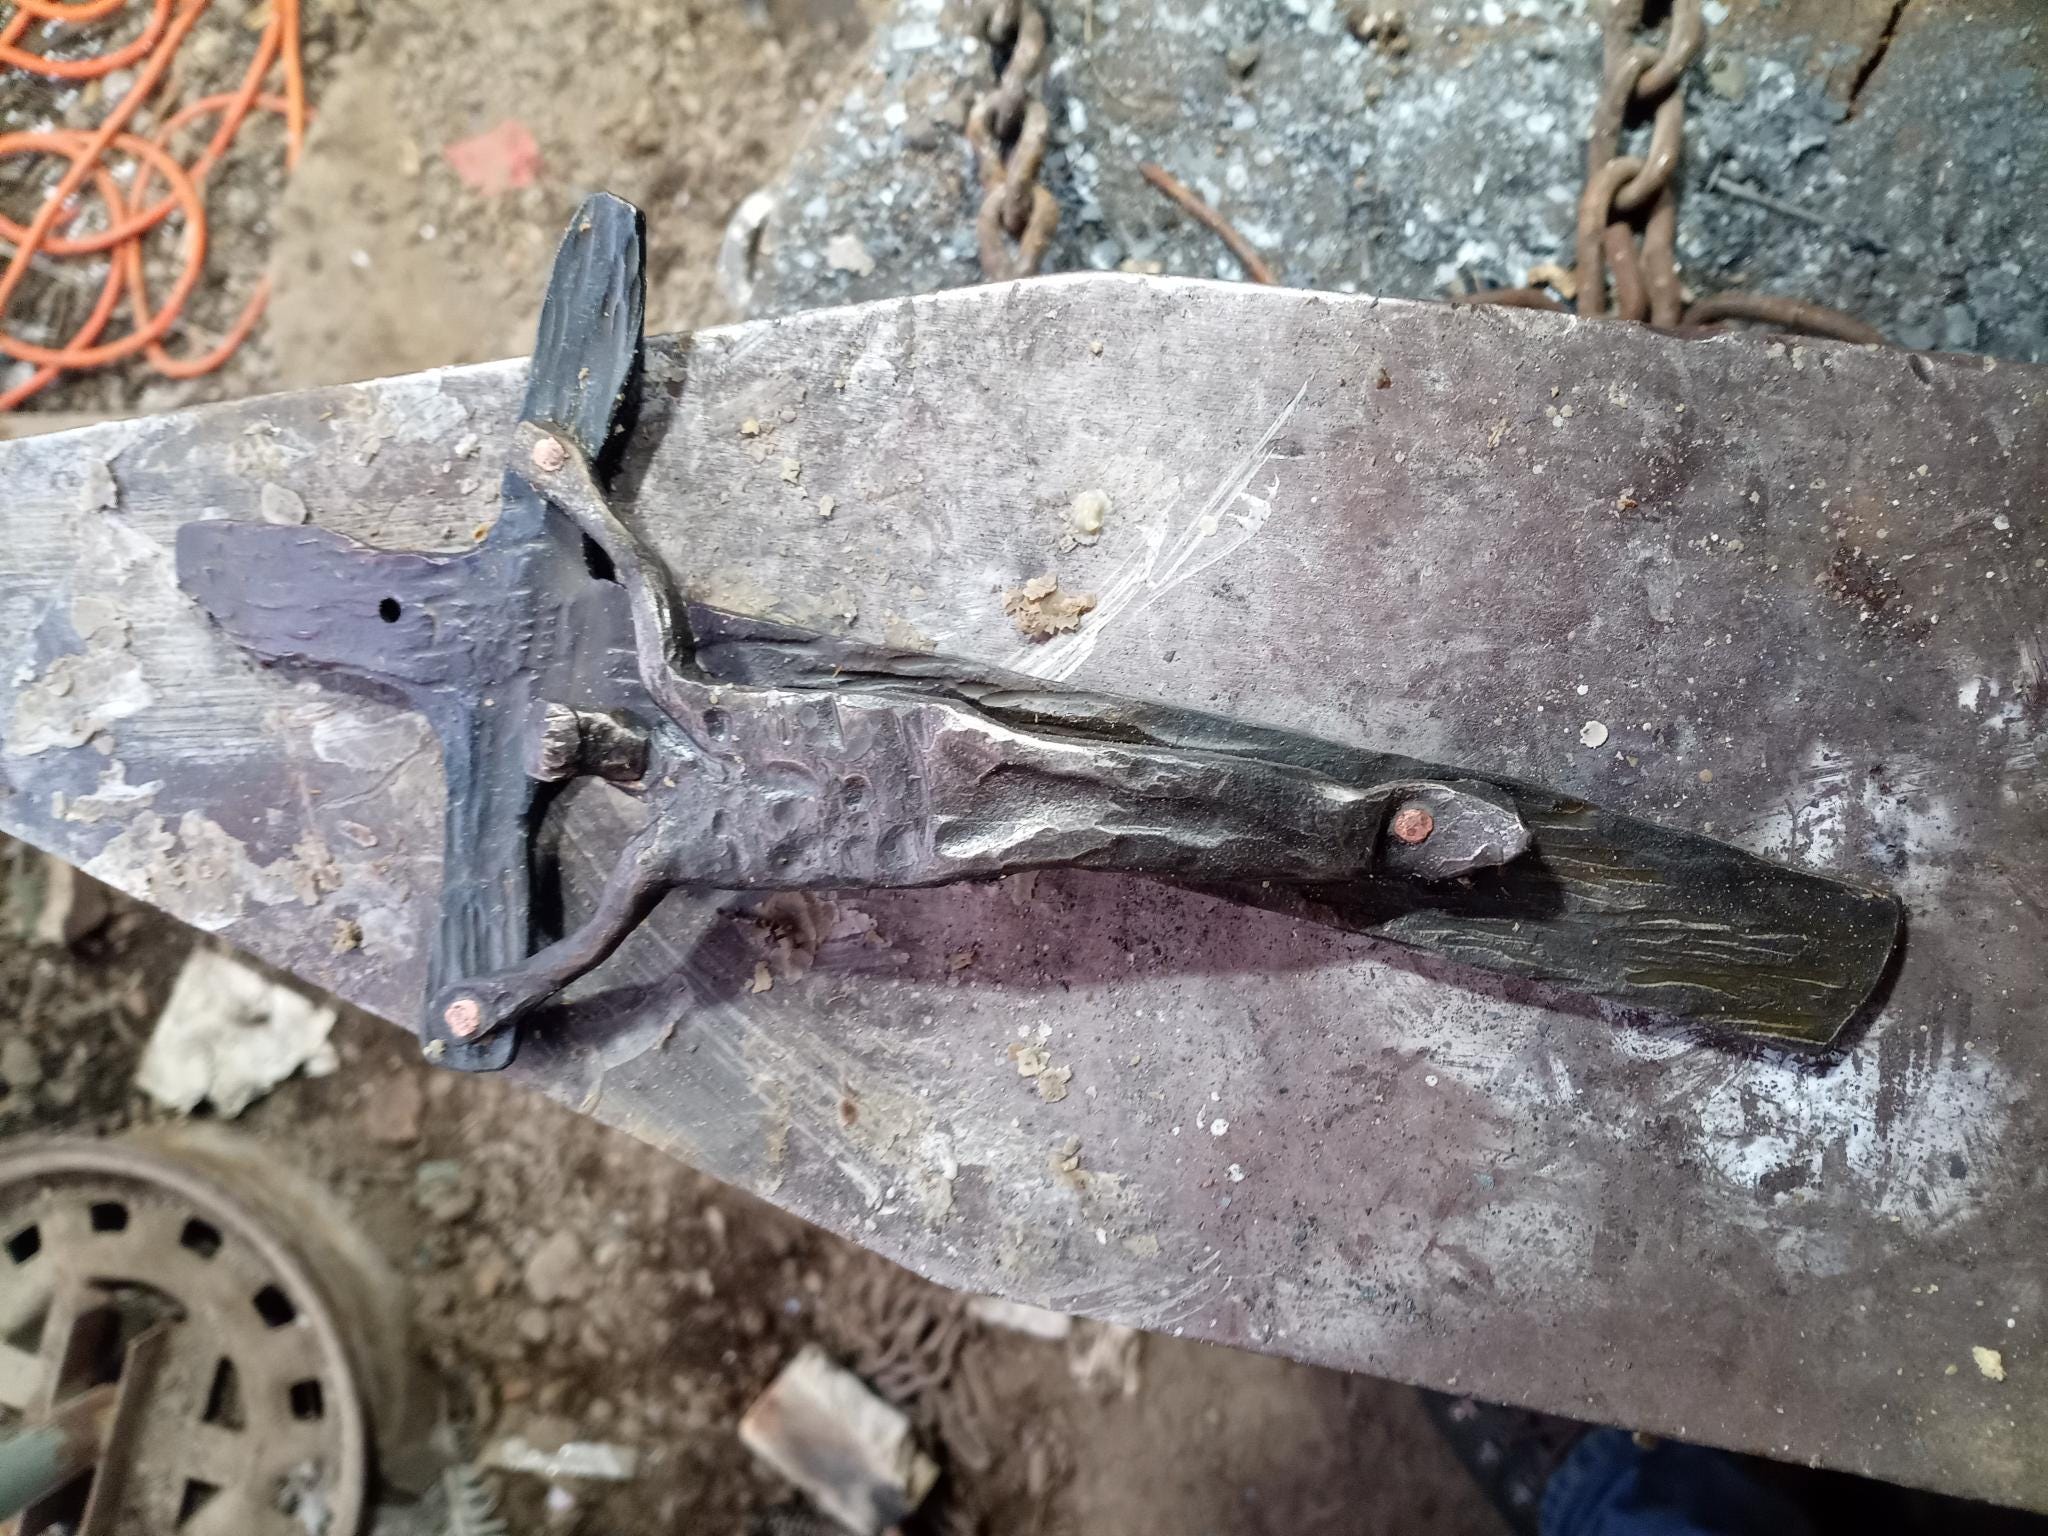
The rivet fasteners, even with the soft copper, are so secure that the pieces feel welded together.
At that point, the only thing left to do was to hang the crucifix—well, the whole batch of crucifixes—up on a board and have a look.


Two of them are already on their way to the client. If you are someone who will cherish that old rugged cross, you can get one for yourself by clicking here.
Thanks be to Jennifer for the delightful and challenging commission.
The question now is…
Which one of you has my next challenge?
The comments on this post are open to all.
This column is a big part of how I make my living—bigger now due to recent exciting events which you can read about here. Because of this, I am currently seeking consulting, coaching, and production gigs.
I am also offering a 20% lifetime discount off the annual subscription rate. If you’re finding these articles valuable, I’d be honored to have you join the ranks of my supporters!
If you’re looking for tales to transfix your imagination, you can find my novels, short stories, visions, and dreams (along with some how-to books and literary studies) by clicking here.
When not haunting your Substack client, I write novels, literary studies, and how-to books. If you’re feeling adventurous click here to find a ridiculous number of fiction and nonfiction podcasts for which I will eventually have to accept responsibility.
If you’re inclined not to believe me, read the writings of the Puritans.
The word “excruciating” derives from “crucifixion.” If one were to take the derivation literally, “excruciating” would mean “to suffer as if being crucified.”
It actually is an initialism for Iesus Nazarenus Rex Iudaeorum—Latin for “Jesus of Nazareth, King of the Jews.”
Forging and finishing very small figures requires some jeweler’s tools (like a large swing-arm magnifying glass) that I don’t yet have space for.
I am aware that this sentence implies that there are TARDISes that are not imaginary, an implication I can only answer with the earnest rejoinder: “You know not what wonders exist in my woods.”
I’ll cover these tools, and their uses, in a future post.
Really cool walk-through. I love how they turned out.
Could epoxy naval brass wire bits into a pretty gnarly golden crown of thorns and side would
If you really want to level up try doing a whole stations of the cross, and read St Alphonsus Liguori’s thing on it, not a namby pamby modern stations.