

Seduction begins with words.
“Hi Dan,” the email said, “I need a bunch of hooks for my house. I want them to look rustic and raw. And while you’re at it, can you forge a crucifix?”
This seduction ended with the most beautiful words a freelancer can hear:
“My budget is XXX. What can you do for me?”
I was hooked.
And soon, I’d be making hooks.
She wanted the hooks first.
Which is good, because I knew how to make hooks.
A crucifix…well…that’s a whole other story.
Crosses and Crucifixes
A cross is a pretty easy thing to make. You get an iron bar, you make a couple cuts, you do a couple bends, and then you hammer it flat, finish it, and call it a day. Half an hour of work, tops, if you’re practiced at it (practice is almost everything in this game).
A crucifix is a different beast.
The crucifix, as the name implies, is a depiction of the crucifixion. Or as my language-addled brain likes to think of it, it’s a statue of the CRUCIfied person AFFIXed to a cross.
It was a pretty safe assumption that the client was not asking for just any old crucifixion. The Romans crucified a lot of people—”getting nailed” meant something completely different back then—but I haven’t yet met a modern person who wants a sculpture of the death of Spartacus. This crucifix had to be THE crucifixion: the one with Jesus and the crown of thorns and the charge document.
So, this is a sculpting job. 3D modeling aside,1 I’ve never done much sculpting. But, looked at from a certain point of view, “forging” is just a form of sculpting that involves an enhanced risk of forest fires, and I’ve been forging for a couple years now, so I know a bit about how coax shapes out of the metal.
Worst case scenario: I’d learn a lot and fail spectacularly.
So I took the job, but deferred payment until after the piece was done successfully (I hate giving refunds).
I sat down with my trusty sketch pad and started working out how to make an iron Jesus…and that’s where I ran into my first problem:
I didn’t have the tools to do this job.
So I made a list of the tools I needed to do the job, and I went out to the forge building and looked around, and discovered problem #2:
The chickens had been hiding from the cold in my forge, and they’d trashed the place.
A day of cleanup quickly brought me to problem #3:
I needed more tool-and-supply racks in order to make enough room in order to do a big job like making a crucifix and all the tooling to make the crucifix.
This was gonna be a much bigger job than I suspected.
Making a List and Chasing Out Mice
For the previous few days, Spring had been quietly poking its nose around the skirts of Winter. When that happens, the mice poke their noses out of their burrows, and it takes the Mighty Mouse Extermination Patrol a few weeks to realize that they need to clock in and earn their kibble.
So I had to run them through the forge a few times while I was getting my list together.
What tools did I need to build?
Well, for this job, I needed a few spring fullers (you’ll see a picture later on), some new punches, and for tool storage I needed another hammer rack and a paper towel holder. But I’d also been putting off making some bending jigs and twisting wrenches—basic tools that turn arduous jobs into very quick-and-easy jobs with better results. Those tools would all require hardy shanks to affix them to the anvil.
All of these would require forging, and most would require welding. And since I’d be starting the welder up, I figured might as well pile on another project that I’d been sitting on half-done for six months now because it intimidated the hell out of me (this will be a new post in a couple weeks—you Star Trek fans won’t want to miss it).
Before I knew it, I had a little over twenty items to make, all of them little things that wouldn’t take long on their own, but all of them a pain in the ass.
When your shop is off-grid, your welder requires an engine, and engines are loud. I tend to batch my welding jobs so that I don’t have to start the welder as often. This was a good batch.
I dove into the scrap pile and made myself the parts and pieces I need.


You’re looking at few bits of pipe, some rebar, some odd sections of railroad spike, some bits of coil spring, the last of the large chunks of 1” square bar that I have, some sections of a piston from a dead frost-free valve, and two garage sale crescent wrenches.
I measured and cut each one to the desired size (this is how you minimize waste so your scrap pile lasts a long time), then laid them out on the table, by project, and labeled each group of parts in soap stone.


Laid out like this, a dozen little projects that can get neglected forever become one big one.
So now, into the forge with the easy stuff!
Racks
I regret to admit that I didn’t get any good forging shots this time. My photographer was buried in other work, and my remote-controlled camera-holding rig had been repurposed to hold a chicken feeder for the last days of winter, because the chickens had broken their other feeder in a cold snap.
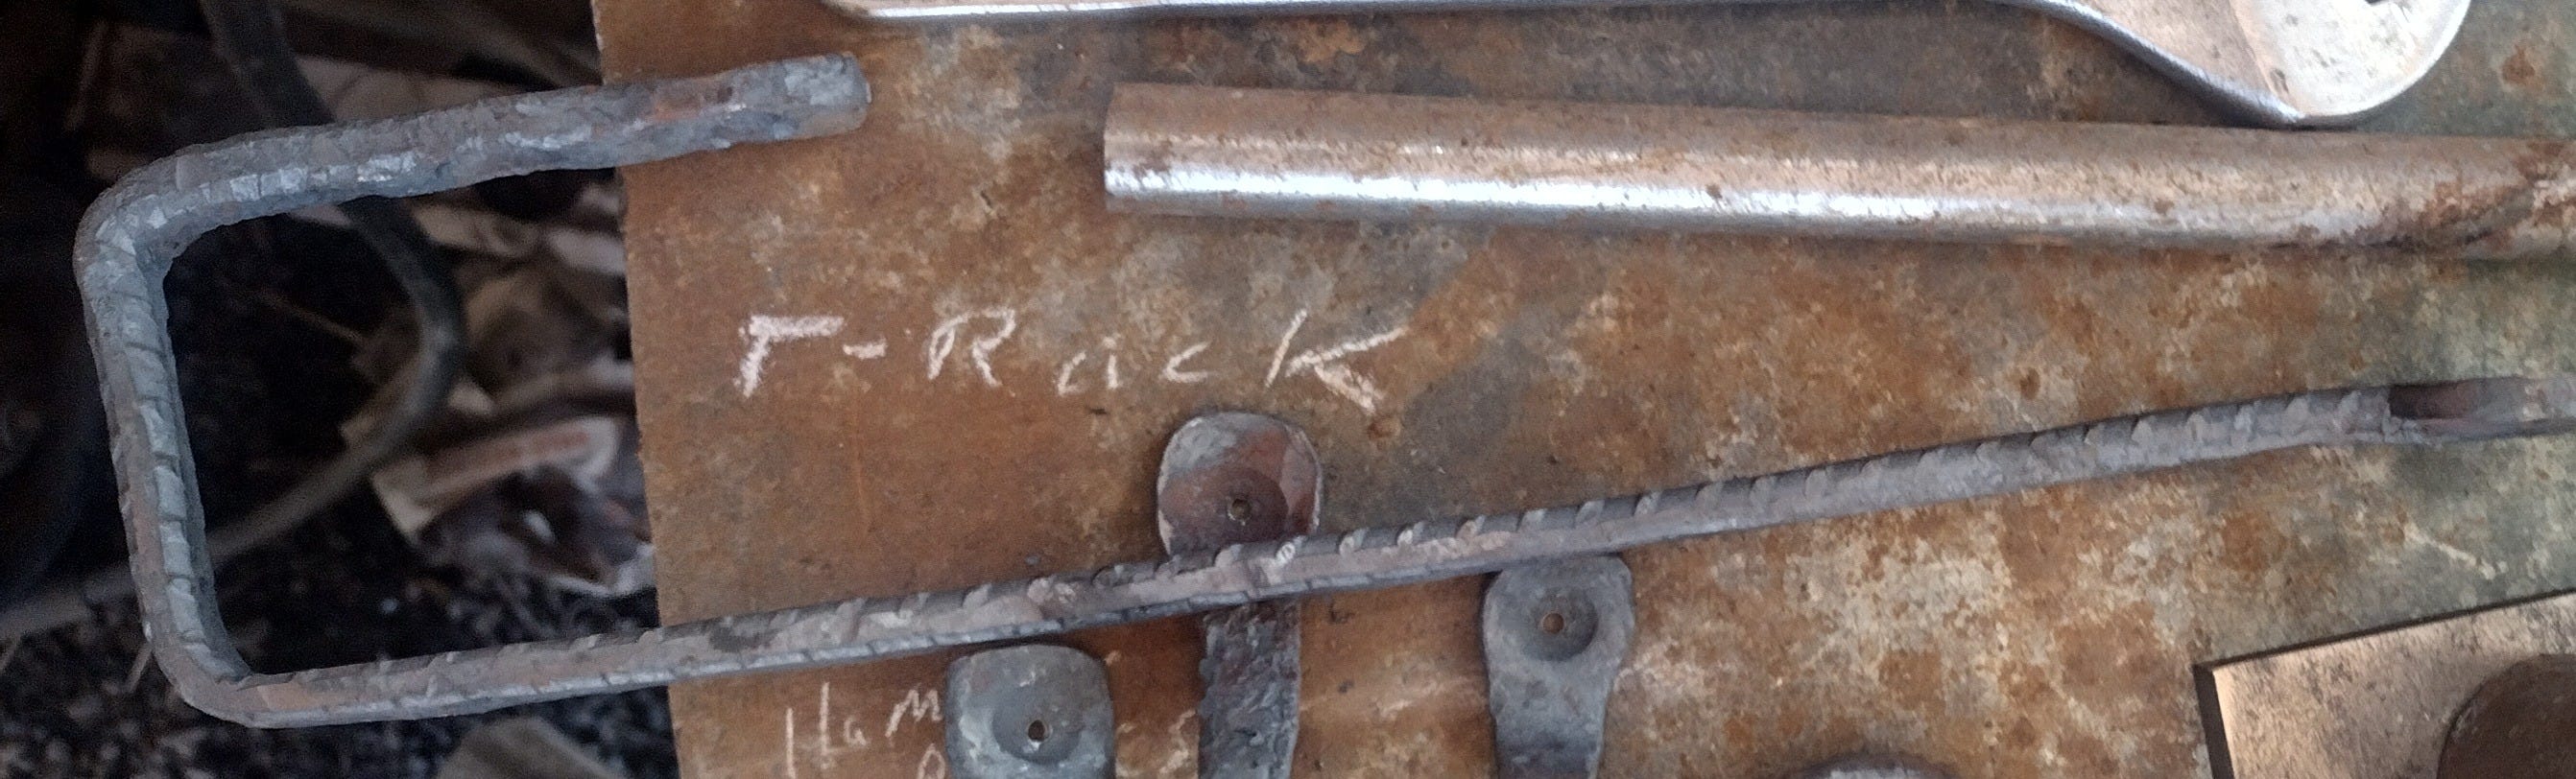
First were the hammer racks. My hammer collection has grown and I’ve started using a lot of smaller hammers that don’t fit in my existing rack, and I need things closer to the anvil. So these bits of rebar…

Went into the forge and got hammered upon, until they became half-loops, like so:

They next got a wire brushing, drill pressing, and forge finishing…


They actually looked halfway-decent when they were all finished up.

They’d actually work well as rustic or industrial drawer pulls. If anyone wants some, comment on this post and I’ll get you squared away.
And then it was time to mount them to their new home and seat some of my errant hammers in them.


Next, the paper towel rack. Paper towels are essential in any shop, but in a metalworking shop they’re also a fire hazard. I’ve gotten tired of moving the roll around to keep it safe—it was time to put it all up out of reach of bits of flying fire from the anvil.
I also made this one out of rebar. A rough forge brought me to this:
Then, after cleanup and finishing, I mounted the thing:


Tooling
Beyond the hammer itself, punches are the most basic metal shaping tool for the blacksmith. The shape of their end (square, rounded, sharp, flat, ball-end, etc.) makes an impression of that shape on the hot metal. Using punches, you can get any shape you want in a forge project, from a sharp crease to a divot to an eyeball to the face on a coin (there’s a reason that when you mint a coin, it is said to be “struck”).
For the crucifix job, I was going to need a very small ball-end punch, a very thin fuller (rounded-edge chisel), and for another job coming up I need a large square punch.
These tools require hard steel, so I used sections of an old coil spring.
A quick digression on metallurgy:
Steel is an alloy of iron and trace amounts of carbon (typically less than .8%). The more carbon in the steel, the harder it gets, and the more you can control its hardness properties. There are thousands of different steel alloys that include different amounts of other metals such as vanadium, chromium, manganese, silicon, and any of a dozen or so other metals that give the steel different qualities such as springiness, toughness, stress-tolerance, stiffness, the way it hardens, etc.
For the blacksmith who makes tools, controlling how that carbon behaves is the key to the properties of the finished steel. As the steel gets hotter, the carbon molecules move around inside the metal, creating different crystalline structures. To get a steel to be both hard and tough, you have to freeze the crystals while they’re in a particular temperature range (which varies by alloy). To freeze the steel, you plunge it into a “quench” medium (oil, water, brine, etc.) that cools the steel faster than the carbon can react, trapping it in its higher-temperature crystal structure. Do this at too high a temperature, though, and you get metal that is incredibly hard, and that shatters like glass.
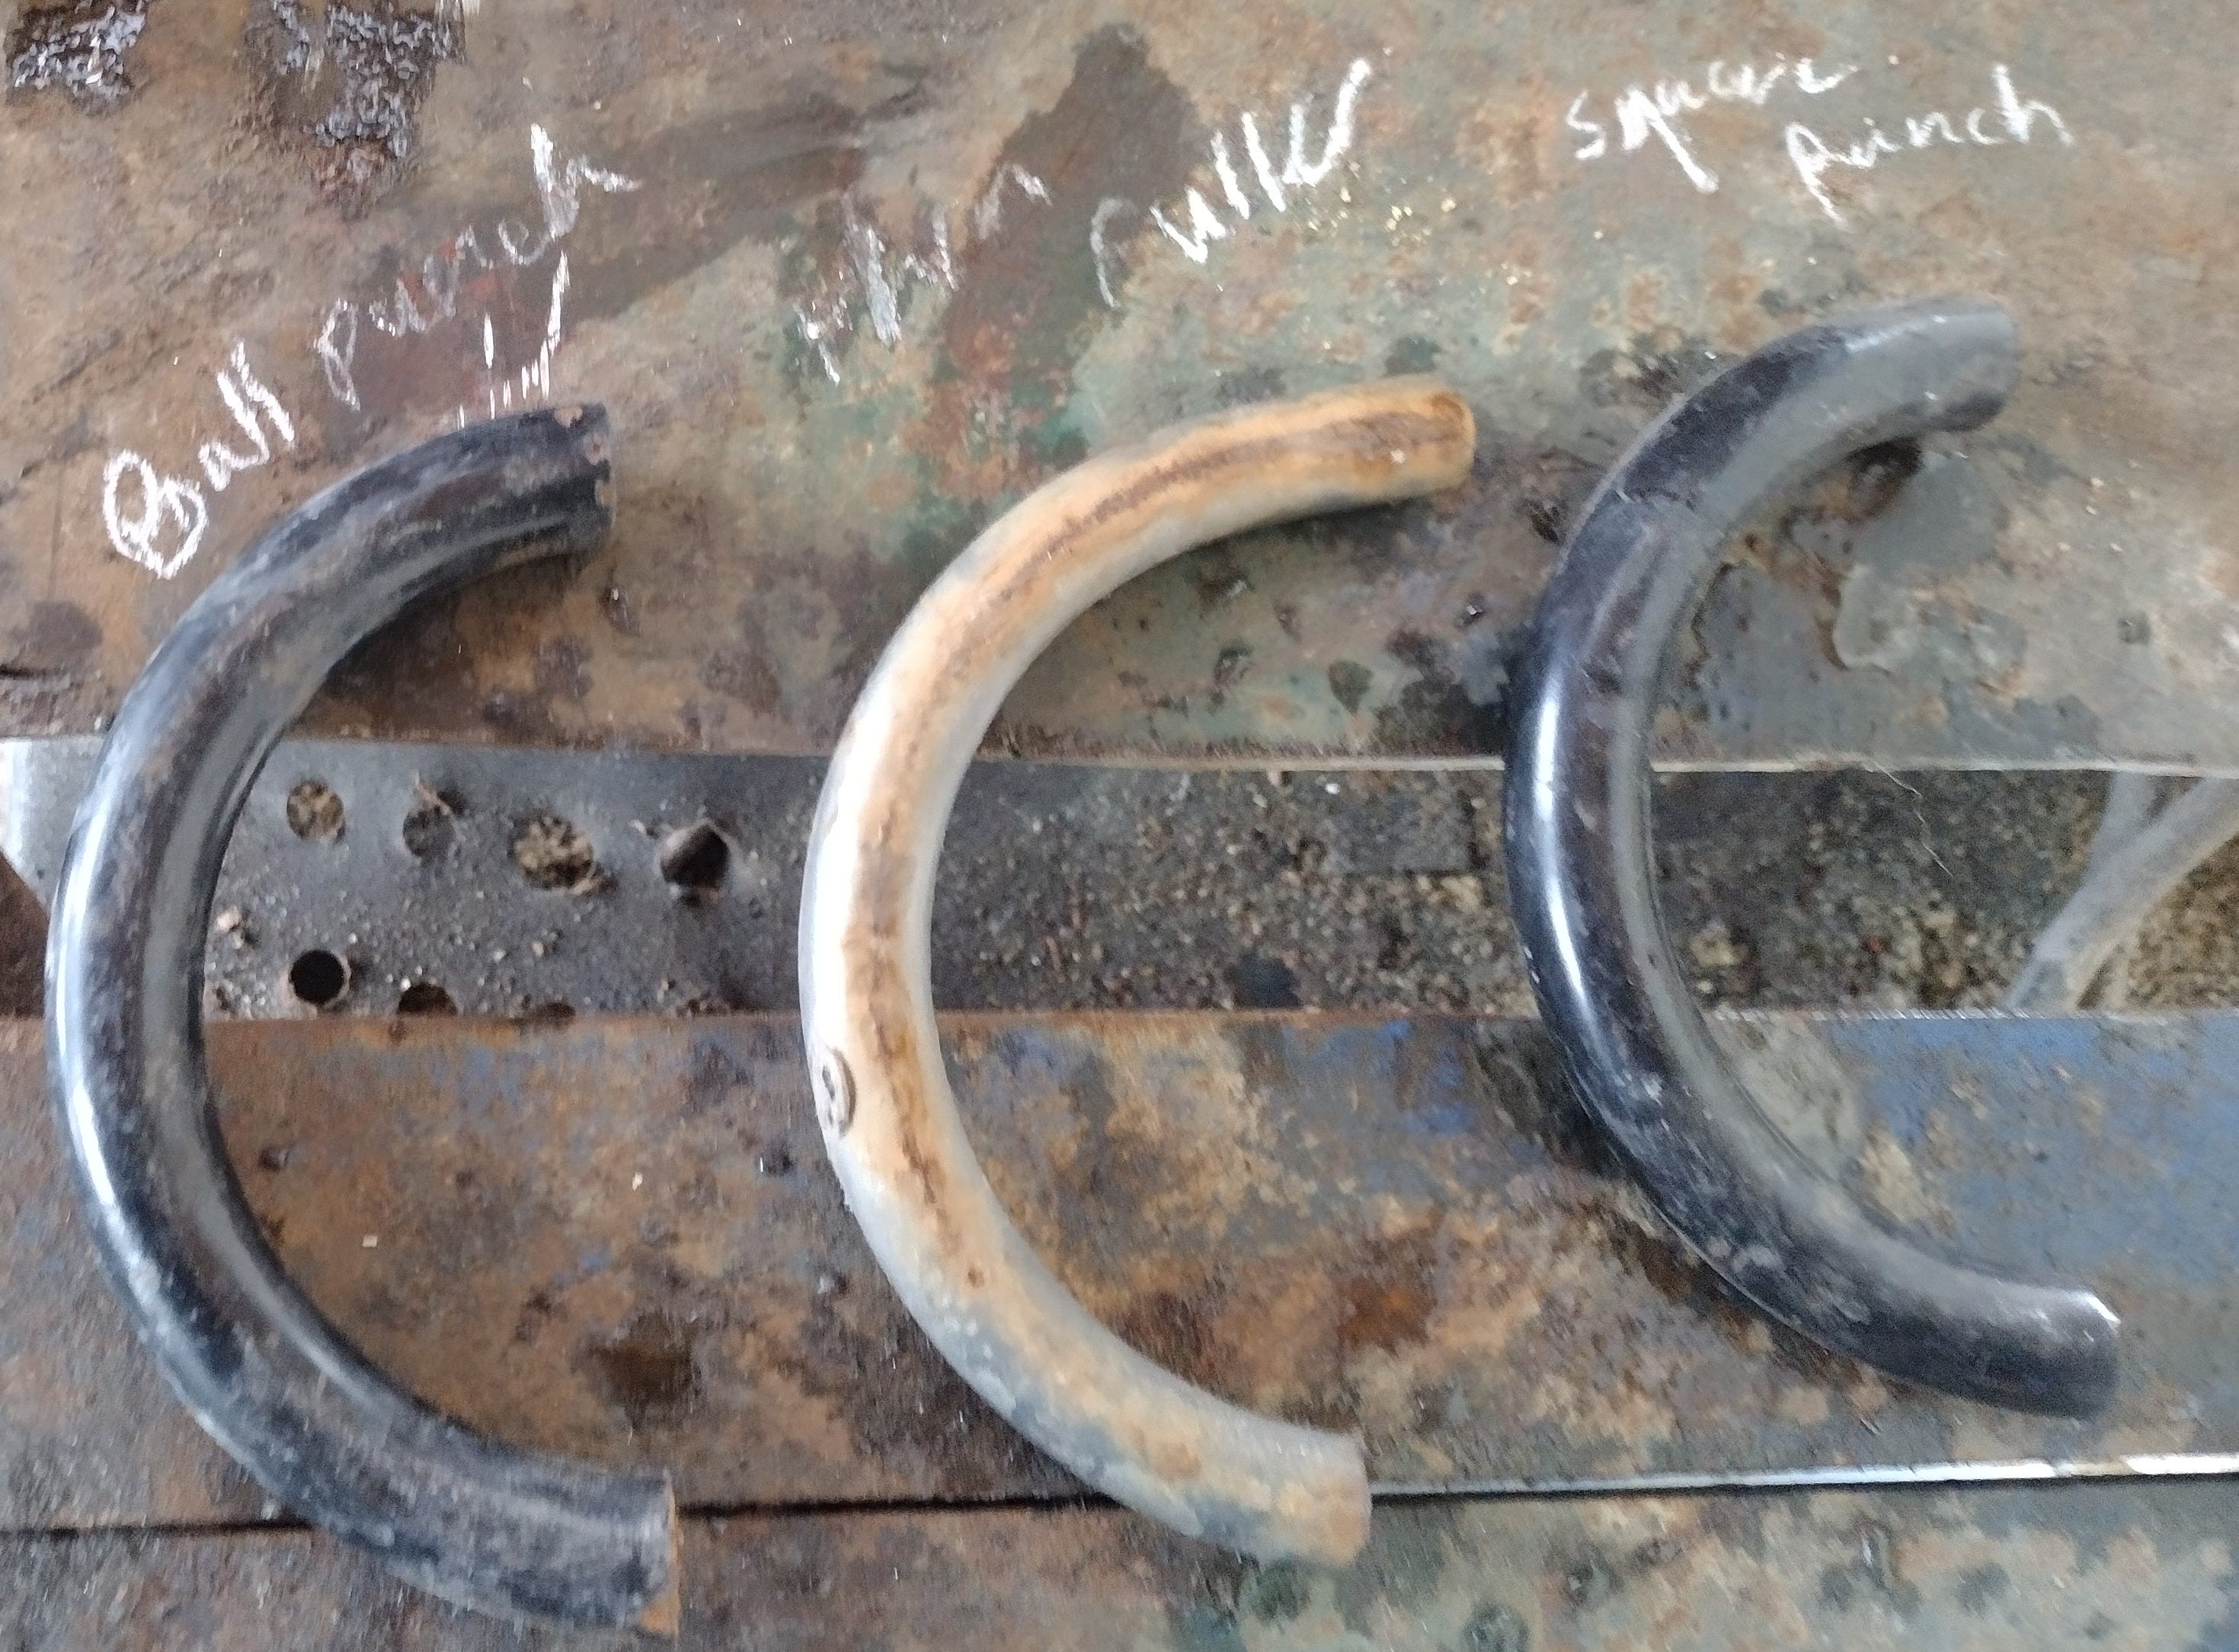
Here’s a side-by-side. Same metal—the coil springs—quenched at two different temperatures. The piece on the left was quenched when it was glowing yellow, the piece on the right was quenched when it was at a medium-red glow (a difference of a few hundred degrees, Fahrenheit).2

The shard on the left looks like it’s made of sand. Each facet of those large crystals is a stress point where the steel can break. The grain size on the rightmost shard is about the equivalent of finely-ground flour. This means that any stress fractures will have a lot of trouble propagating, and the steel will be a lot tougher (though not quite as hard).
The coil springs in cars aren’t as hard as tool steel, but forge tools get hot, and that means they get soft easily anyway. If you can’t afford a high-end tool steel that gets hard when it cools in air (or, like me, don’t live within four hours’ drive of a steel mill), coil springs are a pretty good steel for punches.
Punches aren’t cheap off-the-shelf, but making them? All you gotta do is warm them up, give the end the shape you want, and heat treat them.

A bit of clean-up with the brush and the grinder, and we’ve got our three new punches.
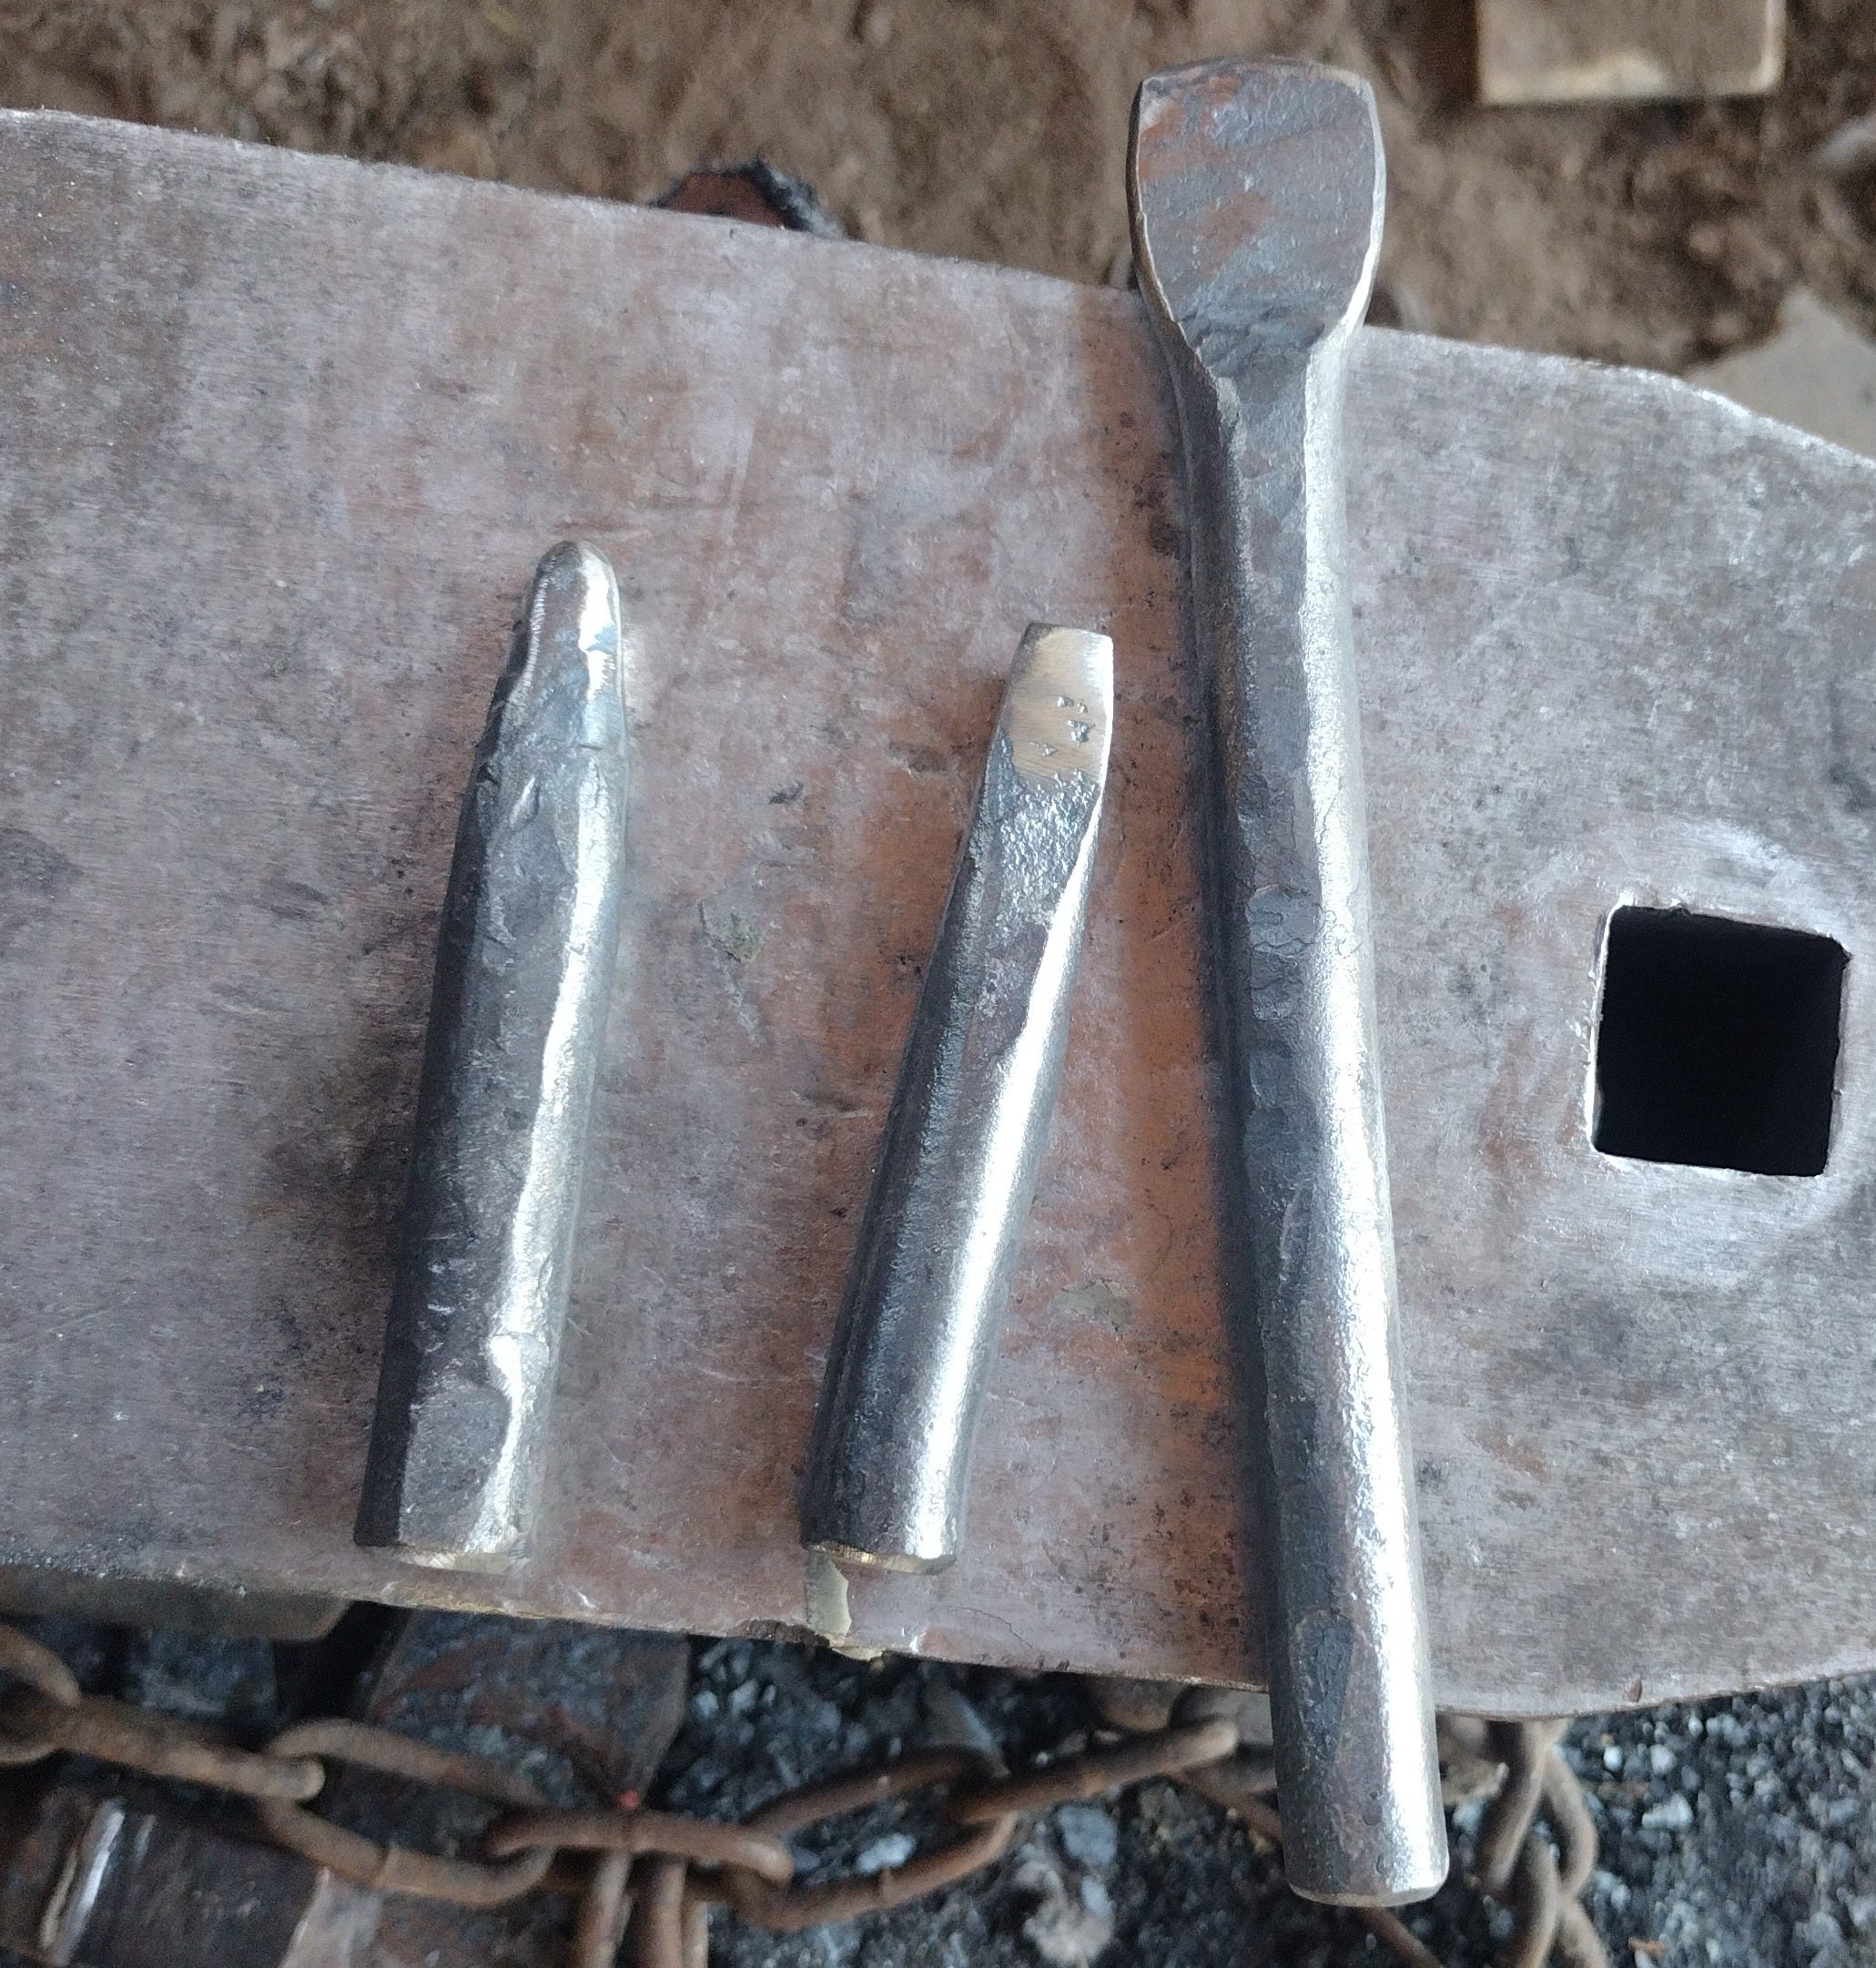
The punch on the left is a small ball-end, suitable for forging eye sockets and other similar depressions. In the middle, we have a square punch measuring about 3/8 of an inch on a side, and on the right we have a spade-end thin fuller, suitable for carving lines a workpiece (this will come in seriously handy on the crucifix project).
Wrenches, Shanks, Jigs, and Fullers
You may have noticed these big hunks of scrap earlier:
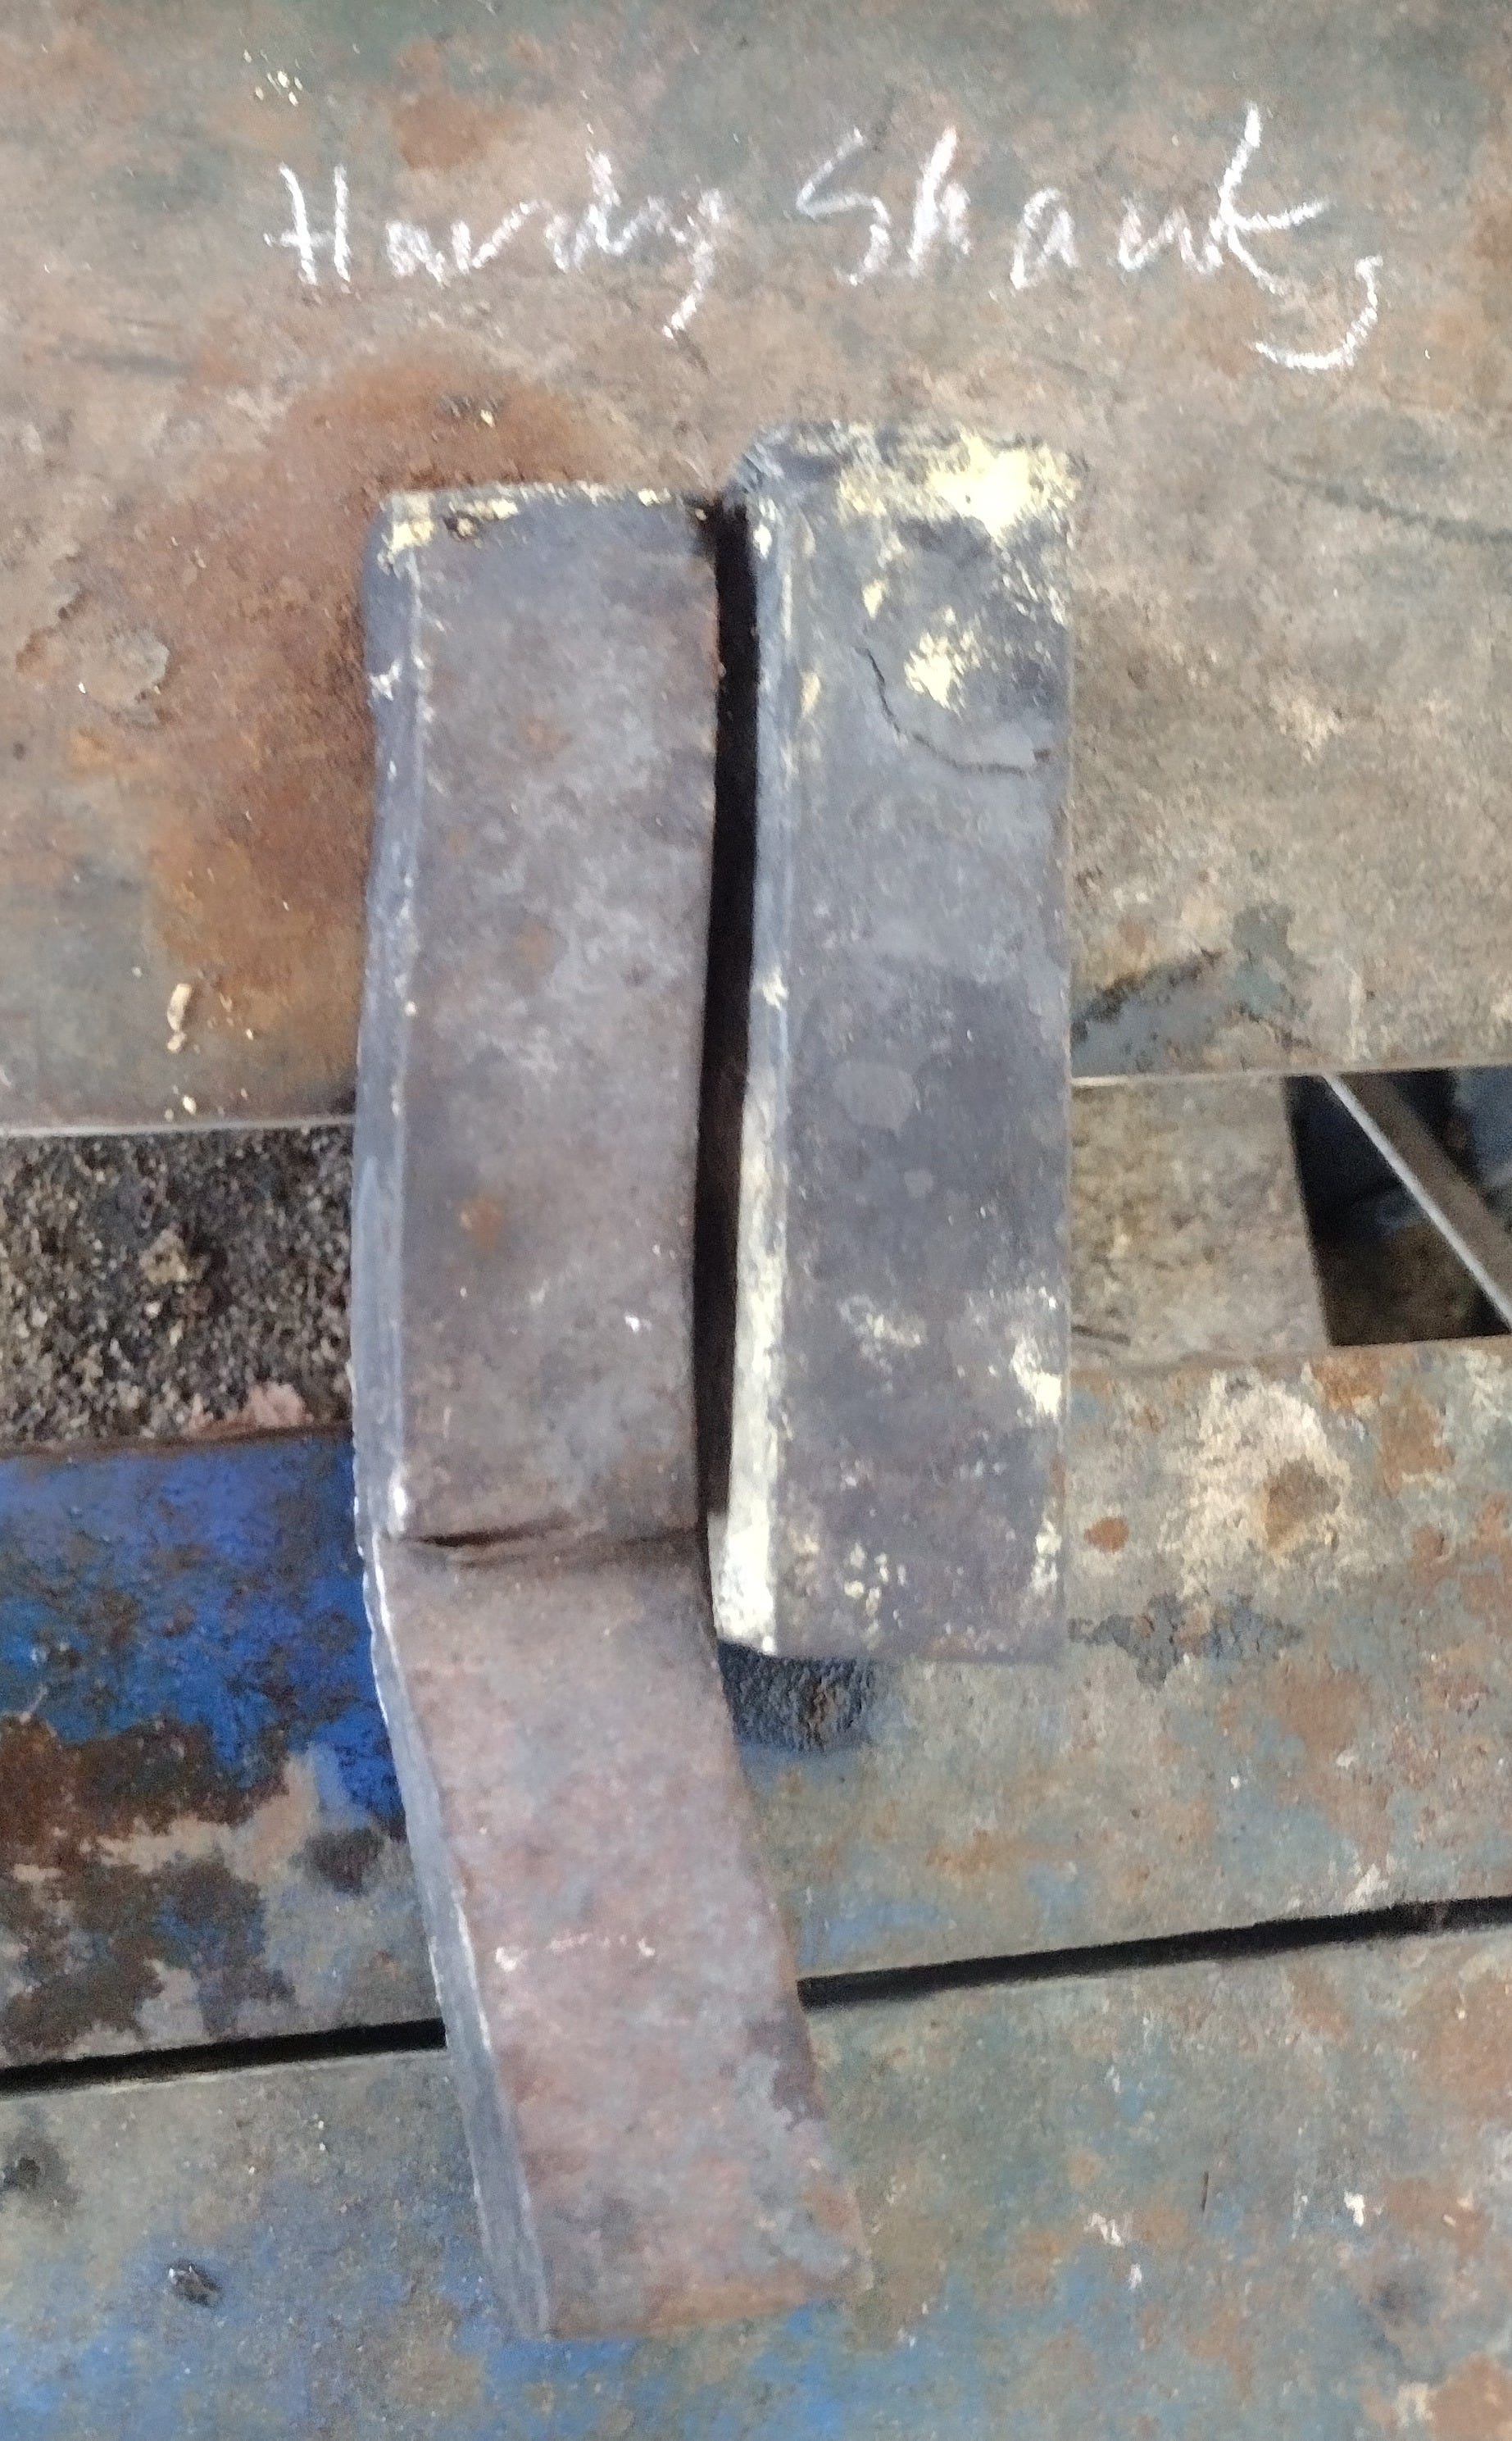
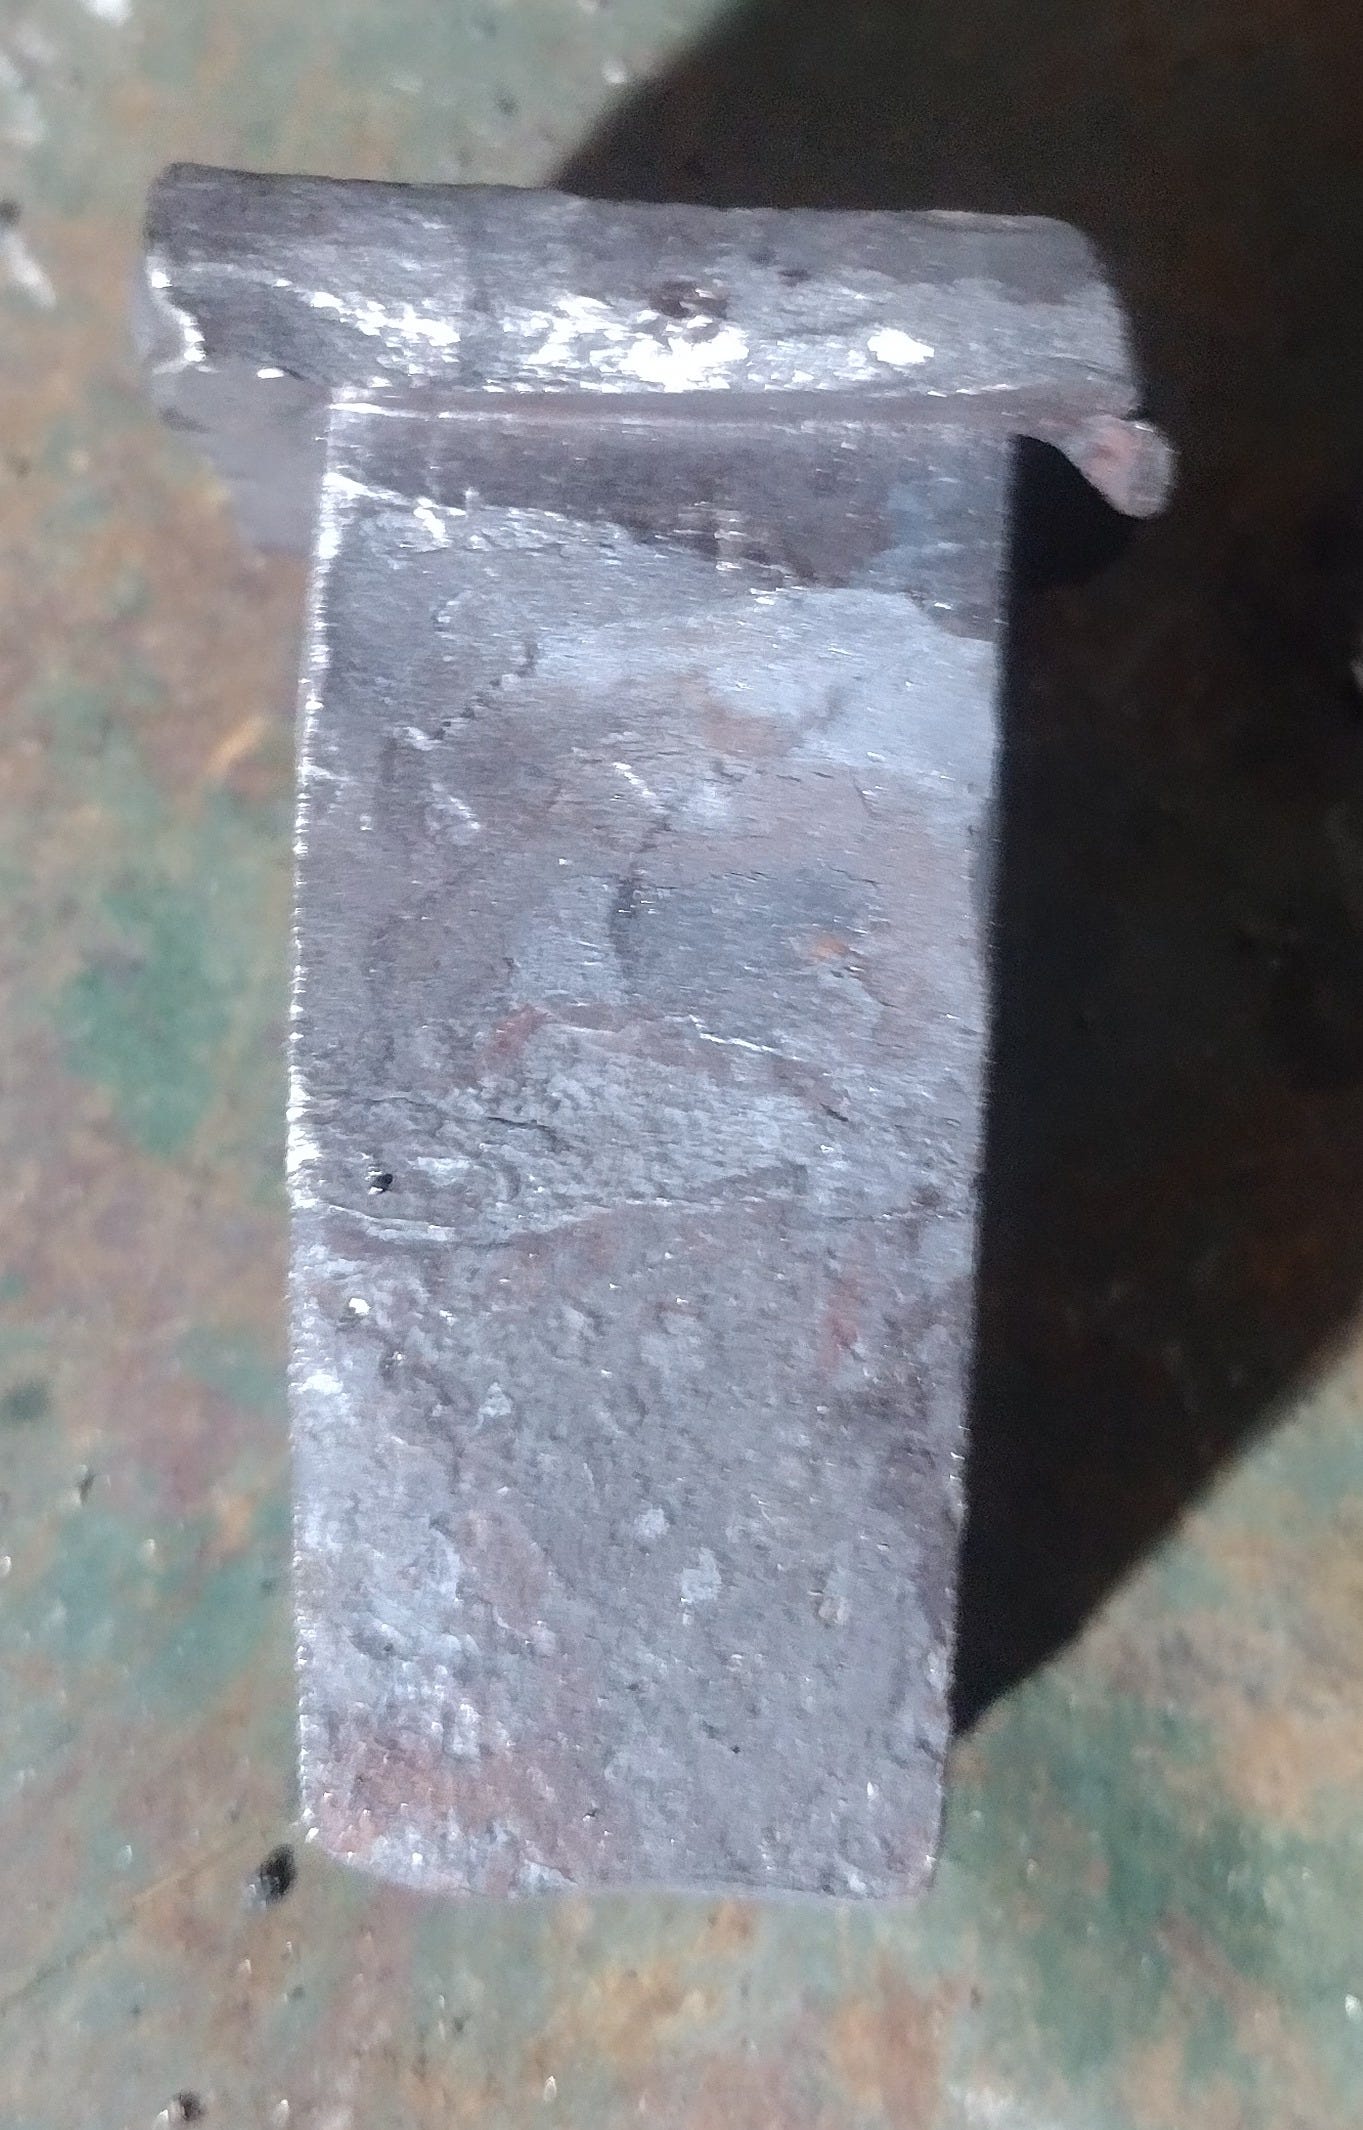
The tools I’m making in this section of the table are all designed to function while fitted into the anvil’s square hole, known as the “hardy hole” (for reasons that would be boring to go into here). This means that the two bending jigs and the three spring fullers will need shanks that fit down into the hole.
After a bit of the old heat’n’beat, I got five of them that looked about like this:
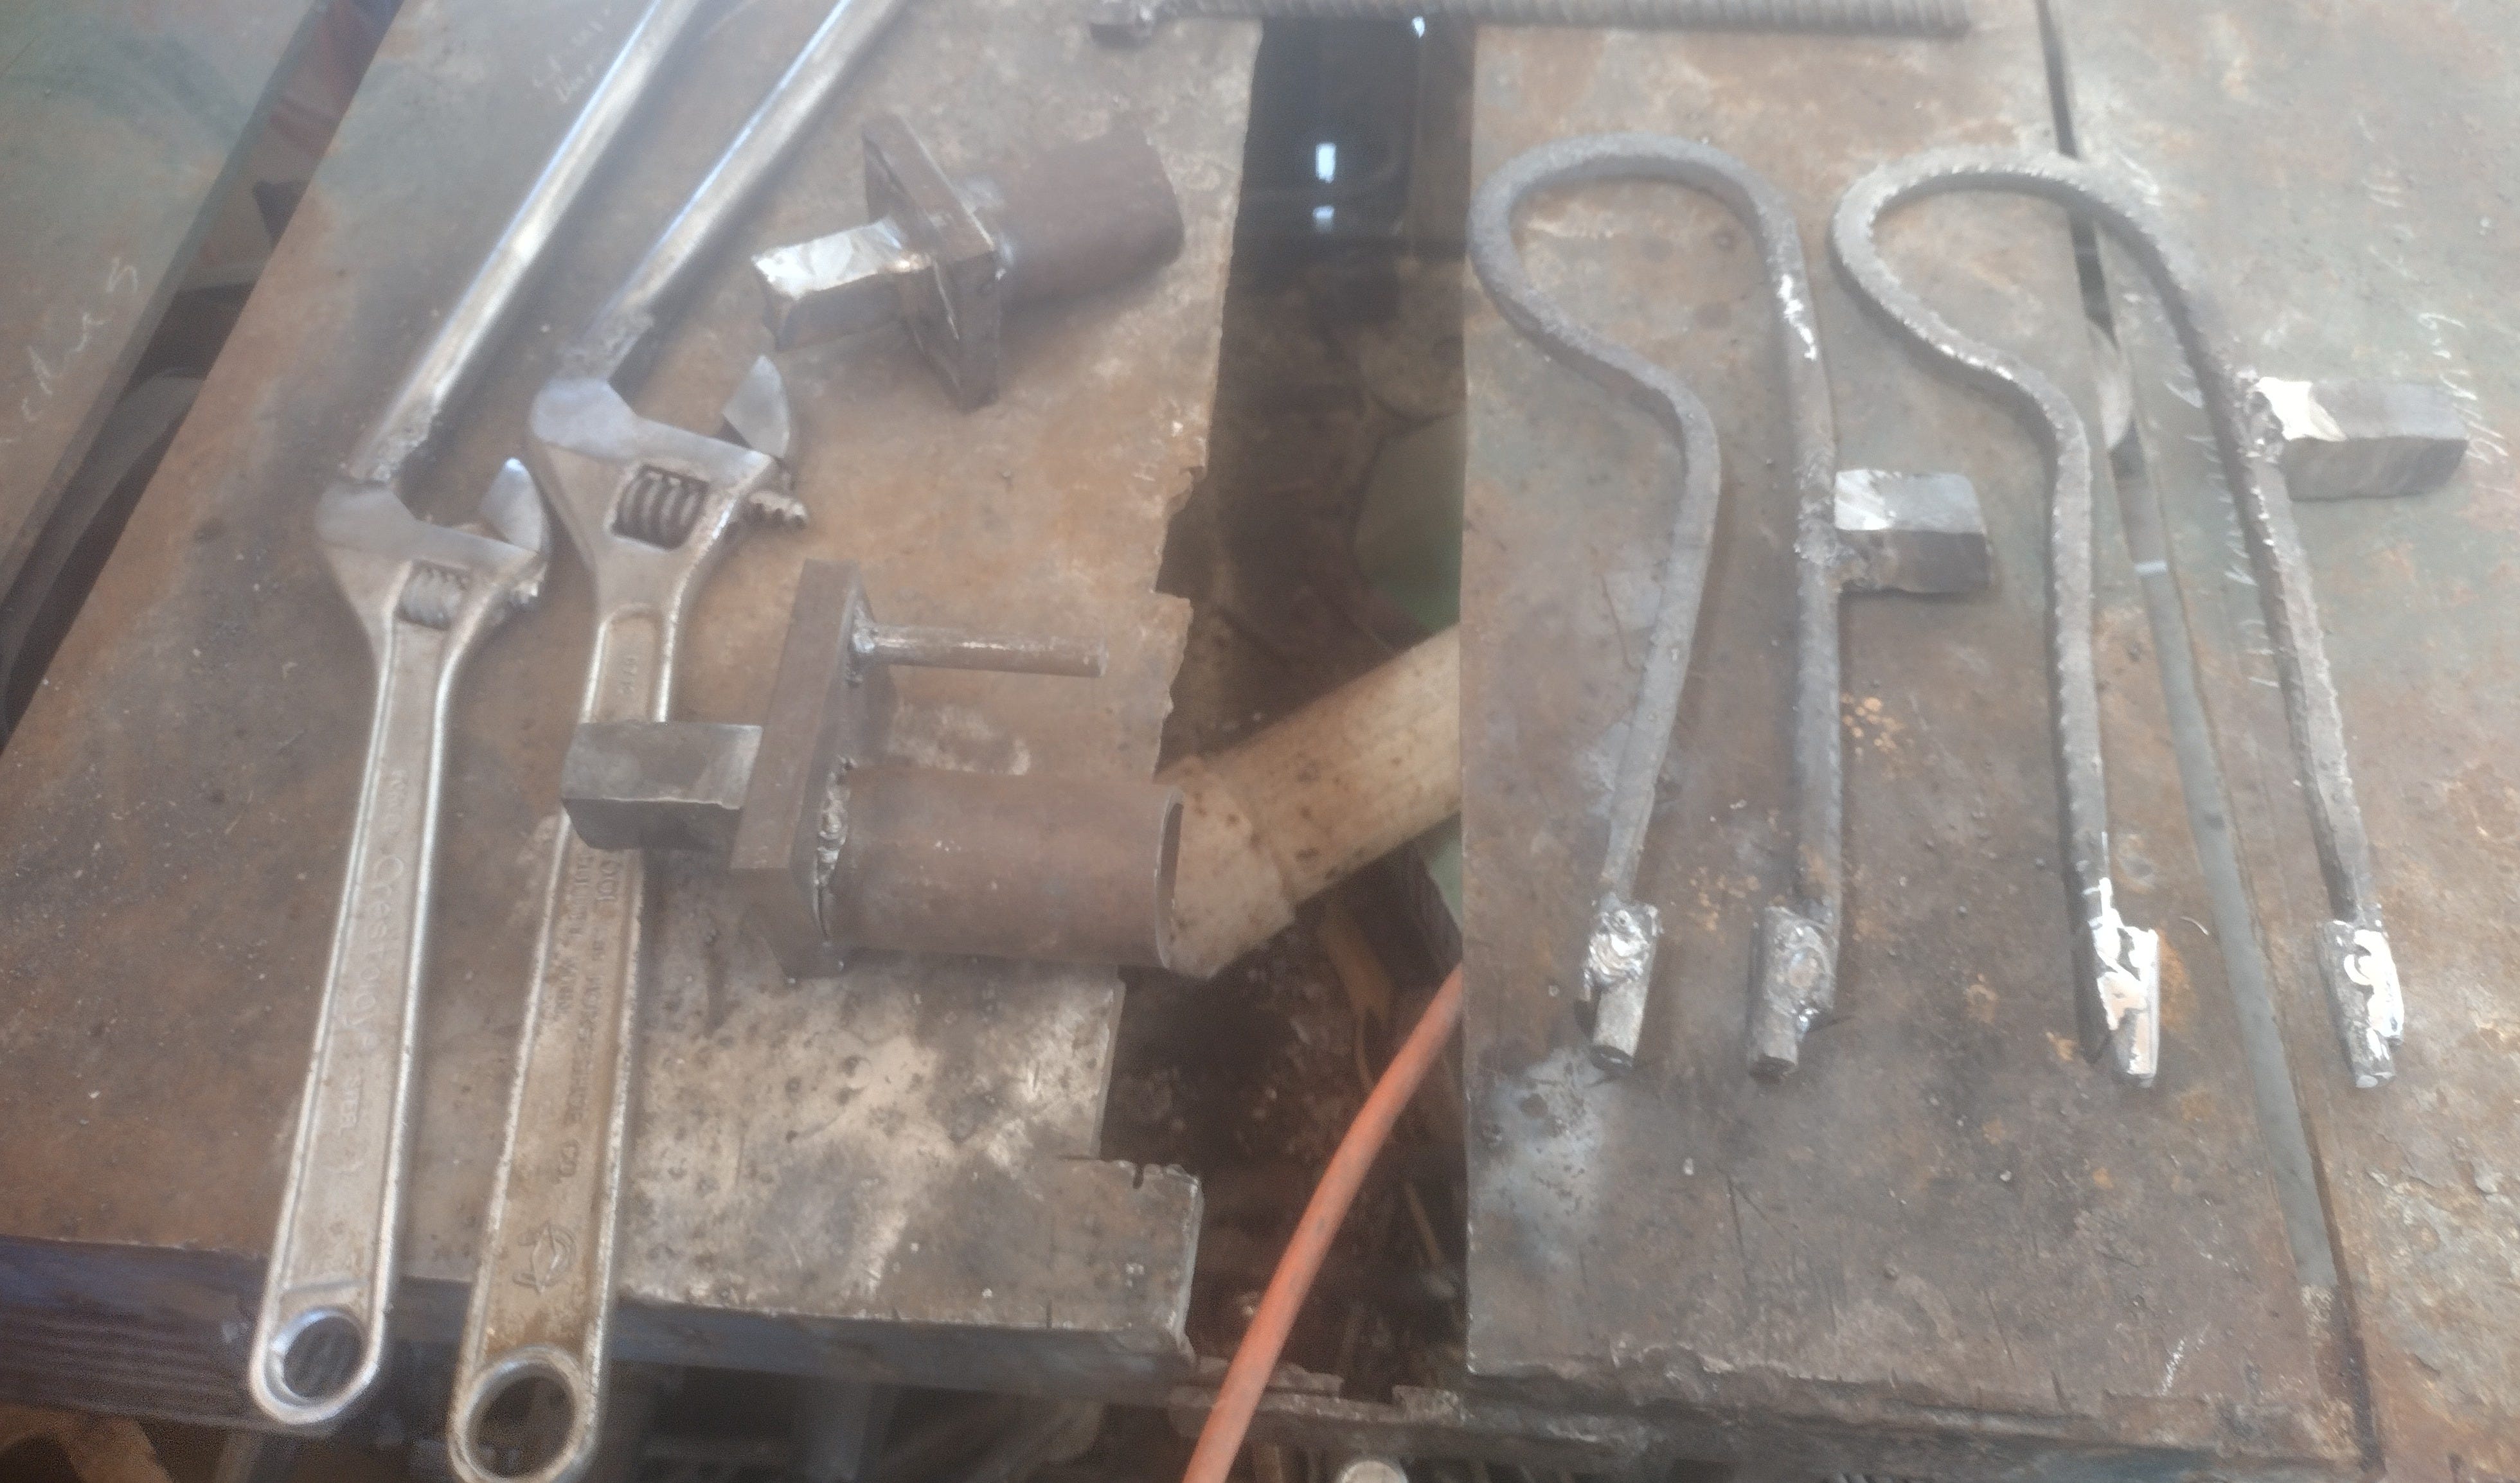
With five of these hardy shanks, I proceeded to take some of the longer lengths of rebar and bend them into springs, then it was time to fire up the welder and start throwing sparks.

After the weld-up, I had a two new spring fullers (which you’ll see in action soon!), two new bending jigs, and two new twisting wrenches:
To use a spring fuller, you stick the hot workpiece in between the dies welded to the ends, and you smash on the top die with your hammer.
To make such a tool, you first make the spring, then you weld the dies together. Then, using a screw press, you compress the spring and weld the dies to each side of the spring. After that cools, you cut the dies apart—this way, you know that when you smash the spring, your dies will come together evenly on the workpiece.
Now, look above. You’ll notice that the two spring fullers in the picture have a sort-of C-shape to them. This creates a lot of durability in the spring, but it gives a fairly narrow clearance for the dies. For my third one, I decided to make a U-shaped spring in hopes of getting more clearance. Unfortunately…
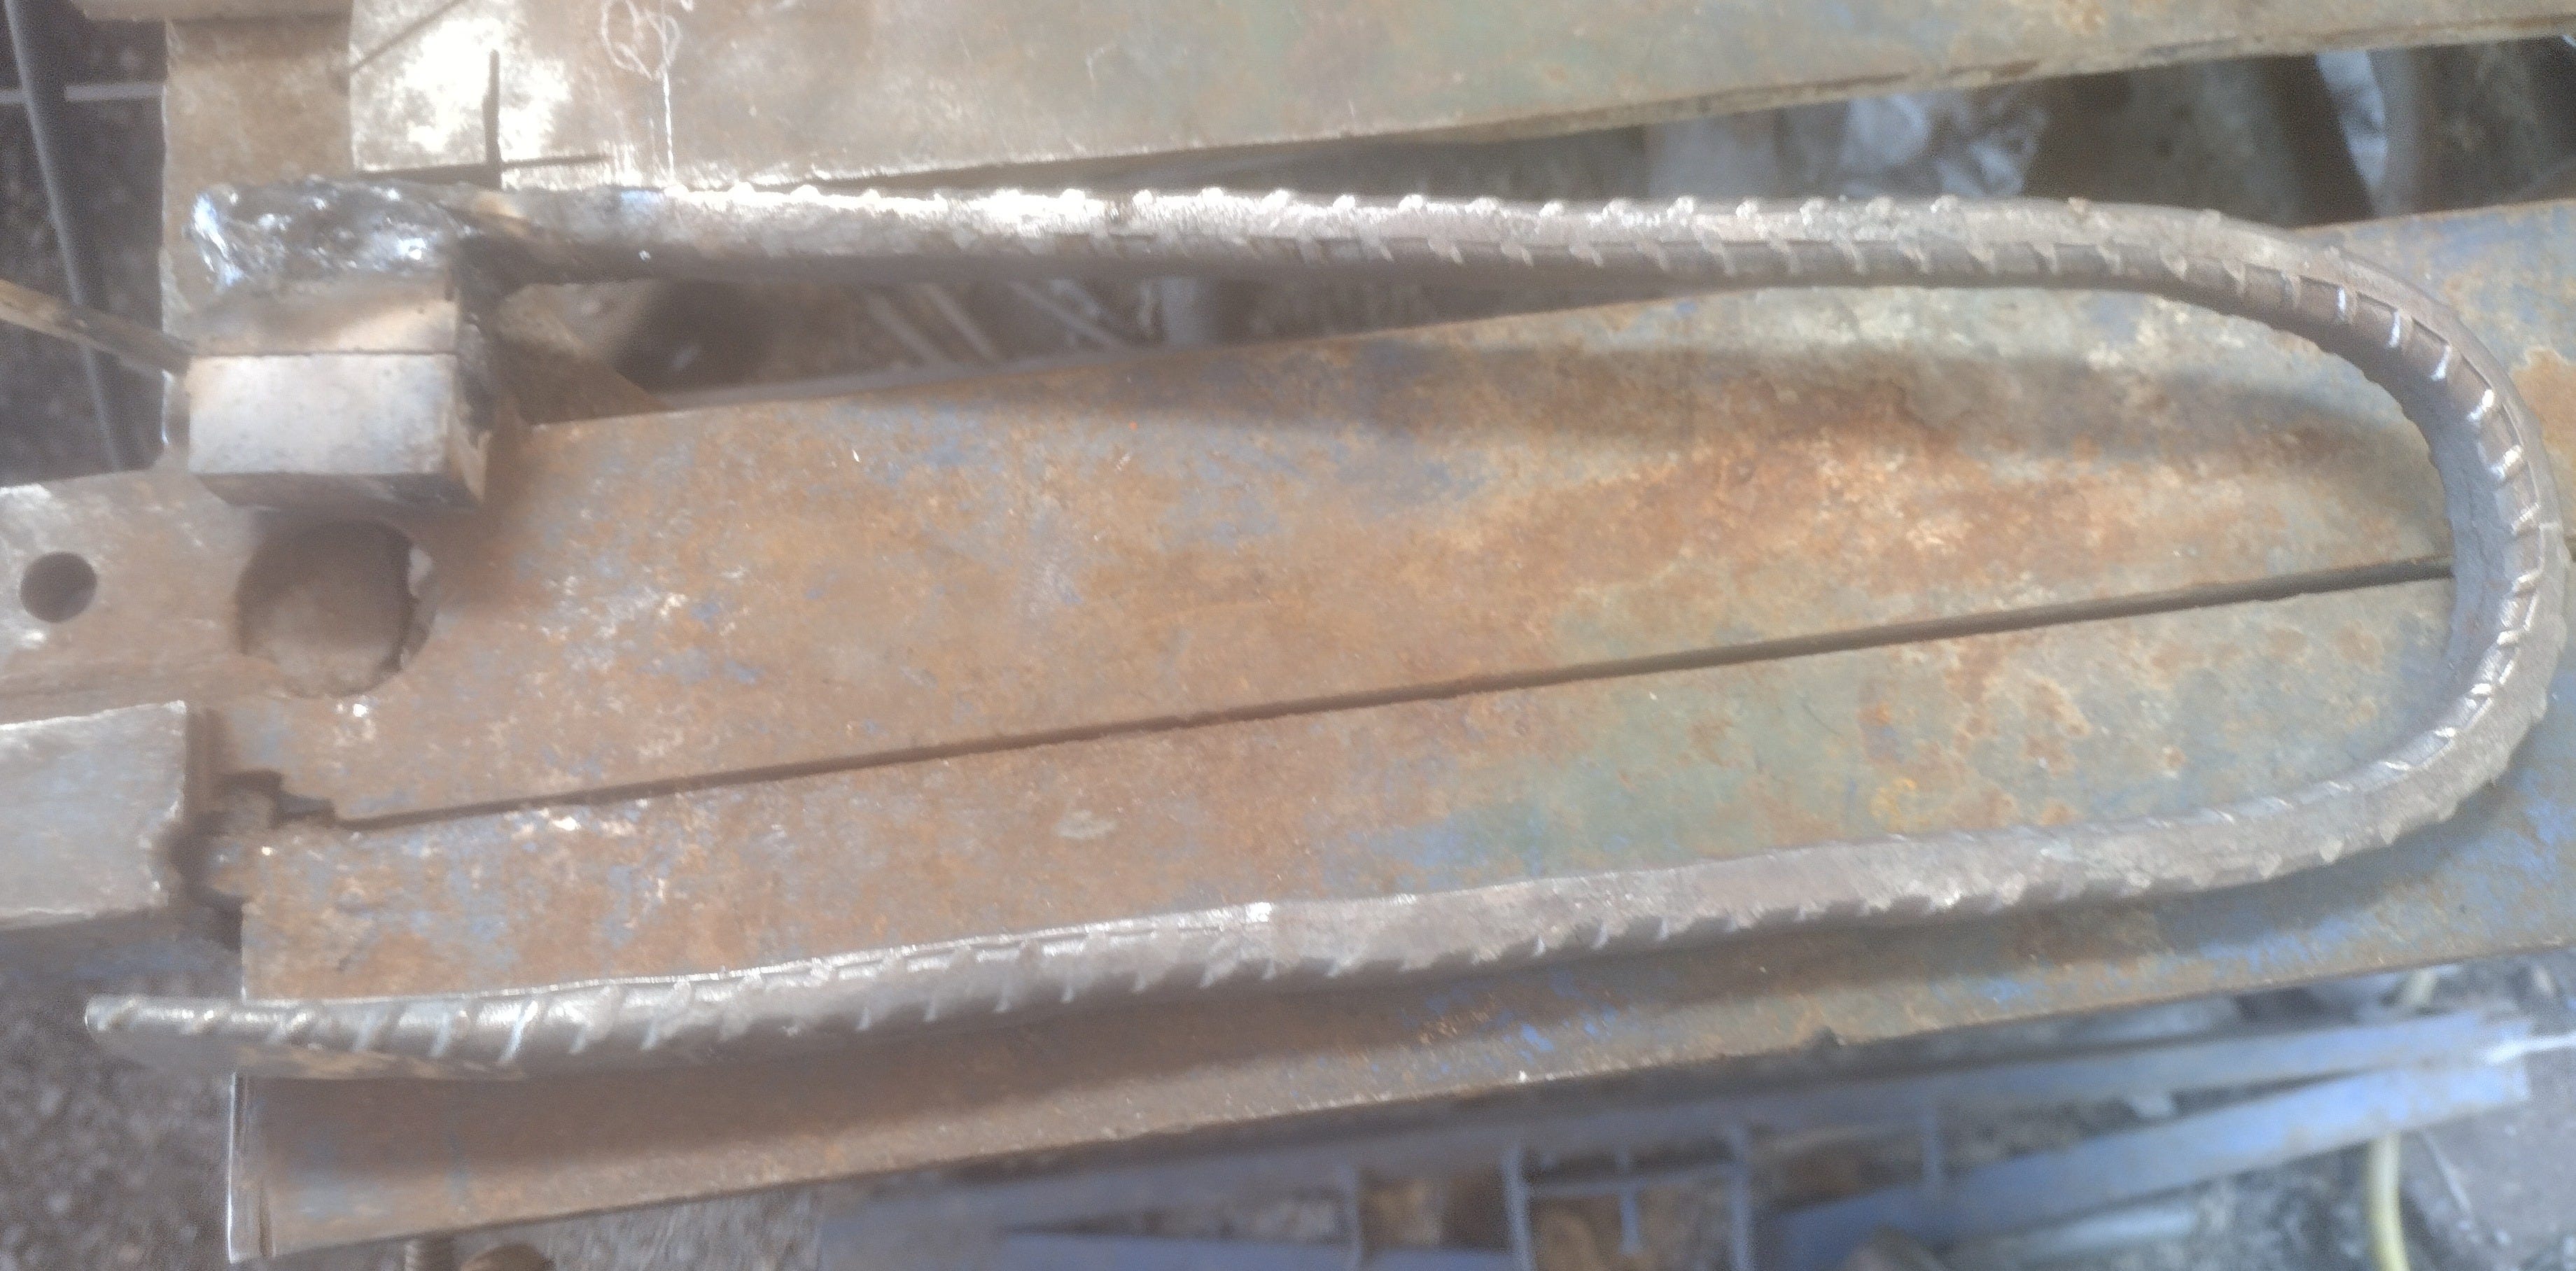
This one failed. I couldn’t compress the u-shaped spring properly, so I wound up with a big nothing in the spring fuller department. So, I set it aside to re-shape next time I do a tooling day.
Still, even with the failure, it wasn’t a bad day’s work, all things considered.
Project Management
Here’s the secret to running a batch project like this, which is obscured by how I organized this post:
You do it in phases.
I’ve shown you the process for each piece. But I didn’t do it in that order.
First I sketched and planned everything.
Then I cut everything to size.
Then I forged everything.
Then I heat treated the punches.
Then I welded everything.
Then I wire brushed everything.
Then those items which required it got a finish (the hammer racks and towel racks—everything else got left at the brushing stage).
And then, as they were finished, things were mounted, racked, or otherwise put away.
I started off at the left side of the table, moved to the right, then went back to the left and swept over the table again. As items got finished, I moved them to their permanent home.
By the end of the day, I had a clear bench and was all set up to do the two artistic projects that were waiting in the wings.
But those…ah. Those are stories all their own!
I am available for hire for made-to-order forge goods. If you want something, hit me up in the comments below.
When you’re working with junk yard steels (i.e. anything you’re recycling), it’s important to do test heat treats, and break the pieces, like you see in these pictures, so you can dial in the ideal temperature at which to quench. If you’re working with virgin steels (stuff you buy from the mill, with chemical data sheets you can reference), you don’t have to do this kind of guess-work.
I appreciate how you broke down your work-flow and everything that goes into a project.
Dan, I was hopeful that you would begin to narrate the project. The documentary fascinates me, and will make the finished product even more meaningful. It means so much to me that you have thrown yourself into this commission, when it would have been easier to just say you didn’t have the tooling. What a gift you have given me!! I am grateful. 💕